51837515_V_1_0.DOC
25/63
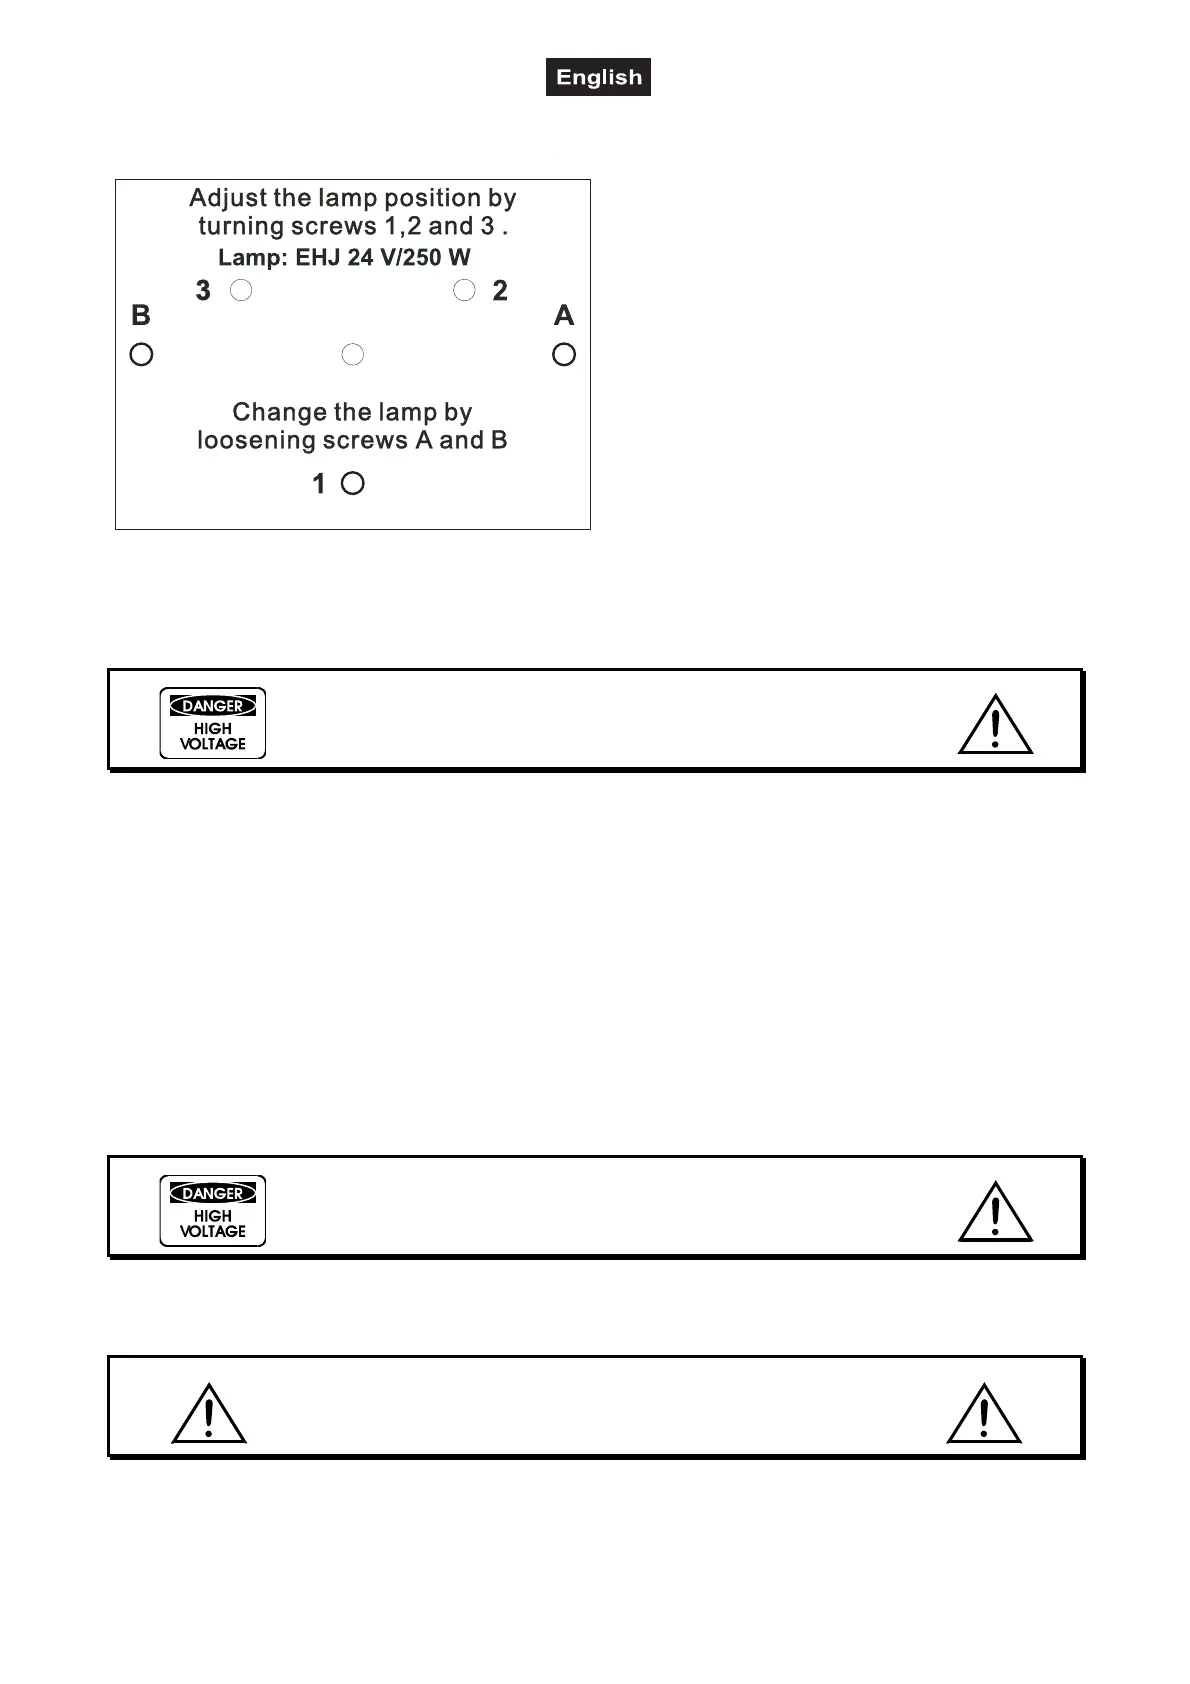
Lamp adjustment
The lampholder is aligned at the factory. Due to
differences between lamps, fine adjustment may
improve light performance.
Strike the lamp, open the shutter and the iris, set the
dimmer intensity onto 100 % and focus the light on a
flat surface (wall). Center the hot-spot (the brightest
part of the beam) using the 3 adjustment screws "1,
2, 3”. Turn one screw at a time to drag the hot-spot
diagonally across the projected image. If you cannot
detect a hot-spot, adjust the lamp until the light is
even.
To reduce a hot-spot, pull the lamp in by turning all
three screws "1, 2, 3” clockwise ¼-turn at a time
until the light is evenly distributed.
If the light is brighter around the edge than it is in the
center, or if light output is low, the lamp is too far
back in the reflector. "Push” the lamp out by turning
the screws "1, 2, 3” counterclockwise ¼-turn at a time the light is bright and evenly distributed.
Inserting/Extracting the second lens
DANGER!
Install the lens with the device switched off only.
Unplug from mains before!
You can adjust the radiation angle by inserting or extracting the second lens.
The second lens is located in the device’s interior with a radiation angle of 25°. If the second lens is
removed, the radiation angle changes to 20°.
For extracting or inserting the second lens, please follow the instructions given below:
Carefully unscrew the four housing screws with an appropriate screwdriver and remove the housing cover.
Unscrew the knurled-head screw in the interior to extract or insert the second lens. The lens features an
attachment fixture with which it can be inserted into one of two fixation points – depending on the use of the
lens. Tighten the knurled-head screw. Replace the housing cover and tighten the housing screws.
Inserting/Exchanging gobos
DANGER!
Install the gobos with the device switched off only.
Unplug from mains before!
If you wish to use other forms and patterns as the standard-gobos, or if gobos are to be exchanged, please
follow the instructions below:
CAUTION!
Never unscrew the screws of the rotating gobo
as the ball bearing will otherwise be opened!
Remove the fixation-ring with an appropriate tool. Remove the gobo and insert the new gobo. Press the
fixation-ring together and insert it in front of the gobo.