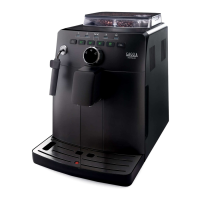
Do you have a question about the Gaggia GD and is the answer not in the manual?
Covers warnings for adult operation, electrical safety, handling hot parts, and environmental factors.
Details on connecting the machine to the water supply, including hardness requirements and softener recommendations.
Instructions for safely connecting the machine to the electrical power supply, ensuring voltage compatibility and proper grounding.
Guidance on connecting the machine to the gas supply, including hose and clamp requirements.
Information on the specific gigleur used for long coffee delivery and available replacements.
Procedure for adjusting the pressure switch to maintain constant boiler pressure for heating elements.
Steps to calibrate the pump pressure using the pressure gauge, ensuring correct espresso extraction pressure.
Guide to selecting the appropriate filter size based on the quantity of coffee ground for optimal brewing.
Instructions for optional replacement of the thermostat to lower the coffee dispensing group temperature.
Details on the different spouts provided with the machine and their respective distances from the cup-holding tray.
Procedure for modifying and memorizing the measured amounts of coffee for each unit using volumetric control.
Guide to modifying timed tea measures by programming the hot water delivery duration.
Explanation of how to dispense coffee using programmed measures and the option for simultaneous delivery.
Instructions for activating continuous coffee delivery mode and how to stop it.
Details on engaging and deactivating special functions like pre-infusion, mixed tea, and washing alarm.
Procedure for dispensing hot water for tea and how to interrupt the delivery.
Instructions for setting the cappuccino and milk functions on specific units and engaging/deactivating them.
How to program and activate the cappuccino delivery function, including separate milk delivery timing.
Steps for programming and delivering milk, similar to the tea delivery process.
Overview of additional functions available on machines with a display, such as language selection.
Instructions on how to read the dispensing operations and consumption values for coffee and tea.
Explanation of alarm conditions such as low water level or lack of volumetric counter impulses and how to reset them.
Instructions for replacing the seal in the filter holder assembly to prevent coffee leakage.
Details for connecting the machine to a 415-400V 3-phase power supply in a star configuration.
Procedure to change connection from star to delta for 240-230V 3-phase power.
Guide to converting the machine for single-phase connection with a 240-230V supply.
Instructions for changing the power cord and modifying connections for single-phase operation.
| Brand | Gaggia |
|---|---|
| Model | GD |
| Category | Coffee Maker |
| Language | English |
