Page: 3 of 21
Model TS959 Tone/Speech Generator Pub. 42004-278A
\\s_eng\gtcproddocs\standard ioms - current release\42004 instr. manuals\42004-278a.doc
12/97
EXPLANATION OF THE PROGRAMMING PROCESS
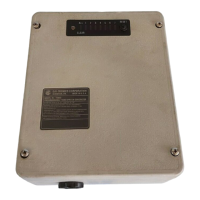
Switch (S1) is used to set the TS959 to various program modes. It is located on the back in the top left
corner of the unit. S1 is a four-position, dual in-line package (DIP) switch. The switch positions are
labeled 1, 2, 3, and 4. The bottom of the switch is labeled OPEN and is referred to as O in the following
program steps. The top of the switch is labeled CLOSED and is referred to as C in this procedure. In this
manual, the position of the four switches is represented by a row of four characters, representing the four
positions of the DIP switch from left to right. For example, the position represented by OOCO:
DIP 1 2 3 4
OOCO 0 0 1 0
After a programming step has been completed, S1 must be set to (OOOO). The red light emitting diodes
(LEDs) on the front panel of the TS959 indicate unit status during programming. You can document your
programming selections on the Programming Summary chart provided on page 13.
DEFAULT RESET
The Default Reset function returns the TS959 to the factory-set operating parameters. Perform the
following procedure if you want to return all the settings to their original, default conditions.
1. Set S1 to CCCC.
2. Press SW8. The LEDs on the front cover will flash through 3 sweeps. This LED sequence notifies
the programmer that the unit is resetting to the default parameters.
3. Reset S1 to OOOO, the normal operating mode.
SWITCH TYPE (ALARM ACTIVATION CONTACTS)
The TS959 is designed to accept either normally open (N.O.) or normally closed (N.C.) switch inputs
(alarm activation contacts). The unit automatically detects the type of switch being used and sets the
program parameters during this step. This step must be repeated after the rest of the programming has
been completed, and the permanent, operational alarm activation inputs are connected.
1. Set S1 to COOO. The LEDs on the front panel indicate the type of switch. Lit LEDs indicate an N.C.
switch, while unlit LEDs indicate an N.O. switch. During programming, only momentary N.O.
switches can be used, so no LEDs should be lit.
2. Press SW8. The LEDs will flash through 3 sweeps indicating that the unit has accepted the new
parameters and is storing them in memory.
3. Reset S1 to OOOO.
ACTIVATION
You may now select the way the alarm will be activated. Each of the seven alarm inputs can be set to
either momentary or maintained activation.
With momentary activation, the input switch needs to be pressed only briefly to activate the tone. It will
then sound for the programmed length of time. See the Signal Duration section.
=