Page: 5 of 21
Model TS959 Tone/Speech Generator Pub. 42004-278A
\\s_eng\gtcproddocs\standard ioms - current release\42004 instr. manuals\42004-278a.doc
12/97
1. When the desired tone is identified, press SW8 to store the tone selection. The LEDs will flash
through 3 sweeps indicating that the unit has accepted the new parameters and is storing them in
memory.
2. If only one input is to be changed, proceed to step 7. If additional tones must be changed, repeat
steps 2 through 5 until all new tones have been programmed, and then proceed to step 7.
3. Reset S1 to OOOO.
SIGNAL DURATION
This step need only be completed for tones selected to have momentary activation. See the Activation
section. Tones programmed for maintained activation will continue as long as the corresponding alarm
input switch is activated. If the duration of momentary activation inputs is not programmed, the unit will
default to continuous operation. In the continuous mode, the alarm will remain “latched” after activation
until the reset switch on the front panel or an external reset switch (N.O.) connected between TB2-18 and
common (TB2-22, TB2-24, or TB2-26) is closed.
Note: Activating the reset input will clear ALL alarm activations.
The programmed time duration of an input can be determined by observing the front panel LEDs and
comparing them to Figure 2. LEDs 1, 2, and 3 represent the units of time: minutes, increments of 10
seconds, and single seconds, respectively. LEDs 4, 5, 6, and 7 represent the number (quantity) of the units
described by LEDs 1, 2, and 3.
A timed duration activation of between 1 second and 15 minutes can be programmed for each of the seven
alarm inputs. The front panel LEDs will again be used to indicate program status.
1. Set S1 to CCCO.
2. Press the switch of the input that you want to program (1 to 7). The corresponding LED lights to
verify your selection.
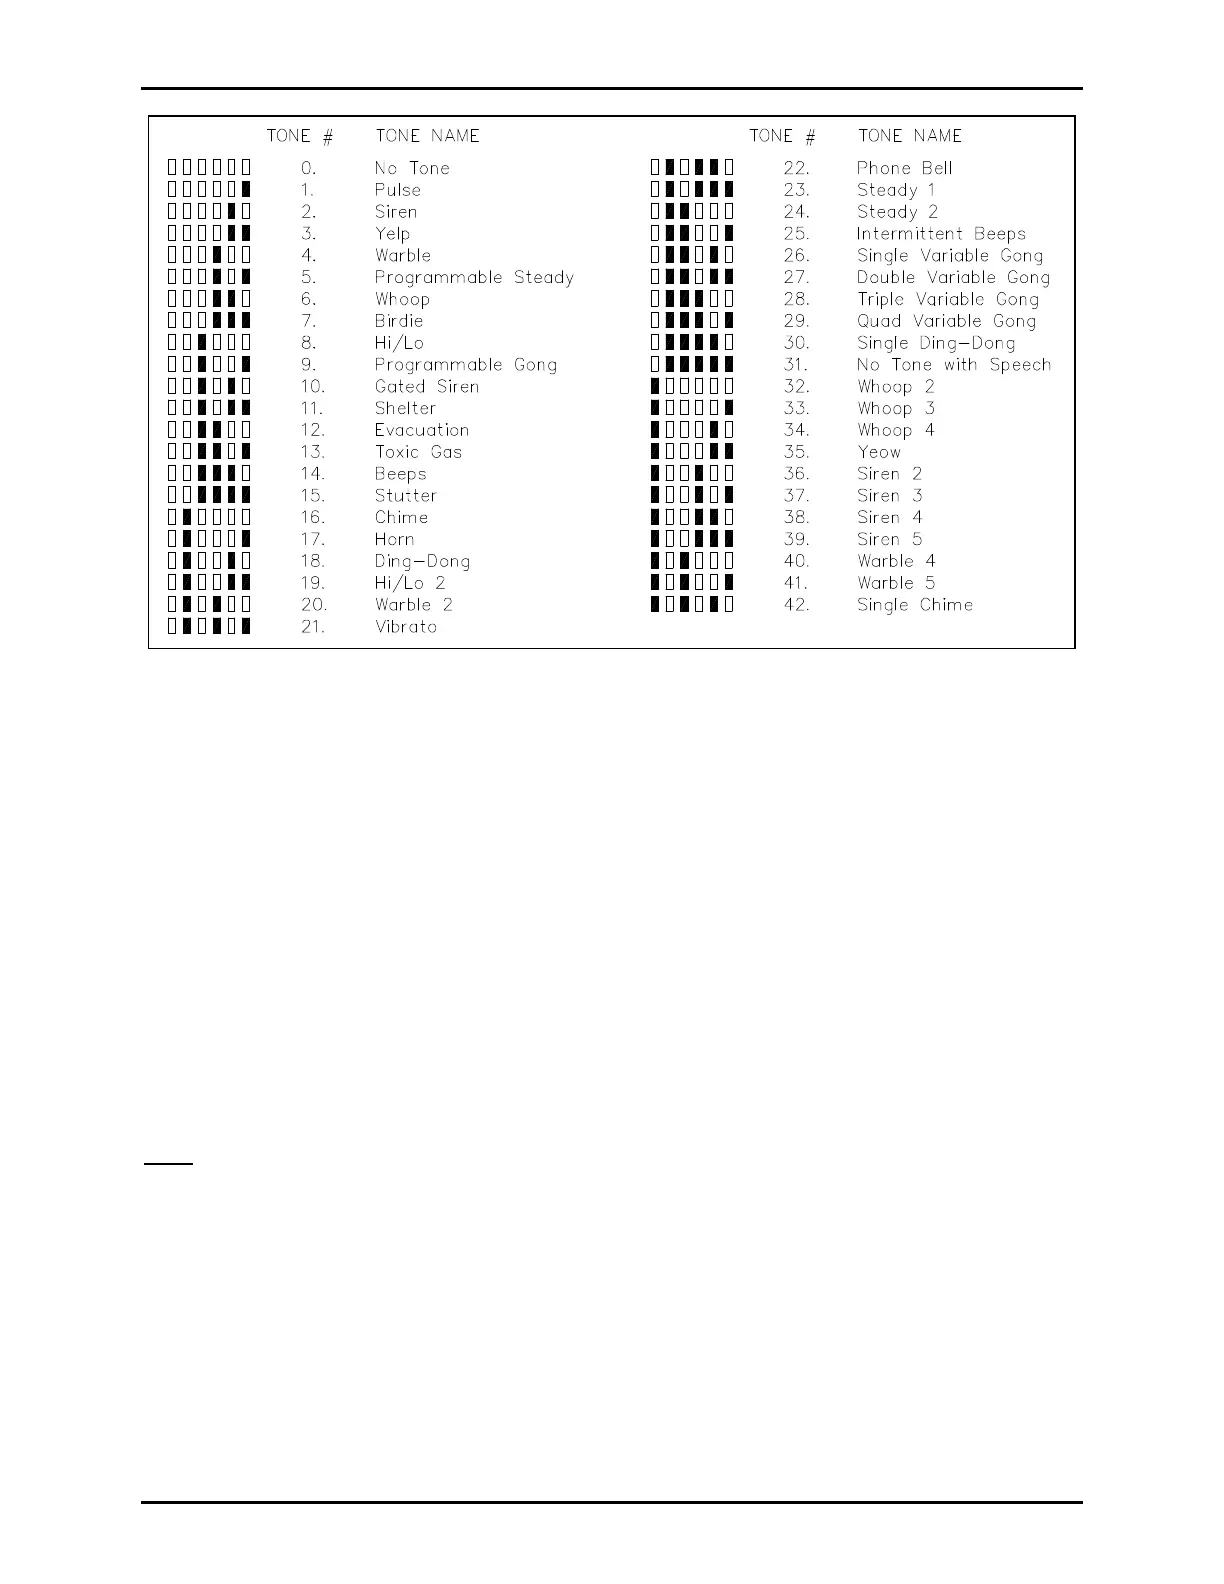
Figure 1. Tone Selection Library
 Loading...