Page: 4 of 21
Model TS959 Tone/Speech Generator Pub. 42004-278A
\\s_eng\gtcproddocs\standard ioms - current release\42004 instr. manuals\42004-278a.doc
12/97
If you want to control the duration of the alarms, select maintained activation. The tone sounds for the
length of time that the switch contact is activated. A typical application for maintained activation would be
to use a two-position switch that is manually turned ON to start the tone, and manually turned OFF to
discontinue the tone. Another application for maintained activation would be when an automatic system
controls the inputs with a relay contact. With maintained activation, the automatic system can control the
duration of the tone.
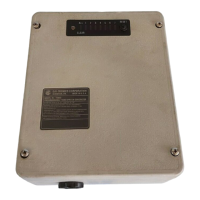
1. Set S1 to OCOO. The front panel LEDs show the existing configuration. Unlit LEDs indicate that
tone activation will be maintained. Lit LEDs indicate that tone activation will be momentary.
2. Press the switches of the tones that need to be changed until the LEDs reflect the configuration desired.
3. Press SW8. The LEDs will flash through 3 sweeps indicating that the unit has accepted the new
parameters and is storing them in memory.
4. Reset S1 to OOOO.
TONE SELECTION
You can select the desired tone for each of the seven inputs from an internal library of 42 tones. Figure 1
gives the tone names and their corresponding LED pattern. You should sample the tones as explained in
step 4 below.
Keep in mind that input 1 is the highest priority, and input 7 is the lowest. For example, if input 6 is
sounding when input 2 is activated, input 2 will interrupt. After input 2 is deactivated, or times out, tone 6
will sound again, starting from the beginning of its time duration. In this way, lower priority
announcements are not lost.
1. Set S1 to OOOC.
2. Press the programming switch of the tone that you want to program (1 to 7). The corresponding LED
will light to verify your selection.
3. Press SW8. LEDs 2 through 7 will display a pattern. See Figure 1 to identify the tone that is presently
selected.
4. Use the following switches to change tones, if desired:
• Switch 1: advances the tone number by 1
• Switch 2: advances the tone number by 10
• Switch 3: clears the tone number to 0
• Switch 4: enables the programmer to hear the tone through the speaker. Press Switch 4 a second
time to turn the tone off. If you cannot hear the tones, the volume control (potentiometer R25) may
need to be turned up. It is located to the right of S1 on the inside front cover.