3E3473 Gallagher HBUS 16 In 16 Out Board Installation Note | Edition 10 | January 2021
Copyright © Gallagher Group Limited Page 6
3 Installation
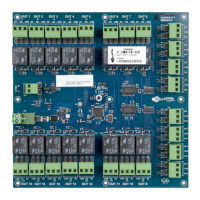
The Gallagher HBUS 16 In 16 Out Board can be mounted in a Gallagher Cabinet.
3.1 Single HBUS 16 In 16 Out Board installation
1. Fit the board within the cabinet, using the screws supplied with the cabinet.
2. Install all the system and power cables. Refer to the topic "Connections" later in this note.
The cables should stow neatly and be held in place by the cable clamps fitted into the base of
the cabinet.
3. Fix the component identification decal (3E3577) inside the cabinet door.
This decal enables you to enter wiring and connection details and identifies the location and
designation of cable connections, etc.
Note: Do not fix the decal over the reflective label. This label is required for front optical
tamper detection.
4. Configure the board in Command Centre. Refer to the topic "Configuring an HBUS IO
Interface" in the Command Centre Configuration Client Online Help.
3.2 Double stacking HBUS 16 In 16 Out Boards
1. Install and wire the bottom board into the cabinet, using the board spacers from the
Gallagher Board Spacer Kit (C200450) to screw the board into the cabinet.
Hint: Fix the second half of the board's component identification decal (3E3577) inside the
cabinet door. This half of the decal enables you to enter wiring and connection details for
the bottom board.
2. Install and wire the top board into the cabinet, using the screws supplied with the cabinet.
Hint: Fix the second half of the board's component identification decal (3E3577) inside the
cabinet door. This half of the decal enables you to enter wiring and connection details for
the top board.
3. Configure the boards in Command Centre. Refer to the topic "Configuring an HBUS IO
Interface" in the Command Centre Configuration Client Help.
Click the Status and Overrides tab and check the Disable Front Tamper checkbox for the
bottom board.
Click the Status and Overrides tab and check the Disable Rear Tamper checkbox for the top
board.

 Loading...