24
You can also safely remove the USB cable without powering down the Reference 600+ and your
computer. Be aware however, that this may have undesirable consequences if the system is currently
taking data or performing an electrochemical experiment.
Front Panel USB LED
The front panel USB LED provides a simple test of two aspects of
normal Reference 600+ USB operation. It has three normal states:
A valid cable connection has been made and the Reference 600+ USB processor is
receiving power from the USB cable,
The flashing state only occurs when Gamry Instruments application software is running.
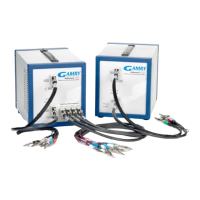
Cell Cable Installation
The Cell Cable connector is a 25-pin female D-type connector on the front of the Reference 600+.
All of Gamry’s standard cell cables have a 25-pin D-type connector on one end and a number of leads
terminated with banana plugs on the other. The D-type connector end of the cable is connected to the
Cell Cable connector on the front of the Reference 600+. Always use the knurled screws on this cable to
hold the cable in place.
A wide variety of cell cables are available for the Reference 600+. These include unshielded cables
designed for maximum AC performance, shielded cables in various lengths, and special cables for use in
EIS systems where very low impedances must be measured. The Reference 600+ can automatically detect
which Gamry Instruments cable is connected and the Gamry Framework software can then adjust the
system performance for the characteristics of that cable.