Part # P152 Rev 1 (01/13/10) Page 13
Motor
1. Open the door.
2. Remove the oven racks and guides
3. Remove the two (2) wing screws securing the fan guard
and remove the guard.
4. Using a hex head wrench loosen the screw securing the
blower wheel to the motor shaft and remove the wheel.
5. Remove the four (4) screws securing the motor mount
plate to the oven casing back and pull the plate froward
into the oven compartment.
6. Disconnect the motor wire connections (note which
wires connect to which) and replace faulty motor.
7. Reassemble in reverse order.
REPLACEMENT OF PARTS continued
TROUBLE SHOOTING
NOTE: Servicing must be carried out by competent persons in accordance with the law.
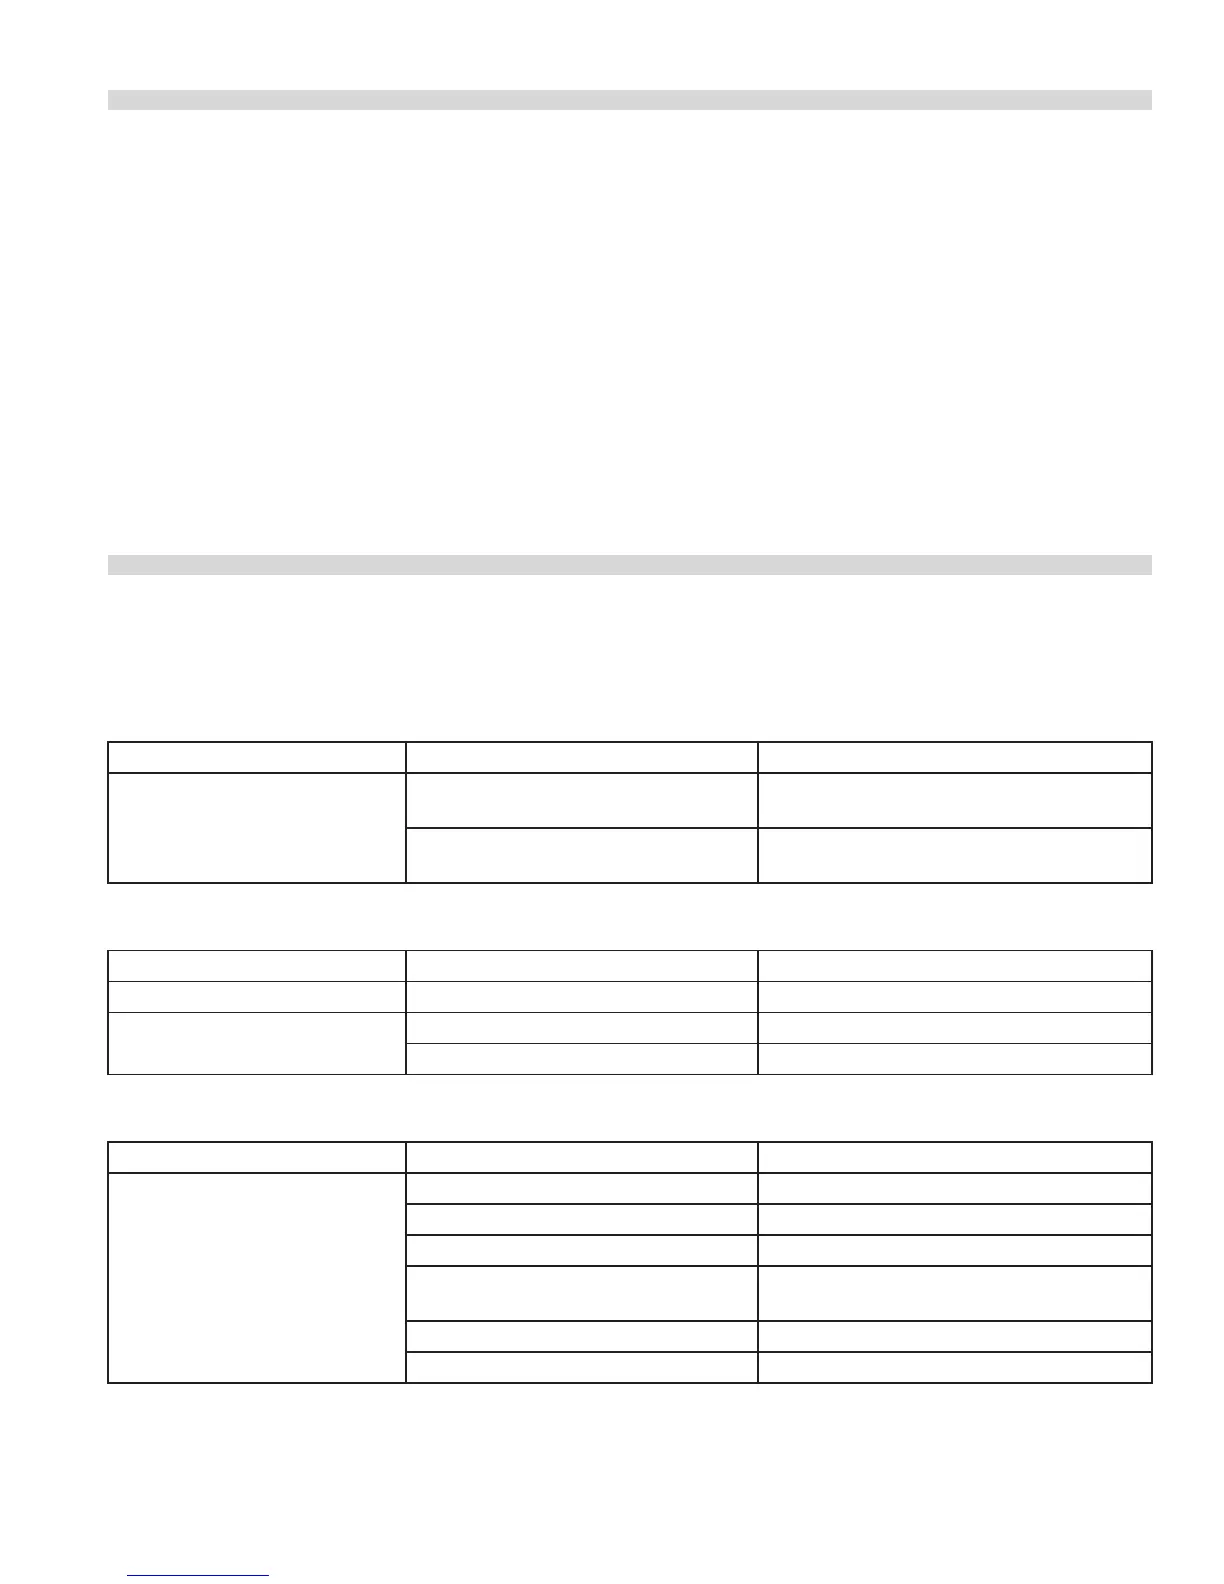
Griddle Diagnostics
PROBLEM POSSIBLE CAUSE SOLUTION
Griddle heating unevenly.
Adjacent griddle is operating at a
dierent temperature.
Check adjacent griddle section.
Griddle was not thoroughly heated
before using.
Allow more time for griddle to saturate.
Increase warm-up time.
Hot Top or Open Tubular Diagnostics
PROBLEM POSSIBLE CAUSE SOLUTION
Top to hot or too cold. Defective innite switch. Replace innite switch.
Top not heating at all. Defective element Replace element.
Defective innite switch. Replace Innite switch.
Sealed Hotplate Diagnostics
PROBLEM POSSIBLE CAUSE SOLUTION
Water in pot does not Boil. Water
takes to long to Boil. Switch set to
position ‘6’.
Pot has irregular bottom. Use at bottom pot.
Pot too large for element size. Use smaller diameter pot.
Pot too small for element size. Use larger diameter pot.
Element was preheated before pot was
placed on element.
Allow element to cool. Protector will reset.
One element circuit may be defective. Replace heating element.
Six heat switch may be defective. Replace 6 heat switch.
 Loading...