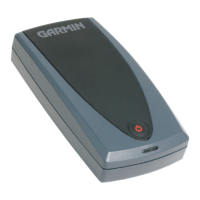
The GMS 10 Network Port Expander lets you connect more than two chartplotters
and other Garmin marine network devices to share data. Simply connect one end of the
network cable to your Garmin marine network device and connect the other end of the
network cable to the Expander. Then, your Garmin marine network devices will be able
to share information such as weather, mapping, and sounder data as well as position
information.
Contents
• GMS 10 Network Port Expander (#010-00351-00)
• Garmin marine network cable (#320-00227-00)
• 7-pin power cable (#320-00023-05)
• Grommet (#252-00129-00) Use the grommet to cover holes you drill for cables.
• Optional mounting hardware kit (#K00-00123-00)
Use the kit only if you cannot mount the Expander by using the factory-drilled
holes. The kit contains two brackets with two screws/nuts per bracket. Use the
screws and nuts to attach the bracket to the unit. Screws to secure the Expander to
your boat are not included.
Selecting a proper mount location
Mount your Expander in a location that is away from heavy foot traffi c and where the
network cables can easily reach your Garmin marine network devices and the Expander.
If you foresee purchasing an additional Expander as you add Garmin network devices,
make certain you have enough space to mount two Expanders near each other. Before you
mount the Expander, consider the length at which the network cables will extend when
plugged in to the Expander and allow for this extra space. If you select a mounting loca-
tion that prevents you from using the Expander’s factory-drilled holes, use the brackets
included in the optional mounting kit. (Instructions are included in the mounting kit.)
Connecting the cable to the network port
1. Unscrew the weather cap from a network port by turning the cap counterclockwise.
2. Connect the network cable to the network port by aligning the cable head with the opening
of the network port. Use the black arrow on top of the cable head as an alignment guide.
3. Tighten the cable cap to prevent the cable from vibrating loose.
GMS 10 Network Port Expander Instructions
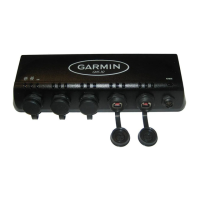
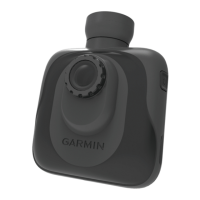
7-pin power cable
connector
network ports
weather caps
LED indicator
lights
190-00347-00_0B.indd 1 4/16/2004, 8:54:50 AM