Do you have a question about the Garmin 605 and is the answer not in the manual?
Controls device power and backlight functions.
Navigates between device pages and switches bike profiles.
Resets timers and creates new laps during activities.
Scrolls through menus, options, and data fields; selects items.
Starts and stops the activity timer.
Opens the menu page and locks/unlocks device buttons.
Zooms in/out on map and altimeter pages.
Procedure to restart the device when frozen or unresponsive.
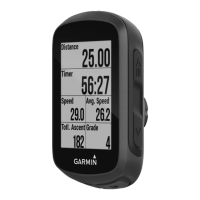
Explains common icons displayed on the device screen.
Details connecting the device to power via USB or AC adapter.
Important note on drying the device before charging.
Guidance on orienting the mount for optimal GPS reception.
Instructions for mounting the device on a bike stem.
Adapting the mount for horizontal handlebars.
Using rubber pads for different handlebar sizes.
Instructions for powering on the device and initial setup.
Guidance on obtaining satellite signals for GPS functionality.
Optional procedure to set a frequently visited location.
Instructions for pairing heart rate and speed/cadence sensors.
How to wear the heart rate monitor for accurate readings.
Wetting sensors for a strong connection.
Attaching the monitor strap correctly.
Bringing the monitor near the Edge to establish connection.
Ensuring proper alignment of magnets for data reception.
Instructions for mounting the GSC 10 sensor on the bike.
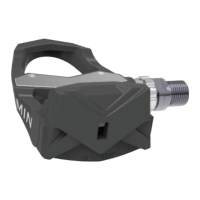
Attaching the pedal magnet to the crank arm.
Attaching the spoke magnet to the wheel.
Fine-tuning the sensor arm for optimal alignment.
Using LED lights to verify sensor alignment.
Securing cable ties and magnets after successful alignment.
Inputting personal data for accurate ride calculations.
Configuring bike-specific settings like wheel size.
Instructions for starting the activity timer and saving data.
Instructions for downloading Garmin Training Center or Connect.
Connecting the device to a PC to upload ride data.
Refer to the owner's manual for advanced functions and settings.
Guidance on online registration for support.
| Display Type | color TFT |
|---|---|
| Battery | rechargeable lithium-ion |
| Battery Life | up to 15 hours |
| Water Resistance | IPX7 |
| GPS | Yes |
| High-Sensitivity Receiver | Yes |
| Barometric Altimeter | Yes |
| Electronic Compass | Yes |
| Map Capability | Yes |
| Basemap | Yes |
| Ability to Add Maps | Yes |
| Touchscreen | No |
| Heart Rate Monitor Compatible | Yes |
| Cadence Sensor Compatible | Yes |
| Speed Sensor Compatible | Yes |
| Accepts Data Cards | microSD card (not included) |