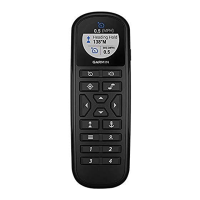
3
Replace the battery cover, and turn the D-ring clockwise.
Attaching a Lanyard
1
Starting from the back of the remote control, insert the loop of
the lanyard through the slot.
2
Thread the other end of the lanyard through the loop, and
pull it tight.
3
If necessary, place the lanyard around your neck or wrist to
tether it during use.
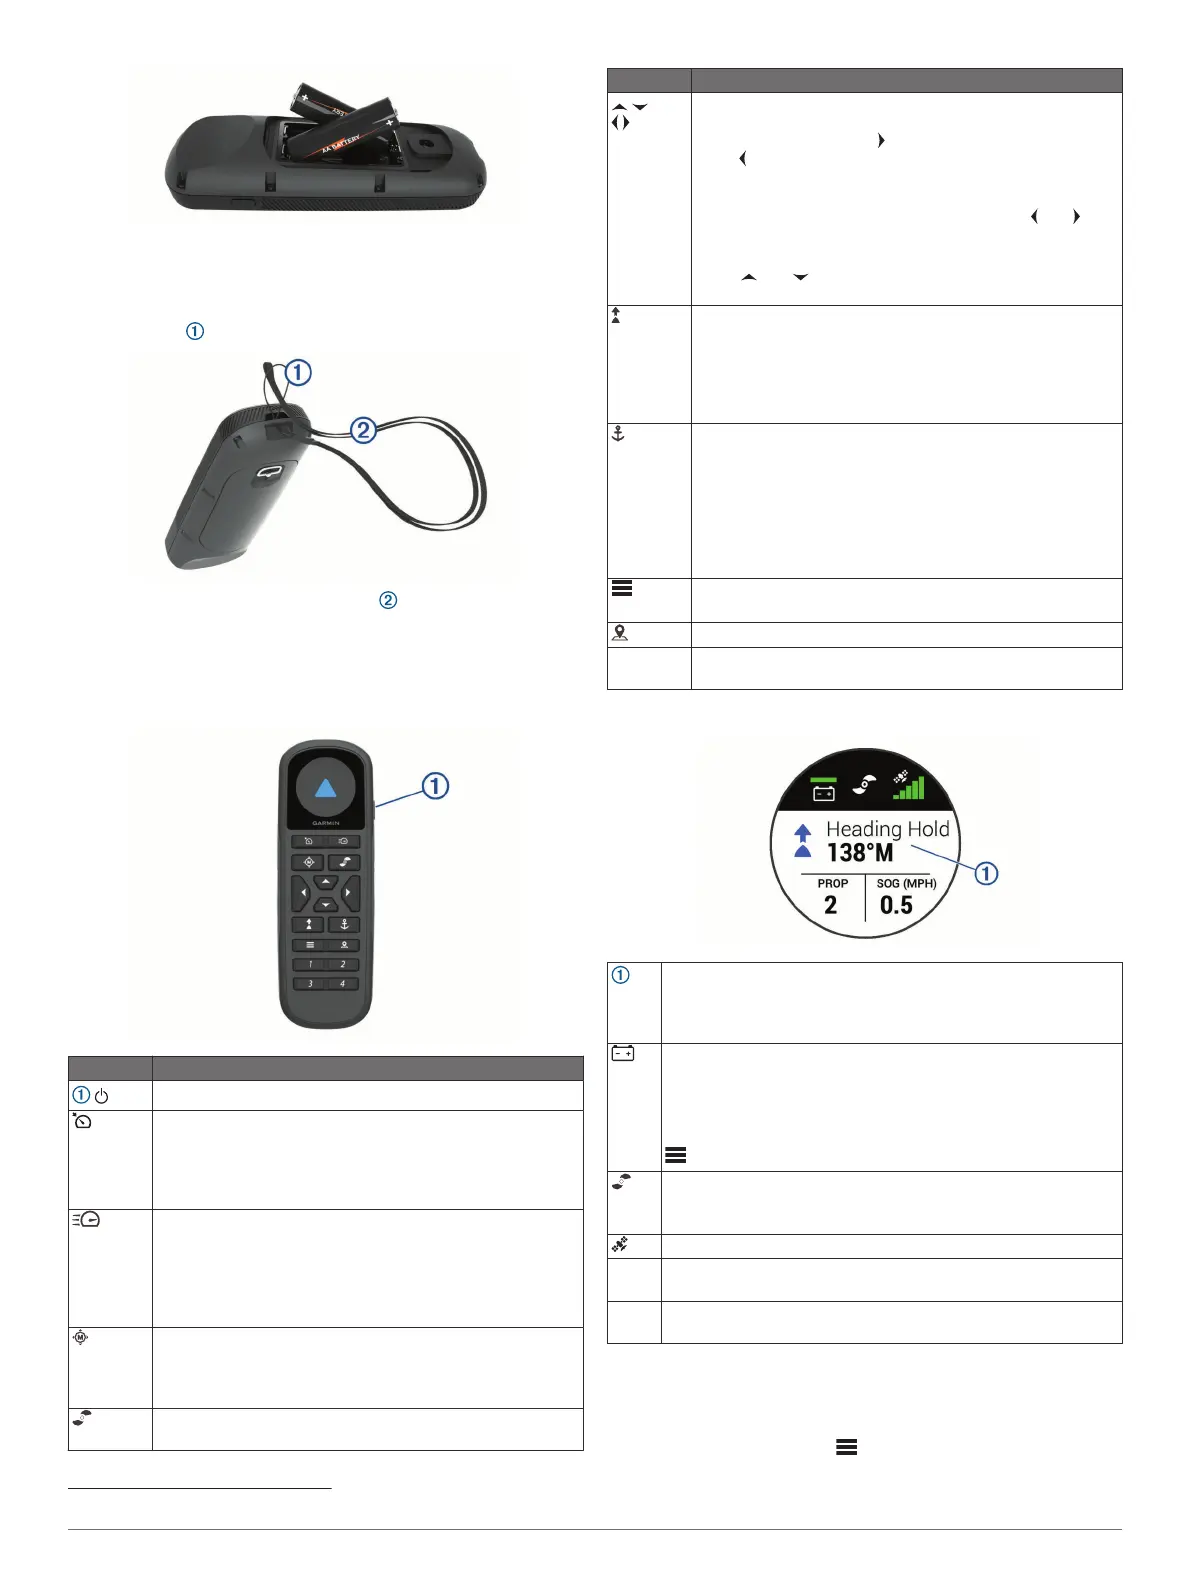
Remote Control Keys
Key Description
Hold to turn the remote control on and off.
Press to turn on and set the cruise control at the current
speed over ground (SOG) (Maintaining Your Speed,
page 5).
Press to disable the cruise control and return to manual
speed control.
If the propeller is on, press to set it to full speed (Toggling
Full Speed, page 5).
If the propeller is off, press to enable the propeller and set it
to full speed.
Press again to return to the previous speed and propeller
state.
Press for manual control (Steering the Trolling Motor
Manually, page 5).
Hold to steer using gestures (Using Gesture Controls to
Steer, page 6).
Press to turn the propeller on and off (Turning the Propeller
On and Off, page 5).
Key Description
Press to navigate the menu (Navigating the Menu,
page 3).
When in the menu, press to select a menu item, and
press to go back.
When in anchor lock, press to jog the anchor lock position
forward, backward, left, or right in 1.5 m (5 ft.) increments.
When in heading hold or manual control, press and for
single-degree step turns, or hold for steering in five-degree
increments.
Press and for incremental speed changes, or hold for
continuous speed changes.
Press to turn on heading hold (set and maintain the current
heading) (Maintaining Your Heading, page 6).
Press to turn off heading hold, stop the propeller, and
resume manual control.
Hold to set the heading hold by pointing the remote (Using
Gesture Controls to Adjust the Heading Hold, page 6).
Press to turn on anchor lock. Anchor lock uses the trolling
motor to hold your position (Holding Your Position,
page 6).
When in anchor lock, press to turn off anchor lock and
return to the previous steering mode.
Hold to jog the anchor lock position by pointing the remote
(Using Gesture Controls to Adjust Your Held Position,
page 6).
Press to open the menu.
Press to exit the menu.
Press to mark a waypoint.
1 through
4
Press to open the shortcut for the Garmin chartplotter
assigned to the key.
1
Remote Control Screen
Shows the operational status of the trolling motor.
For example, when in manual control, Manual is shown, and
when the heading hold is on, Heading Hold is shown, along with
the heading-hold set point in degrees.
Shows the trolling motor battery status.
Green: the motor battery voltage is good.
Yellow: the motor battery voltage is low.
Red: the motor battery voltage is critically low.
TIP: You can view the remote control battery level by pressing
.
Shows the status of the propeller.
When the propeller icon is shown, the propeller is on. When the
propeller icon is not shown, the propeller is off.
Shows the GPS signal strength of the trolling motor.
PROP Shows the speed level of the propeller (Adjusting the Speed of
the Motor, page 5).
SOG Shows the measured speed over ground (SOG) in the specified
units.
Navigating the Menu
You can use the menu and arrow keys to navigate the menu on
the remote control.
• To open the menu, press .
1
Requires a connection to a compatible Garmin chartplotter. See your chartplotter owner's manual for instructions.
Remote Control 3