USB Mode: Sets the device to use mass storage mode or
Garmin mode when connected to a computer.
On a Forerunner 645 Music device, this sets the device to
use Media Transfer Protocol (MTP) mode or Garmin mode
when connected to a computer.
Reset: Allows you to reset user data and settings (Resetting All
Default Settings, page 26).
Software Update: Allows you to install software updates
downloaded using Garmin Express.
Time Settings
Hold UP, and select Settings > System > Time.
Time Format: Sets the device to show time in a 12-hour or 24-
hour format.
Set Time: Sets the time zone for the device. The Auto option
sets the time zone automatically based on your GPS position.
Time: Allows you to adjust the time if it is set to the Manual
option.
Alerts: Allows you to set sunrise and sunset alerts to sound a
specific number of minutes or hours before the actual sunrise
or sunset occurs.
Sync With GPS: Allows you to manually sync the time with GPS
when you change time zones, and to update for daylight
saving time.
Changing the Backlight Settings
1
Hold Menu.
2
Select Settings > System > Backlight.
3
Select During Activity or Not During Activity.
4
Select an option:
• Select Keys and Alerts to turn on the backlight for key
presses and alerts.
• Select Gesture to turn on the backlight by raising and
turning your arm to look at your wrist.
• Select Timeout to set the length of time before the
backlight turns off.
Changing the Units of Measure
You can customize units of measure for distance, pace and
speed, elevation, weight, height, and temperature.
1
Hold UP.
2
Select Settings > System > Units.
3
Select a measurement type.
4
Select a unit of measure.
Clock
Setting the Time Manually
1
Hold UP.
2
Select Settings > System > Time > Set Time > Manual.
3
Select Time, and enter the time of day.
Setting an Alarm
You can set up to ten separate alarms. You can set each alarm
to sound once or to repeat regularly.
1
From the watch face, hold UP.
2
Select Alarm Clock > Add Alarm.
3
Select Time, and enter the alarm time.
4
Select Repeat, and select when the alarm should repeat
(optional).
5
Select Sounds, and select a type of notification (optional).
6
Select Backlight > On to turn on the backlight with the alarm.
7
Select Label, and select a description for the alarm
(optional).
Deleting an Alarm
1
From the watch face, hold UP.
2
Select Clock > Alarm Clock.
3
Select an alarm.
4
Select Delete.
Starting the Countdown Timer
1
From any screen, hold LIGHT.
2
Select Timer.
NOTE: You may need to add this item to the controls menu
(Customizing the Controls Menu, page 20).
3
Enter the time.
4
If necessary, select Restart > On to automatically restart the
timer after it expires.
5
If necessary, select Sounds, and select a type of notification.
6
Select Start Timer.
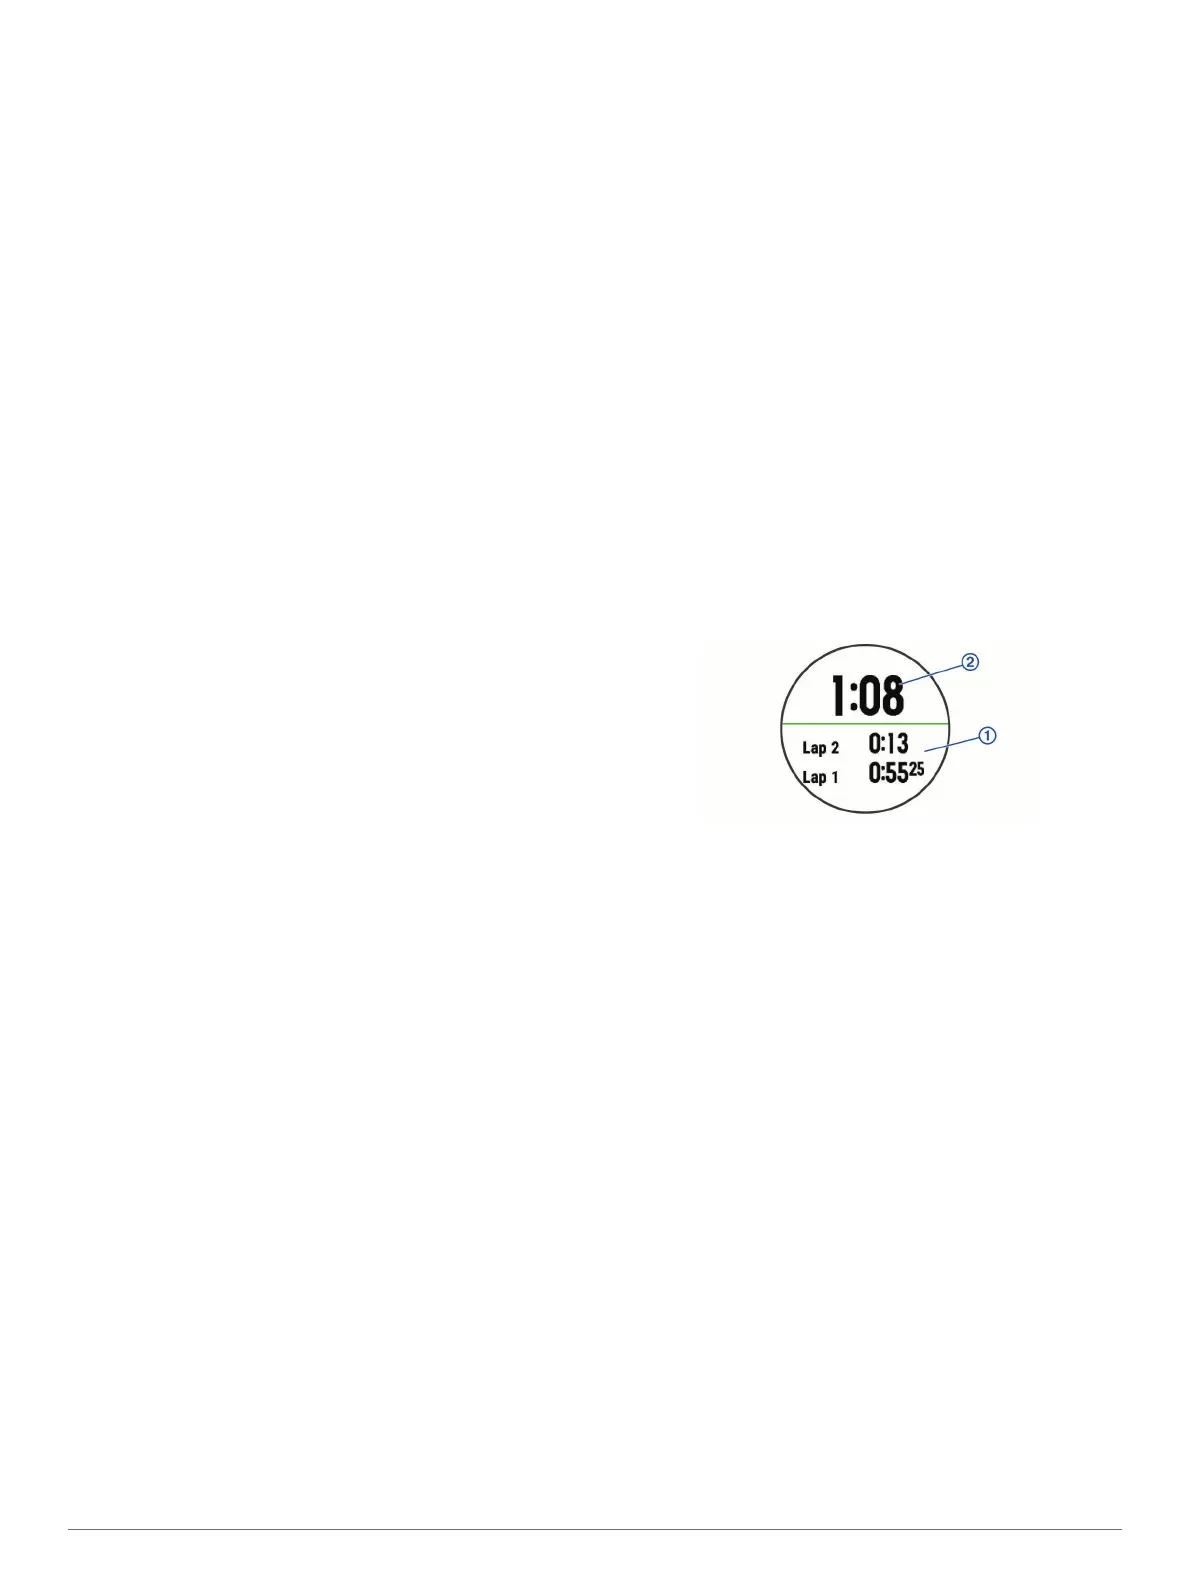
Using the Stopwatch
1
From any screen, hold LIGHT.
2
Select Stopwatch.
NOTE: You may need to add this item to the controls menu
(Customizing the Controls Menu, page 20).
3
Select START to start the timer.
4
Select BACK to restart the lap timer
À
.
The total stopwatch time
Á
continues running.
5
Select START to stop both timers.
6
Select an option.
7
Save the recorded time as an activity in your history
(optional).
Syncing the Time with GPS
Each time you turn on the device and acquire satellites, the
device automatically detects your time zones and the current
time of day. You can also manually sync the time with GPS
when you change time zones, and to update for daylight saving
time.
1
From the watch face, hold UP.
2
Select Settings > System > Time > Sync With GPS.
3
Wait while the device locates satellites (Acquiring Satellite
Signals, page 26).
VIRB Remote
The VIRB remote function allows you to control your VIRB
action camera using your device. Go to www.garmin.com/VIRB
to purchase a VIRB action camera.
Controlling a VIRB Action Camera
Before you can use the VIRB remote function, you must enable
the remote setting on your VIRB camera. See the VIRB Series
Owner's Manual for more information. You must also set the
VIRB widget to be shown in the widget loop (Customizing the
Widget Loop, page 20).
1
Turn on your VIRB camera.
2
On your Forerunner device, select UP or DOWN from the
watch face to view the VIRB widget.
Customizing Your Device 23