Installation
SncrroN
2
-
IxsreLLATroN
This section
describes
the
installation
of
the
SL40
including
mounting,
wirin-e,
and
connections.
A
post
installation check-out
procedure
is
included at
the end of this
section.
PnE.IxSTALLATION
INFORMATION
Always
follow
good
avionics
installation practices
per
FAA Advisory Circulars
(AC)
43.13-
I A,
43.13-2A, and
AC 20-67B, or later FAA
approvcd
revisions
of
these docuntents.
Follow
the installation
procedure
in
this
section
as
it is
presented
lbr a successful
installation.
Read the entirc scction
befbre
beginning
the
procedurc.
Perform
the
post
installation
check-
out before
closing
the
work
area
in
case
problems occur.
INsrulATIoN
OvoRvIpw
A successful
installation should start
with careful
planning
irrcluding
dctcrrnination
of
mounting
location
for the
SL40, antcllta
nrounting,
connc'ctiorrs
to microphones, speakers,
and
headphones, cable
routing, and
otlicr required
mociiflcations. Once
thc
mounting
locatiotr
has becn
dctcrminecl,
prepare
thc mounting
framc fbr installation. lt
may be easier
to
complete
the
wiring harncss
and attach thc
conncctors
to the
ntcrurrting {i'arne bcfbre
installing
the
mounting
fiamc.
lxsrnllATroN
CoxstnERATIoNS
MouNrlNc
CoNsl
oERATIoNS
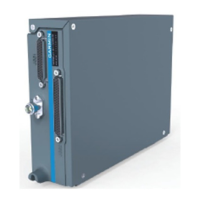
The SL40
is designed
to mount in
the avionics
stack
irr thc aircralt
instrumcnt
pancl
within
easy
vicw
and reach of
thc
pilot.
Thc
stanclard
package includcs
a
nrountirtg
fianrc fbr ease
of
mounting,
conncctiorrs,
and scrvicc
of tltc
unit. Allow
an additional onc
inclt
clcarance
to
tlte
rear of
the mounting
fiame fbr ct'urncctors
and
cablcs.
For typical
installertrons,
thc
SL40 does not
require
cxternal cooling. Whcrr
rnounting
thc
SL40,
leave
a clear:.rncc of
l/tl
to
ll4
inch
between
aviotrics
to allow
fbr
circulation.
MrNrnaunr
Svsrsnl
CoNnrcuRATToN
The SL40
requires
connections to thc
fbllowing
cquipnrcnt
as a mitrimunt:
o
powcr
input
.
speaker or hcadphonc output
.
microplronc
iltpul
.
an antcnrla
EgurruENr
MouNrtxc
Once the
cable assemblies
lrave
been made,
attach
the 15
pin
dsub and
coaxial cable
connectors
to the rear
connector mountirrg
plate
and
the mounting
frame
as
illustrated
in
Figure
2 and
Figure 3.
Routc the
wiring bundle
as appropriate.
The rear
connector
plate
should
be
attached
to the mounting frame
before
installing
the frame
in the instrument
panel.
Tlie rear
connector
plate
can be used to tie
down the
cable assemblies. Connect
the shield
grounds directly to the
connector
rnounting
plate.
SL40 InstulIation
ManuaI

 Loading...