VX900T
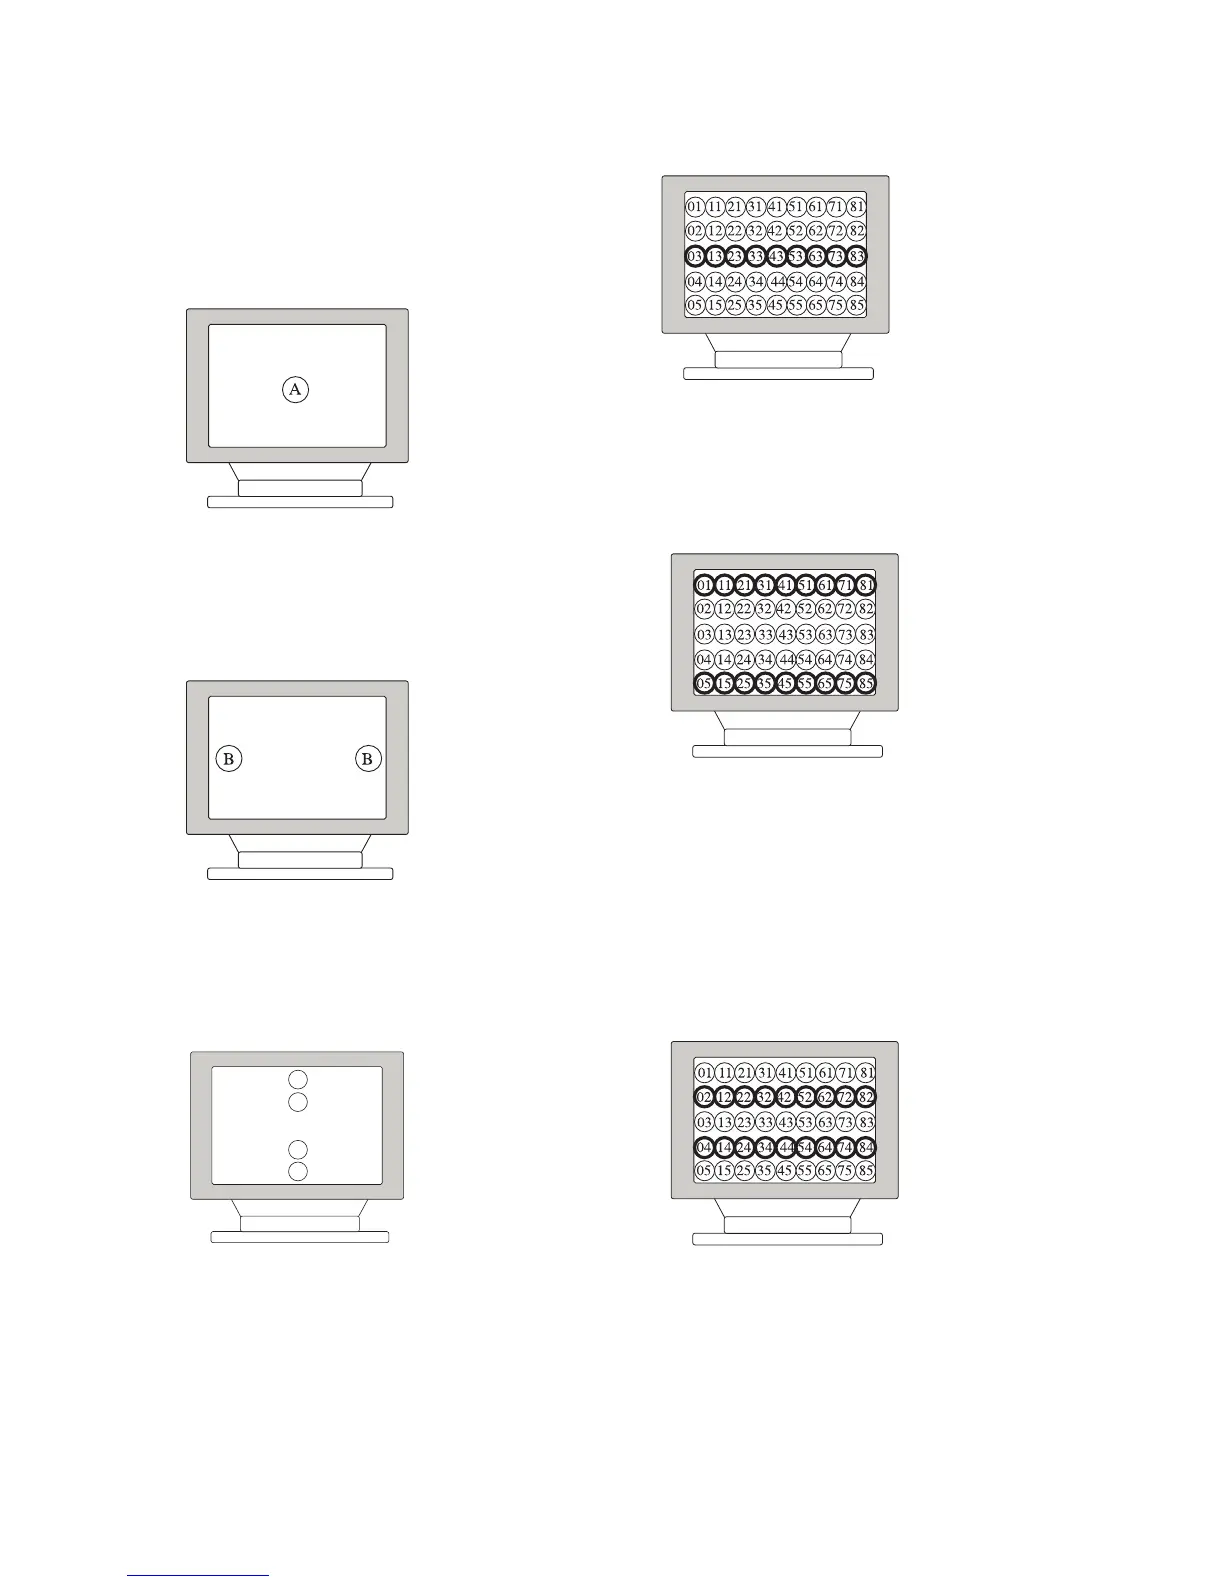
11. Digital Convergence Adjustment
l Set CONV_SWITCH_NDX to 3
Step 1
Adjust area "A" as follows:
1) Adjust H-STAT and V-STAT with 4-poles magnet
2) Adjust HMC and VMC with 6-poles magnet
Step 2
Adjust area "B" as follows:
1) Correct H-TILT with TLH correction plate.
2) Correct XCV with XCV core.
Step 3
C
C
C
C
Adjust area "C" with the following register:
"X_STATIC_CONV_PARA_TOP"
"X_STATIC_CONV_PARA_BTM"
"Y_STATIC_CONV_PARA_TOP"
"Y_STATIC_CONV_PARA_BTM"
Step 4
Adjust area "03" - "83" with the following register:
"X DYNAMIC CONV RX03" - "X DYNAMIC CONV RX83"
"Y DYNAMIC CONV RY03" - "Y DYNAMIC CONV RY83"
Step 5
Adjust area "0" - "81" with the following register:
"X DYNAMIC CONV RX01" - "X DYNAMIC CONV RX81"
"Y DYNAMIC CONV RY01" - "Y DYNA MIC CONV RY81"
Step 6
Adjust area "05" - "85" with the following register:
'X DYNAMIC CONV RX05" - "X DYNAMIC CONV RX85"
"Y DYNAMIC CONV RY05" - "Y DYNAMIC CONV RY85"
Step 7
Adjust area "02" - "82" with the following register:
"
X DYNAMIC CONV RX02" - "X DYNAMIC CONV RX82"
"Y DYNAMIC CONV RY02" - "Y DYNAMIC CONV RY82"
Step 8
Adjust area "04" - "84" with the following register:
"X DYNAMIC CONV RX04" - "X DYNAMIC CONV RX84"
"Y DYNAMIC CONV RY04" - "Y DYNAMIC CONV RY84"
Section 4 Adjustments (Page 15)
English
98KJ4015-1
Printed in U.S.A.
© 1998.11
9-978-872-91