Please note that all unit must be properly grounded. For your own safety, you should never
remove any ground connectors from electrical devices or power cables, or render them
inoperative.
Please sure that only qualified people install and operate the mixing console. During
installation and operation, the user must have sufficient electrical contact to earth,
otherwise electrostatic discharges might affect the operation of the unit.
2.CONTROL ELEMENTS AND
CONNECTORS
This chapter describes the various control elements of your mixing console. All controls, switches
and connectors will be discussed in detail.
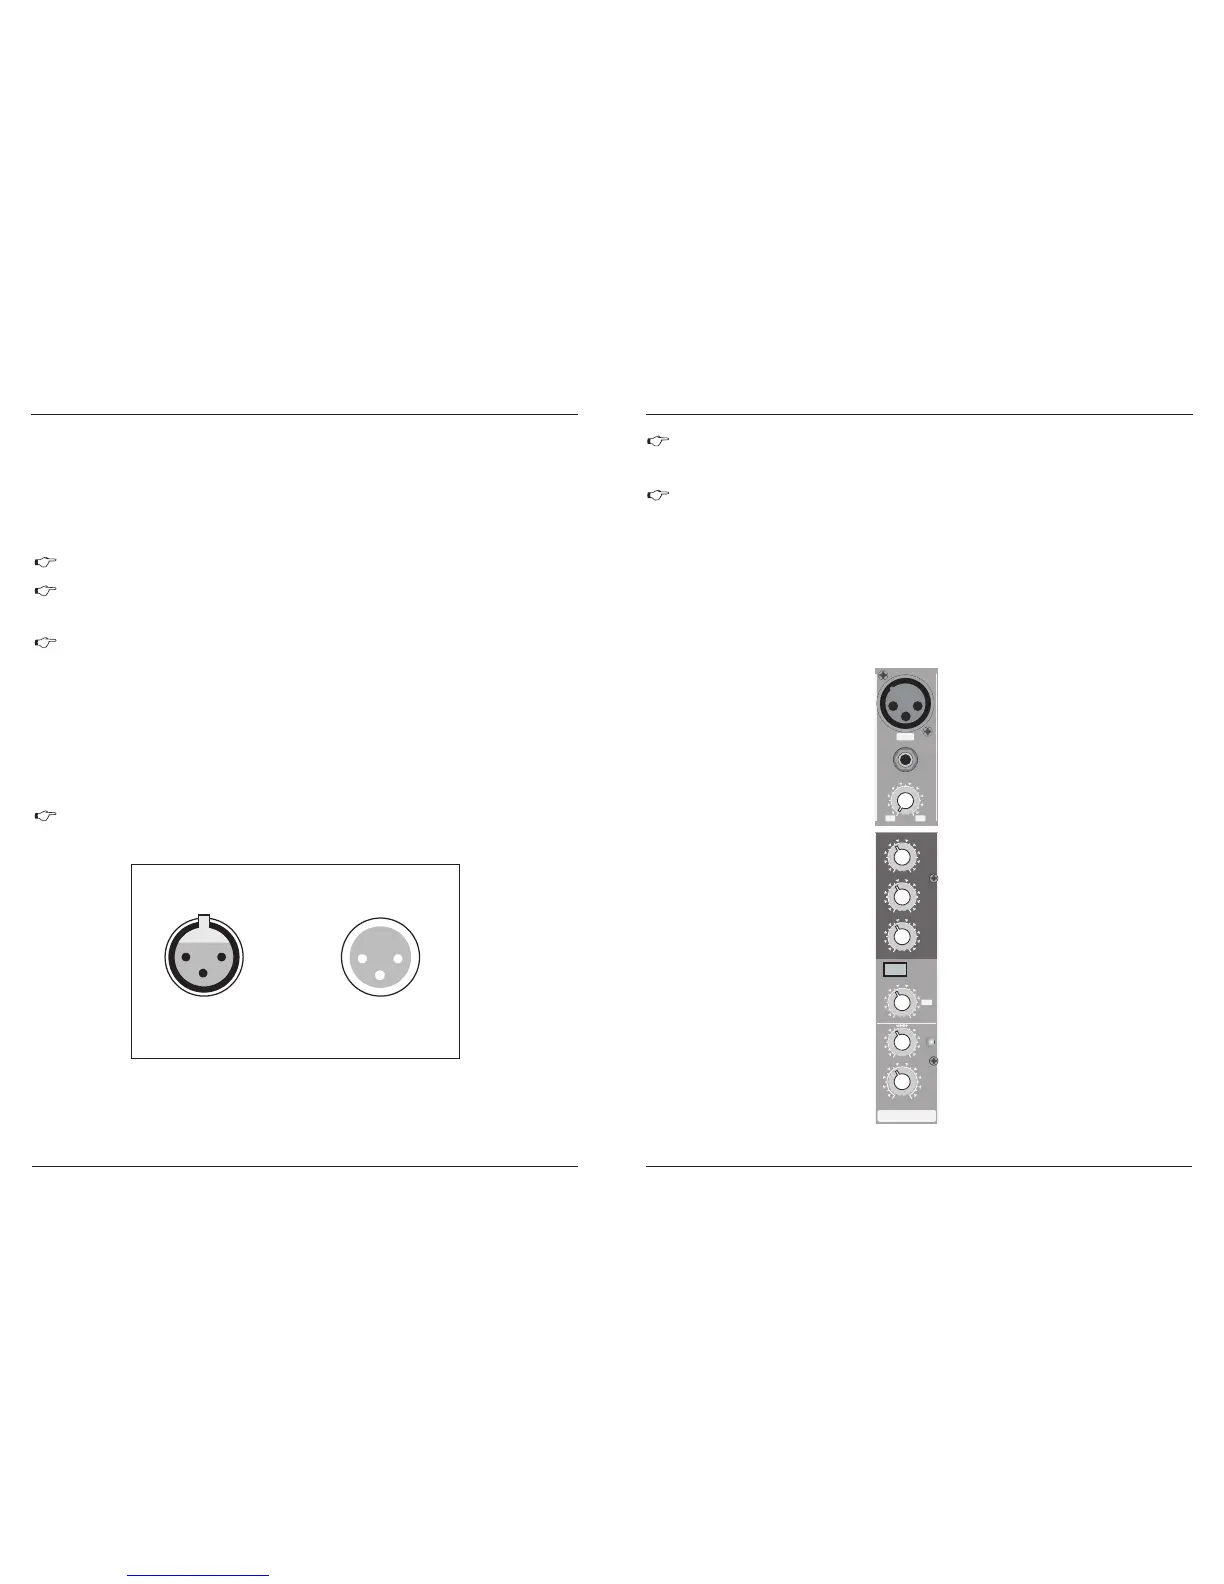
2.1 Mono channels
Fig. 2.1: Connectors and controls on the mono channels
4
1
+10 -40 +10 +60
TRIM
dB/ dBu
BAL
OR
UNBA L
LIN E
IN
MIC
0
- +15
8
L R
0
-15 +15
0
-15 +15
0
-15 +15
EQ
PAN
HIG H
12 KHz
MID
2.5 KHz
LOW
80 Hz
FX
CLIP
0
- +15
8
1
LEVEL
LOW CUT
75H z
18 dB/Oc t
12
3
15
4.1 Mains connection
You will need a larger number of cable for the various connections to and from the console. The
illustrations below show. The wing of these cables. Be sure to use only high-grade cable.
Please use commercial RCA cables to wire the 2-track inputs and outputs.
You can, of course, also connect unbalanced devices to the balanced input/outputs. Use either mono
plugs, or ensure that ring and sleeve are bridged inside the stereo plug (or pins 1 & 3 in the case o
f XLR
connectors).
Caution! Never use unbalanced XLR connectors (PIN 1 and 3 connected) on the MIC input
connectors when using the phantom power supply.
4.INSTALLATION
Connect the power supply to the 3-pin mains connector on the rear of the console. Use the AC adapter
supplied to connect the console to the mains. The adapter complies with all applicable safety standards.
Please use only the power supply unit provided with the console.
4.2 Audio connections
Fig. 4.1: XLR connections
Please use only the power supply unit provided with the console.
AC POWER IN
For unbalanced use pin 1 and pin 3 have to be bridged
Balanced use with XLR connectors
1=groud / shield
2=hot (+ve)
3=cold (-ve)
1
2
3
1
2
3
Input
Output
Never connect the MX to the power supply unit while the latter is connected to the mains!
First connect the console to the power supply unit, then connect the power supply unit to
the mains.
MX-6-FX / MX-8-FX
MX-6-FXU / MX-8-FXU
MX-6-FX / MX-8-FX
MX-6-FXU / MX-8-FXU