Figure 1.1 Order Codes ..................................................................................................................................................... 1-2
Figure 2.1 Mounting Details............................................................................................................................................... 2-2
Figure 2.10 565/575 Rear Panel Layout ........................................................................................................................... 2-15
Figure 2.2 Mounting Arrangement with Relay Collar ......................................................................................................... 2-3
Figure 2.3 Computer Interface Cable for RelayCom Package .......................................................................................... 2-4
Figure 2.4 Removal of Hi-Pot Screw ................................................................................................................................. 2-6
Figure 2.5 565/575 Relay Typical Wiring........................................................................................................................... 2-8
Figure 2.6 Voltage Sensing Wire ....................................................................................................................................... 2-9
Figure 2.7A 565/575 with MTM CT and Open Delta VT Typical Wiring ............................................................................ 2-10
Figure 2.7B 565/575 with MTM CT and Wye VT Typical Wiring........................................................................................ 2-11
Figure 2.8A Open Delta VT and CT MTM Typical Wiring .................................................................................................. 2-12
Figure 2.8B Wye VT and CT MTM Typical Wiring ............................................................................................................. 2-13
Figure 2.9 MTM Mounting Dimensions............................................................................................................................ 2-14
Figure 3.1 Normal Inverse Time/Phase Overcurrent Curve .............................................................................................. 3-2
Figure 3.2 Moderately Inverse Time/Phase Overcurrent Curve ........................................................................................ 3-3
Figure 3.3 Very Inverse Time/Phase Overcurrent Curve .................................................................................................. 3-4
Figure 3.4 Extremely Inverse Time/Phase Overcurrent Curve .......................................................................................... 3-5
Figure 3.5 Normal Inverse Time/Ground Overcurrent Curve ............................................................................................ 3-6
Figure 3.6 Moderately Inverse Time/Ground Overcurrent Curve ...................................................................................... 3-7
Figure 3.7 Very Inverse Time/Ground Overcurrent Curve................................................................................................. 3-8
Figure 3.8 Extremely Inverse Time/Ground Overcurrent Curve ........................................................................................ 3-9
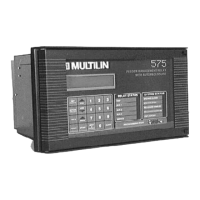
Figure 4.1 565/575 Relay Front Panel............................................................................................................................... 4-4
Figure 8.1 Secondary Injection Test Setup ....................................................................................................................... 8-2
Figure C1. System Controller Block Diagram (1 of 2) ........................................................................................................ C-2
Figure C2. System Controller Block Diagram (2 of 2) ........................................................................................................ C-3
LIST OF FIGURES