EasyManua.ls Logo

GE BT22 Series User Manual

GE BT22 Series
3 pages
To Next Page IconTo Next Page
Page #1 background imageLoading...
Page #1 background image
Installation Guide
imagination at work
(For BT22 Series of CE version)
LED Luminaires
BEFORE YOU BEGIN
Read these instructions completely and carefully.
Save These Instructions
Use only in the manner intended by the manufacturer. If you have any questions, contact the manufacturer.
Tools and components required:
• Phillips head screwdriver.
• UL approved conduit tting.
• UL approved twist-on wire connectors.
Prepare Electrical Wiring
Electrical Requirements
LED driver must be supplied with 220-240
VAC, 50/60 Hz and connected to an individual properly grounded branch circuit,
protected by a 15 or 20
ampere circuit breaker. Use Min. 75 °C supply conductor.
Grounding Instructions
The grounding and bonding of the overall system shall be done in accordance with National Electric Code (NEC) Article 600
and local codes.
WARNING
RISK OF ELECTRIC SHOCK
Turn power off before inspection, installation or removal.
Properly ground electrical enclosure.
RISK OF FIRE
Follow all NEC or IEC and local codes.
Use only UL or IEC approved wire for input/output connections.
Minimum size 18 AWG (0.75 mm
2
).
Question and Answer IconNeed help?

Do you have a question about the GE BT22 Series and is the answer not in the manual?

GE BT22 Series Specifications

General IconGeneral
BrandGE
ModelBT22 Series
CategoryLantern
LanguageEnglish

Summary

Before You Begin

Electric Shock Safety

Turn power off before inspection, installation, or removal. Properly ground electrical enclosure.

Fire Safety Precautions

Follow NEC or IEC codes and local codes. Use UL or IEC approved wire for connections.

Save Installation Instructions

Use the product as intended by the manufacturer. Contact them with any questions.

Prepare Electrical Wiring

Electrical Requirements

Connect the LED driver to a properly grounded branch circuit with a 15 or 20A breaker.

Grounding Instructions

System grounding and bonding must comply with National Electric Code (NEC) Article 600 and local codes.

Unit Installation Steps

Unpack and Inspect Unit

Carefully unpack and inspect the unit for defects. Wear work gloves to prevent dirt transfer.

Install Luminaire in Ceiling

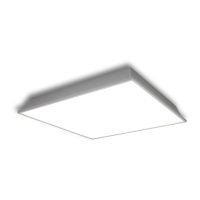
Install the unit into the reserved hole in the ceiling.

Optional: Attach Safety Brackets

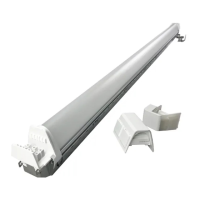
Attach supplied L-shape brackets to the fixture and hang unit with a cable.

Electrical Connections

Remove Electrical Enclosure Cover

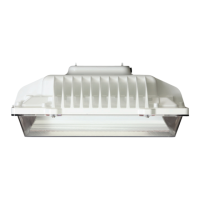
Remove the electrical enclosure cover to access wiring terminals.

Prepare Knockout and Grommet

Remove knockout, insert grommet, and unscrew strain relief for cable entry.

Connect AC Line and Secure Cable

Connect AC line to terminal block via strain relief and screw strain relief tightly.

Replace Electrical Enclosure Cover

Replace the electrical enclosure cover after completing wiring connections.

Related product manuals