Increase
Tension
Decrease
Tension
Use This
Mounting
Hole
INCREASE
DECREASE
STEP 3 – CHECK DOOR BALANCE
• With dishwasher on the wood skid, check the door balance
by opening and closing the door.
• If the door drops when released, increase the spring tension.
If the door rises when released, decrease the tension.
• There are two types of counterbalances and therefore two
methods of adjustment. Identify which counterbalance is
present and adjust tension accordingly. Please note: If there
are 3 holes on the cable, use the cable to adjust; if there is
one hole on cable, use the tub leg to adjust.
Figure H
7
Dishwasher Installation
Figure G
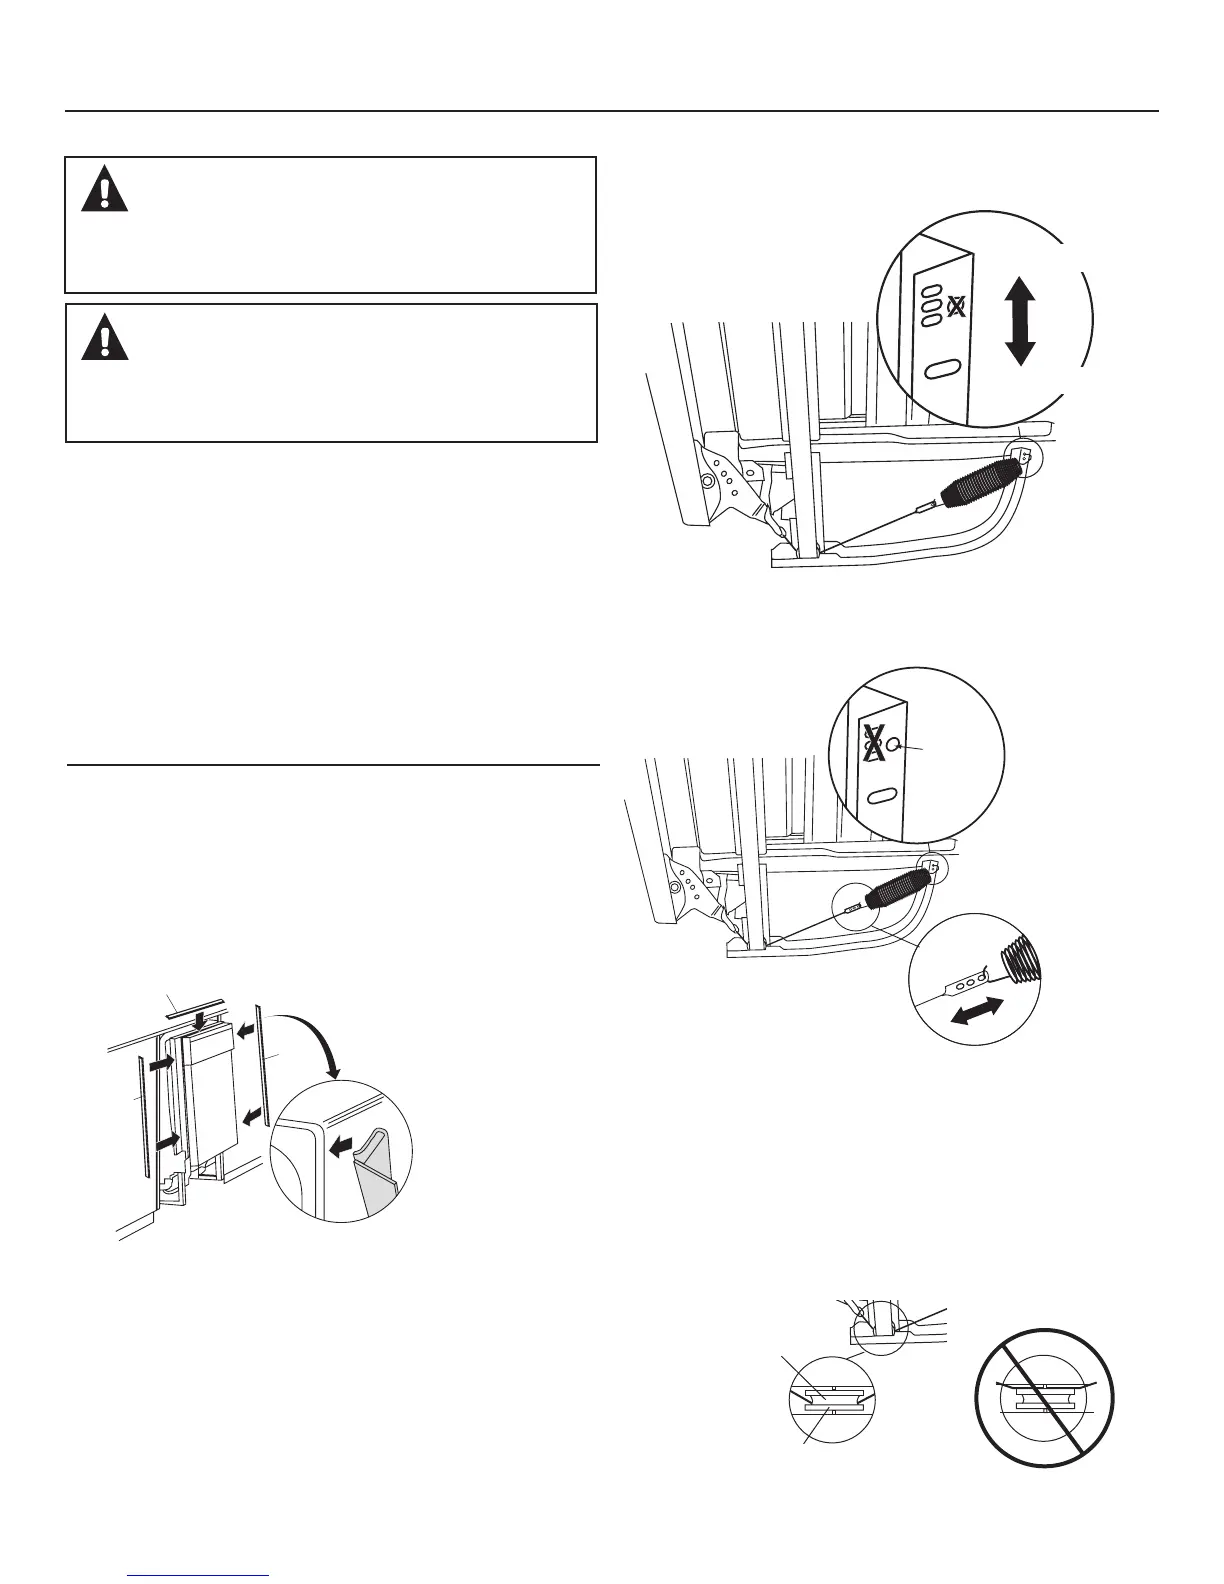
STEP 2 – INSTALL TRIM PIECES
In this step, you will need the trim pieces set aside in Step 1.
• Press top trim piece onto top of tub ange. Start with the
right edge and work your way to the left.
• Repeat process with the left and right trim pieces working
from the top down.
• Open and close the door to check that trim does not bind
and does not interfere with door latch or door hinges.
Trim
Strip
Trim
Strip
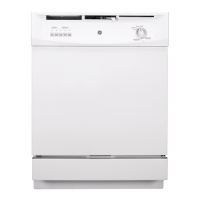
Type 2 – Three-hole cable
Adjust tension by moving spring hook to one of the three holes
on the pulley cable.
Figure I
After adjusting spring tension, open and close the door to
make sure the door operates smoothly. If the door is hard
to move or if the spring cable binds, check the routing of
the spring cable. The cable should be routed between the
shoulders of the pulley cable roller. If the cable is off the roller:
latch door, remove spring tension and route the cable between
the shoulders of the roller. See Figure J.
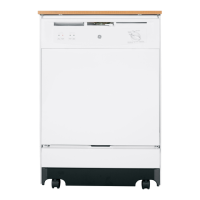
Type 1 – One-hole cable
Adjust tension by moving spring hook to one of the three holes
on the tub leg.
STEP 1 – LOCATE INSTALLATION ITEMS
• Locate the items in the installation package and set aside for
use in the listed steps.
• Trim pieces – Step 2
• Junction box cover – Step 7 or Step 19
• Drain hose and clamp – Step 10
• Countertop Bracket Kit – Step 12
• Screw Kit – Step 16
• Drain hose hanger – Step 18
• Owner’s Manual – Step 20 and Step 25
• Hard Water test strip – Step 22
• Sound upgrade kit (selected models) – Step 23
• Product samples and/or coupons – Step 25
Figure J
Correct Spring
Cable Routing
Shoulder
Pulley
Incorrect Spring
Cable Routing
CAUTION
Do not remove the wood base until you are ready to
install the dishwasher. The dishwasher will tip over
when the door is opened if the base is removed.
PRECAUCIÓN
No retire la base de madera hasta que esté listo para
instalar la lavadora de platos. Cuando la puerta se abra,
la lavadora de platos se inclinará si la base se retira.

 Loading...