– 60 –
To correct any fl ame problems, perform the
following procedures:
Bake Burner
1. Remove the oven door. (See Oven Door Removal.)
2. Remove the bake burner. (See Bake Burners and
Glow Bar Igniters.)
3. Inspect the primary air opening. The opening
must be clear and free of insulation all the way
down to the metal shield below the 0.314-in. (8-
mm) opening.
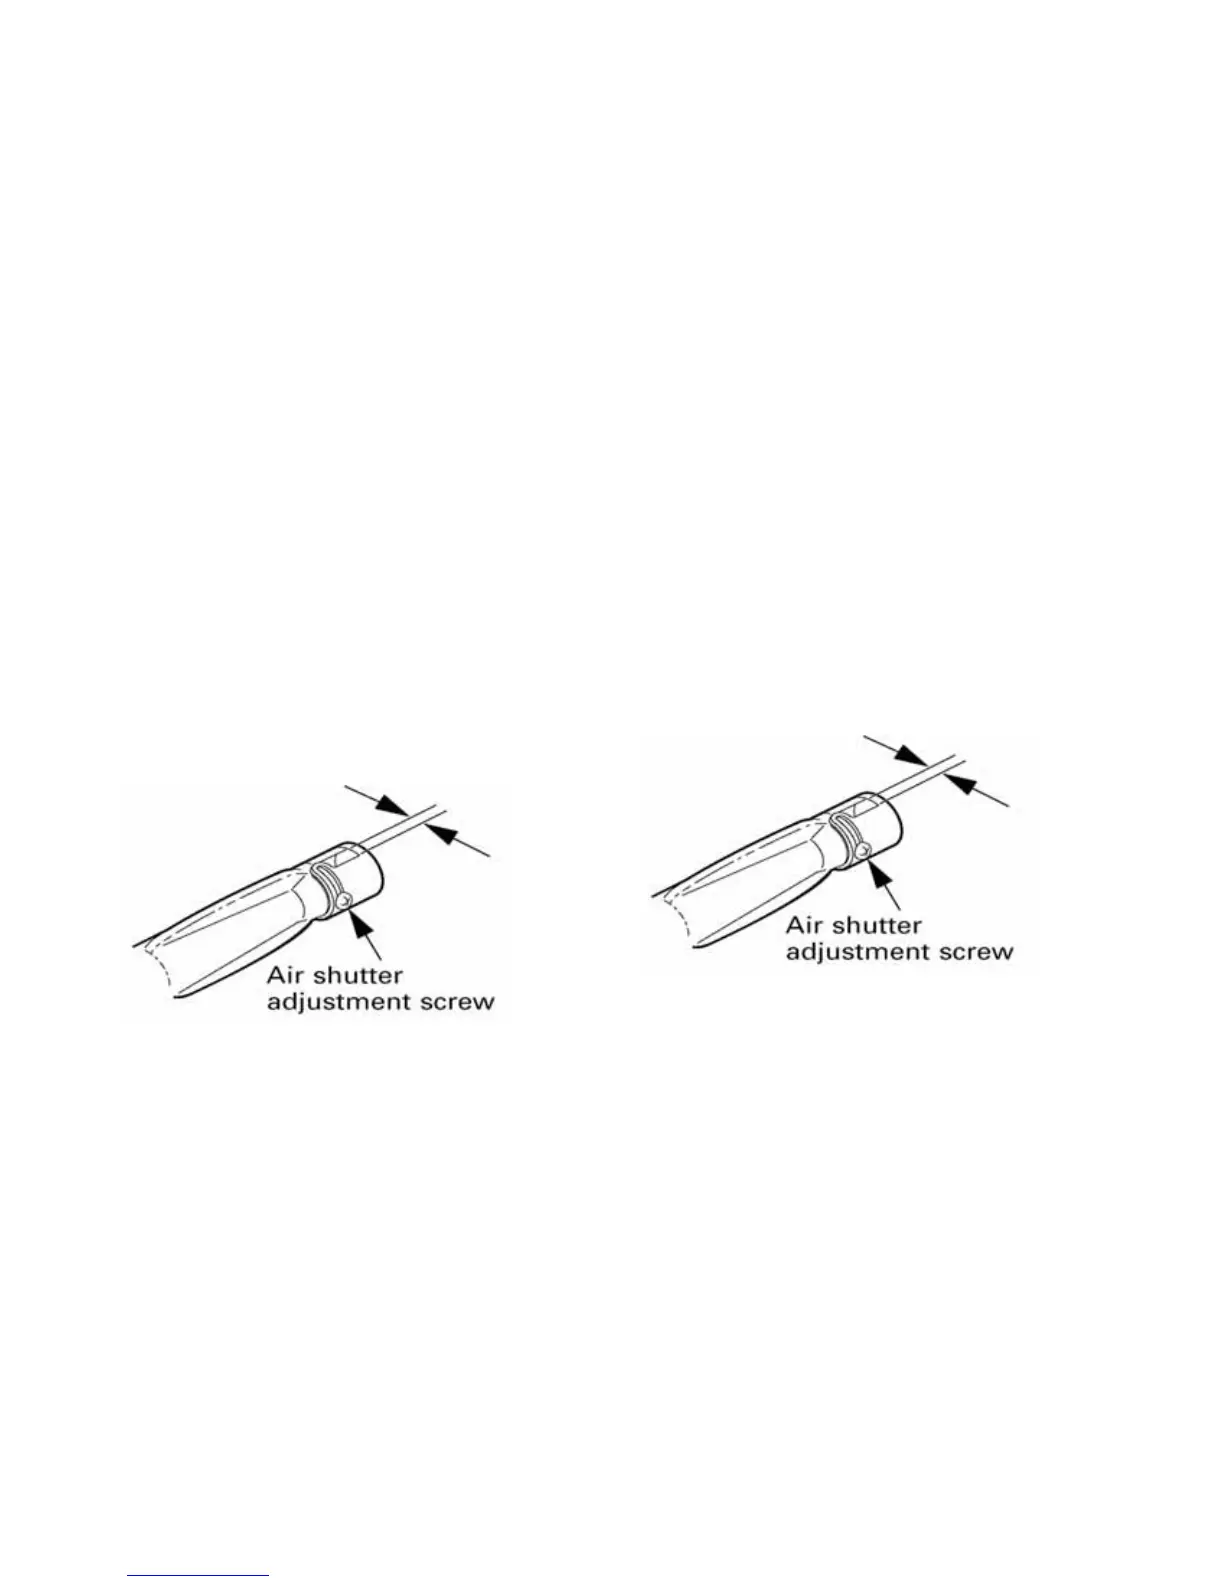
4. Use a screwdriver to loosen the air shutter
adjustment screw.
5. Using a drill bit as a gauge, adjust the air shutter
to 11/32 in. (8.7 mm).
a. If the fl ames were yellow during the test,
open the air shutter an additional 1/32 in.
(0.79 mm.)
b. If the fl ames blow away or fl uttered from the
burner during the test, close the air shutter
an additional 1/32 in. (0.79 mm).
11
/
32
Broil Burner
The broil burner is accessible and located in the top
center of the oven.
1. Remove the oven door. (See Oven Door Removal.)
2. Remove the broil burner. (See Broil Burner and
Glow Bar Igniter.)
3. Inspect the primary air opening. The opening
must be clear all the way down to the metal
shield below the 0.314-in. (8-mm) opening.
4. Use a screwdriver to loosen the air shutter
adjustment screw.
5. Adjust the air shutter to 11/32 in. (8.7 mm).
a. If the fl ames were yellow during the test,
open the air shutter an additional 1/32 in.
(0.79 mm).
b. If the fl ames blow away or fl uttered from the
burner during the test, close the air shutter
an additional 1/32 in. (0.79 mm).
6. Tighten the air shutter adjustment screw.
7. Install and close the oven door. Before installing
the burner baffl e and oven fl oor cover, set the
control for BAKE and observe the bake burner
fl ame for any fl ame problems.
Note: Examine the burner baffl e for signs of
warpage. If warped, the baffl e will have to be
replaced.
8. Install the burner baffl e and oven fl oor cover.
With the customer present, test the oven from
a cold start to be sure any odor problems have
been corrected.
11
/
32
6. Tighten the air shutter adjustment screw.
7. Install the oven door. Set the control for BROIL
and observe the broil burner fl ame for any
fl ame problems.
8. With the customer present, test the oven from
a cold start to be sure any odor problems have
been corrected.