GE MEDICAL SYSTEMS CT PROSPEED SERIES INSTALLATION
2124011
3-24
REV 15
3–5–1 Installation (continued)
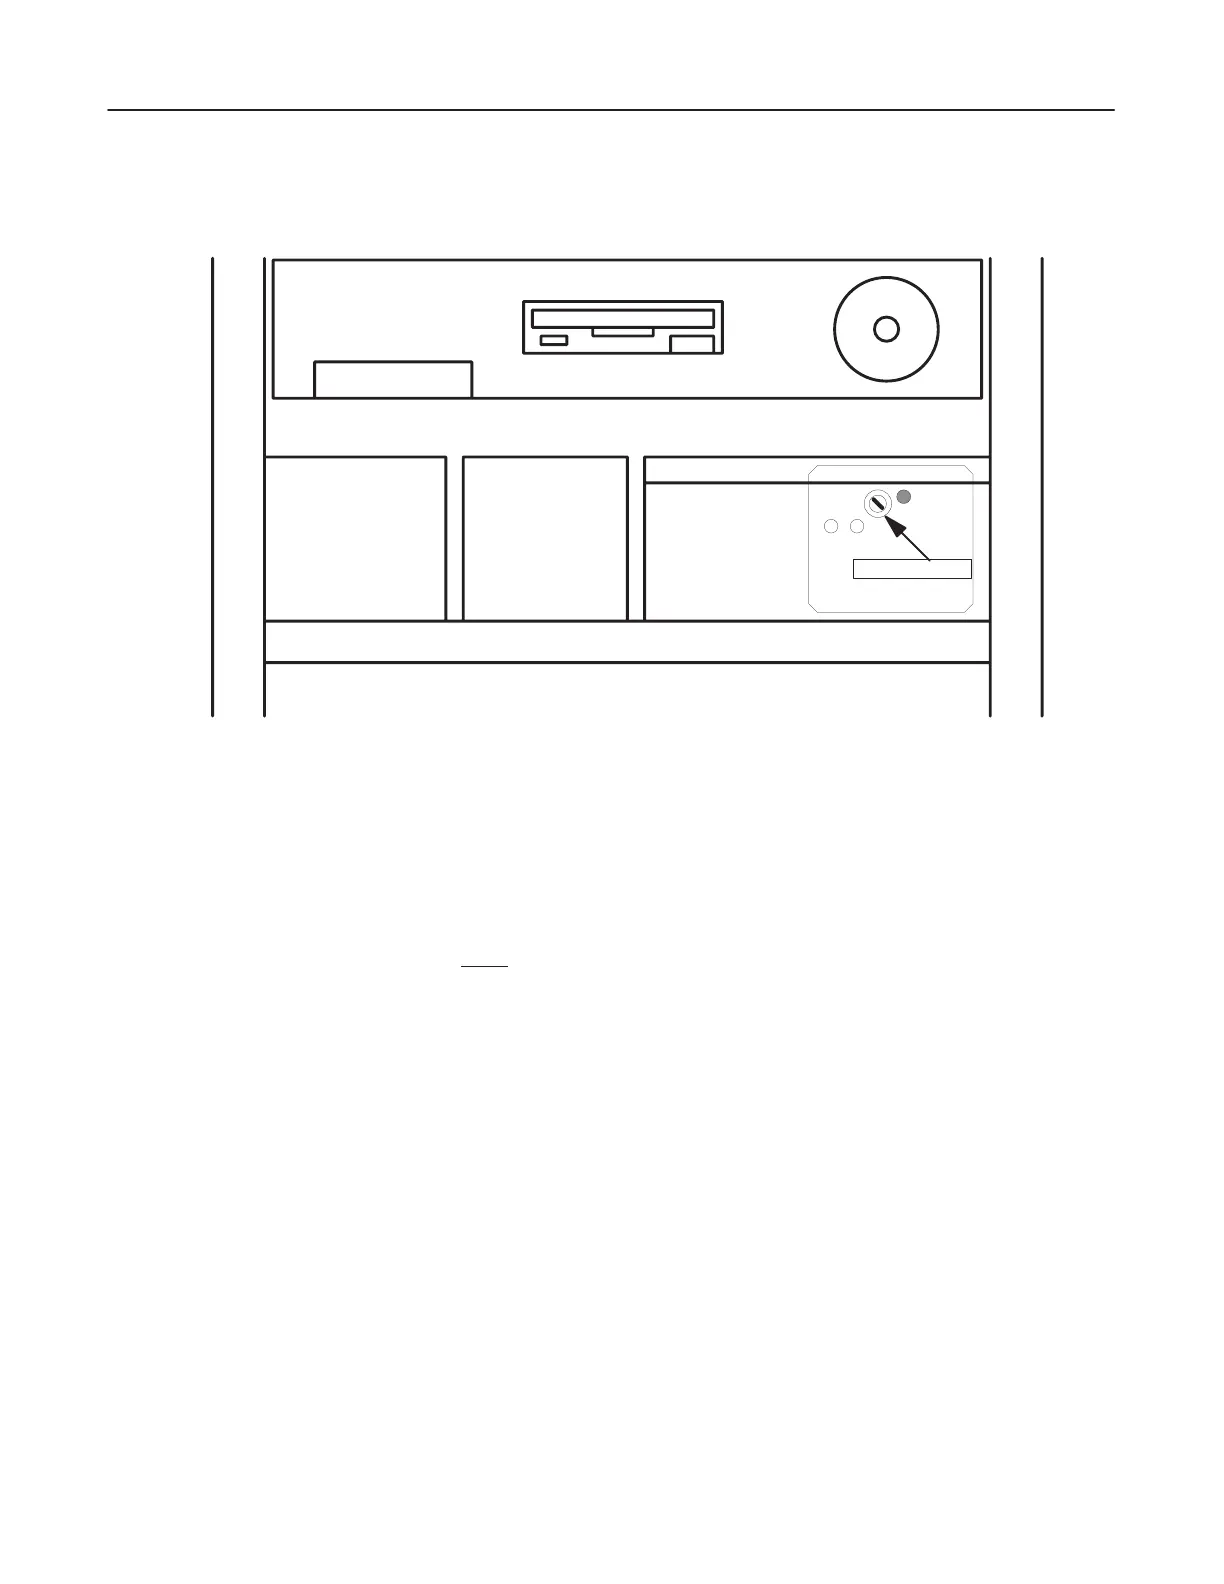
V. ADJ.
H
OC FRONT VIEW
+12VDC
PS
HDD
ADJUSTER
5VDC ADJUSTING TRIMMER
ILLUSTRA
TION 3–19
5. Change
the CUST
OM P
ARAMETER for
the MOD as follows. Refer to SYSTEM FUNCTIONAL CHECK Manual,
Section 5 (or 6), Load From Cold Procedure.
a. Using the BOOT Floppy, enter the Maintenance menu, and select CUSTOM PARAMETER program.
b. Use Change Parameters to set MOD to Available.
Note
Do not set Optical Disk to available unless the site also has the 12” Optical Disk system installed.
c. After exiting CUSTOM PARAMETER program, reboot the system.
6. Refer to the Operator Manual, Image Management section, and perform the MOD System Initialize, Archive,
Retrieve and cartridge handling operations.
7. Refer to the Operators Manual, Image Management section to determine the required settings for Function
Menu.
Pay special attention to Auto Store Device, OD Special Store,
Auto Delete, Min V
acant Image Space for
Scan,
OD Packing, and OD system No. Set these options as
the site requires (default settings usually suf
fice).
Note
The small screwdriver included in the MOD installation kit is used to provide a means of ejecting a
cartridge
from the drive with power turned of
f. Insert the screwdriver in the Manual Eject hole (to the
left
of the Busy LED), and turn clockwise about 10 turns. Be sure that
power is OFF before performing
Manual eject.
 Loading...


