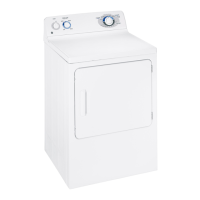
Preparingto install yourdryer.
Read these instructions completely and carefully.
WARNING
• This dlyer must be exhm_sted m the ou/doors
using only rigid metal or flexible metal 4"
diameter ductw_nk tin inside tile chyer cabinet
or exhm_sdng.
• Never use plastic or other combustible ductwork.
See Exhausting section.
• This appliance must be properly grounded
and installed as des_ ribed in these Installation
Instructions.
• Do not install or store appliance in an area where
it xdll be exposed to water/weather. See Location
of YourOryerse(tion.
• The National Fuel (;as code resuicts installations
of gas appliances in garages. They must be 18"
(45.7 _m) offthe ground and prote_ted fiom
vehides bya banier. SeeLocationof YourDryer
section.
• Tile electricalserviceto the (hTei iinlst confi)iiil
_dth local codes and ordinances and the latest
edition of the National Electrical Code,
ANSI/NFI'A 70.
• Tile gasserviceto tile (liTer inust COlflbim xdth
local codes and ordinances or tile latest edition of
the National Fuel (3as Code ANSI Z223.1 .The gas
duet is designed under ANSI Z 21.5. l fin"home
use only. This dlyer is not recolnlnended fin.
commerdal applications such as restmnants or
beauty salons, etc.
ToolsandMaterialsRequiredforDryerInstallation
• Phillips head screwdriver
• ( hannel-lock a(!juslable pliers
• Carpenter's level
• Flat or suaight blade screwdriver
• Duct tape
• Rigid or flexible metal 4" (10.2cm) duct
• Vent hood
• Pipe thread sealer (GAS DRFER)
• Plastic knife
• 1/2" open-end _Tench
10
UnpackingtheDryer
_] Using tile fi)m shipping canon corner posts
(two on ead_ side), cmefhlly lay the duet on its
left side and remove foam shipping pad.
A AUEION:To prevem damage, do not use the
conUol panel as a means to pick up or move
the <hTer.
[_ Return tl_e&Ter to an upright position.
Foamshippingpad ._}
_] Adiust d_e leveling legs to match tim washer
height. Tim duet must be level and rest firmly
on all four le_eling legs.