32
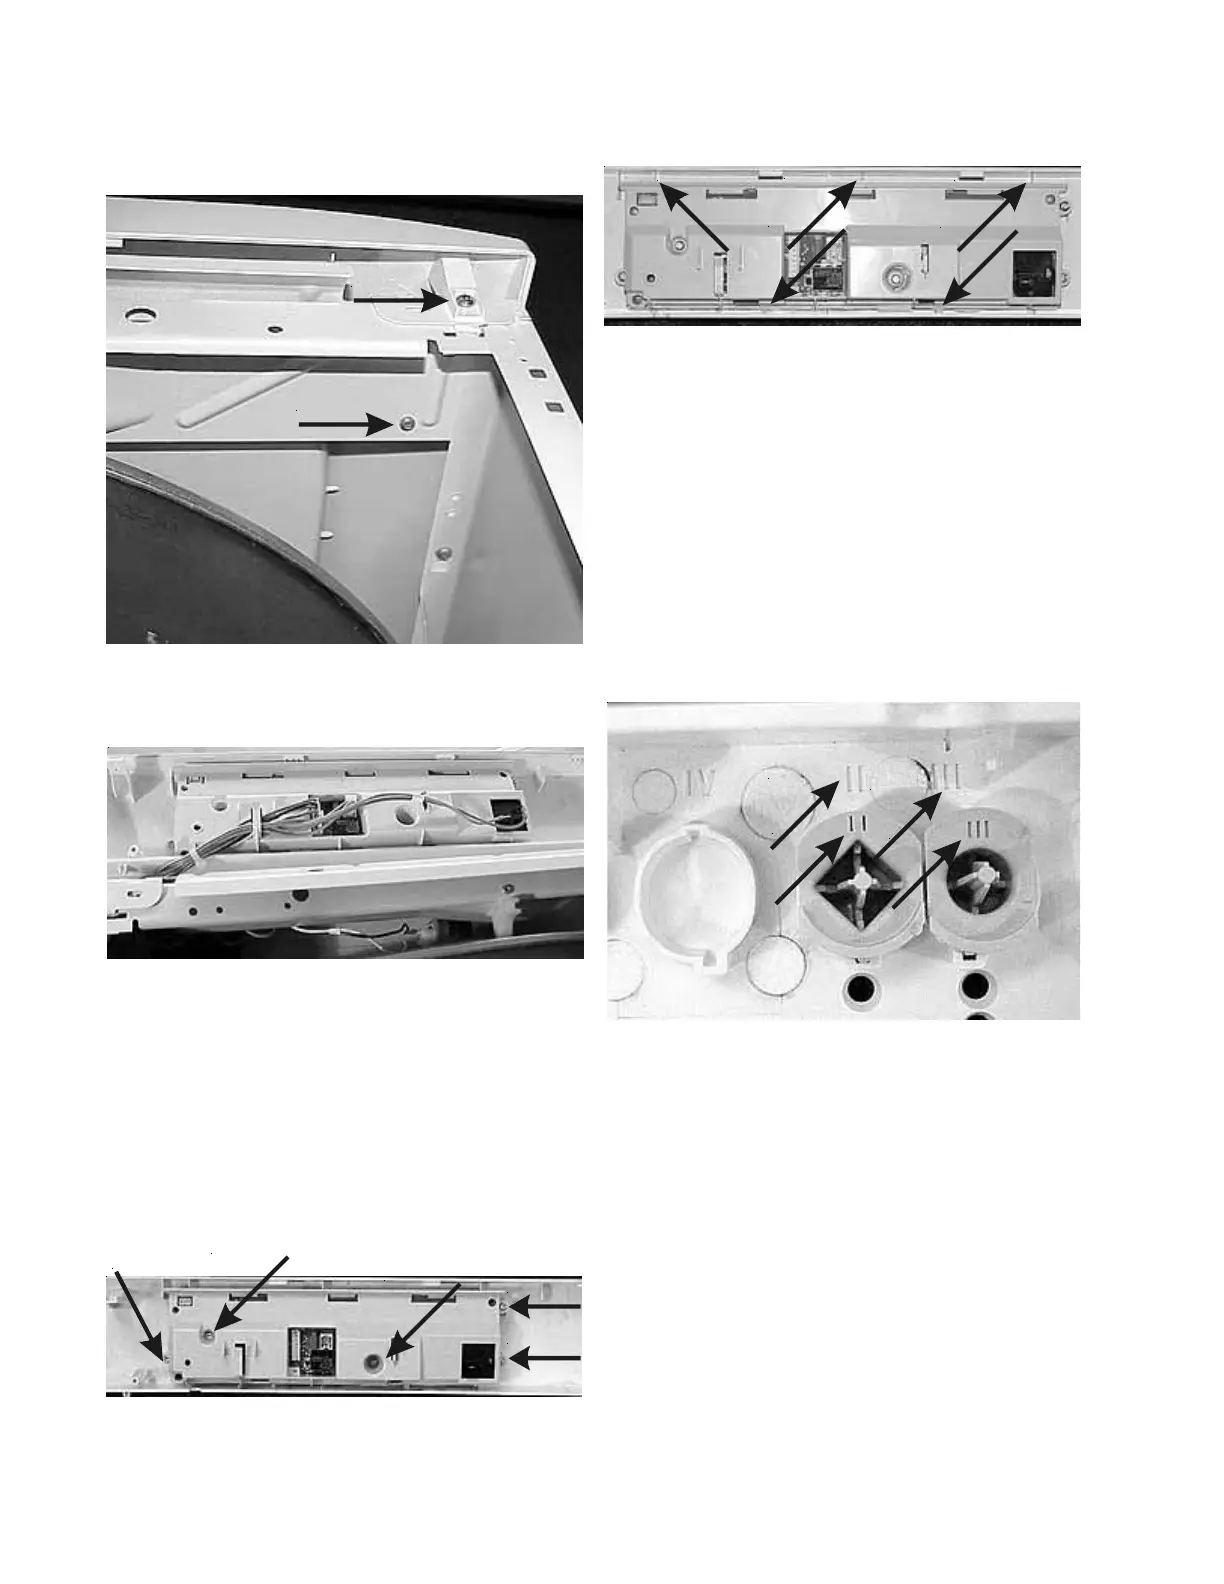
2. Remove the (4) screws, (2 on each side), holding the
console to the front panel and roll the console
forward.
3. Disconnect the wiring from the control board and
lift the console off.
Removing the control board:
1. Disconnect the dryer from electrical supply, remove
the Temp knob and the top panel.
2. Remove the console.
3. Remove the (5) screws holding the control board to
the console.
4. Release the (2) tabs at the bottom and the (3) tabs
at the top and lift the control board out.
Note: Be careful not to lose the springs.
Removing the programming buttons and
springs:
1. Disconnect dryer from the electrical supply and
remove the control board.
2. Lift the buttons and springs out of the console.
3. The buttons are not all the same. Each button has
a Roman numeral stamped into it and the console
has Roman numerals above the button slot. Match
the number on the button to the number on the slot.
Removing the temp knob shaft:
1. Disconnect dryer from the electrical supply, turn
the TEMP knob to HOT, and remove the knob.
2. Remove the control board.
 Loading...