Dishwasher Installation
15
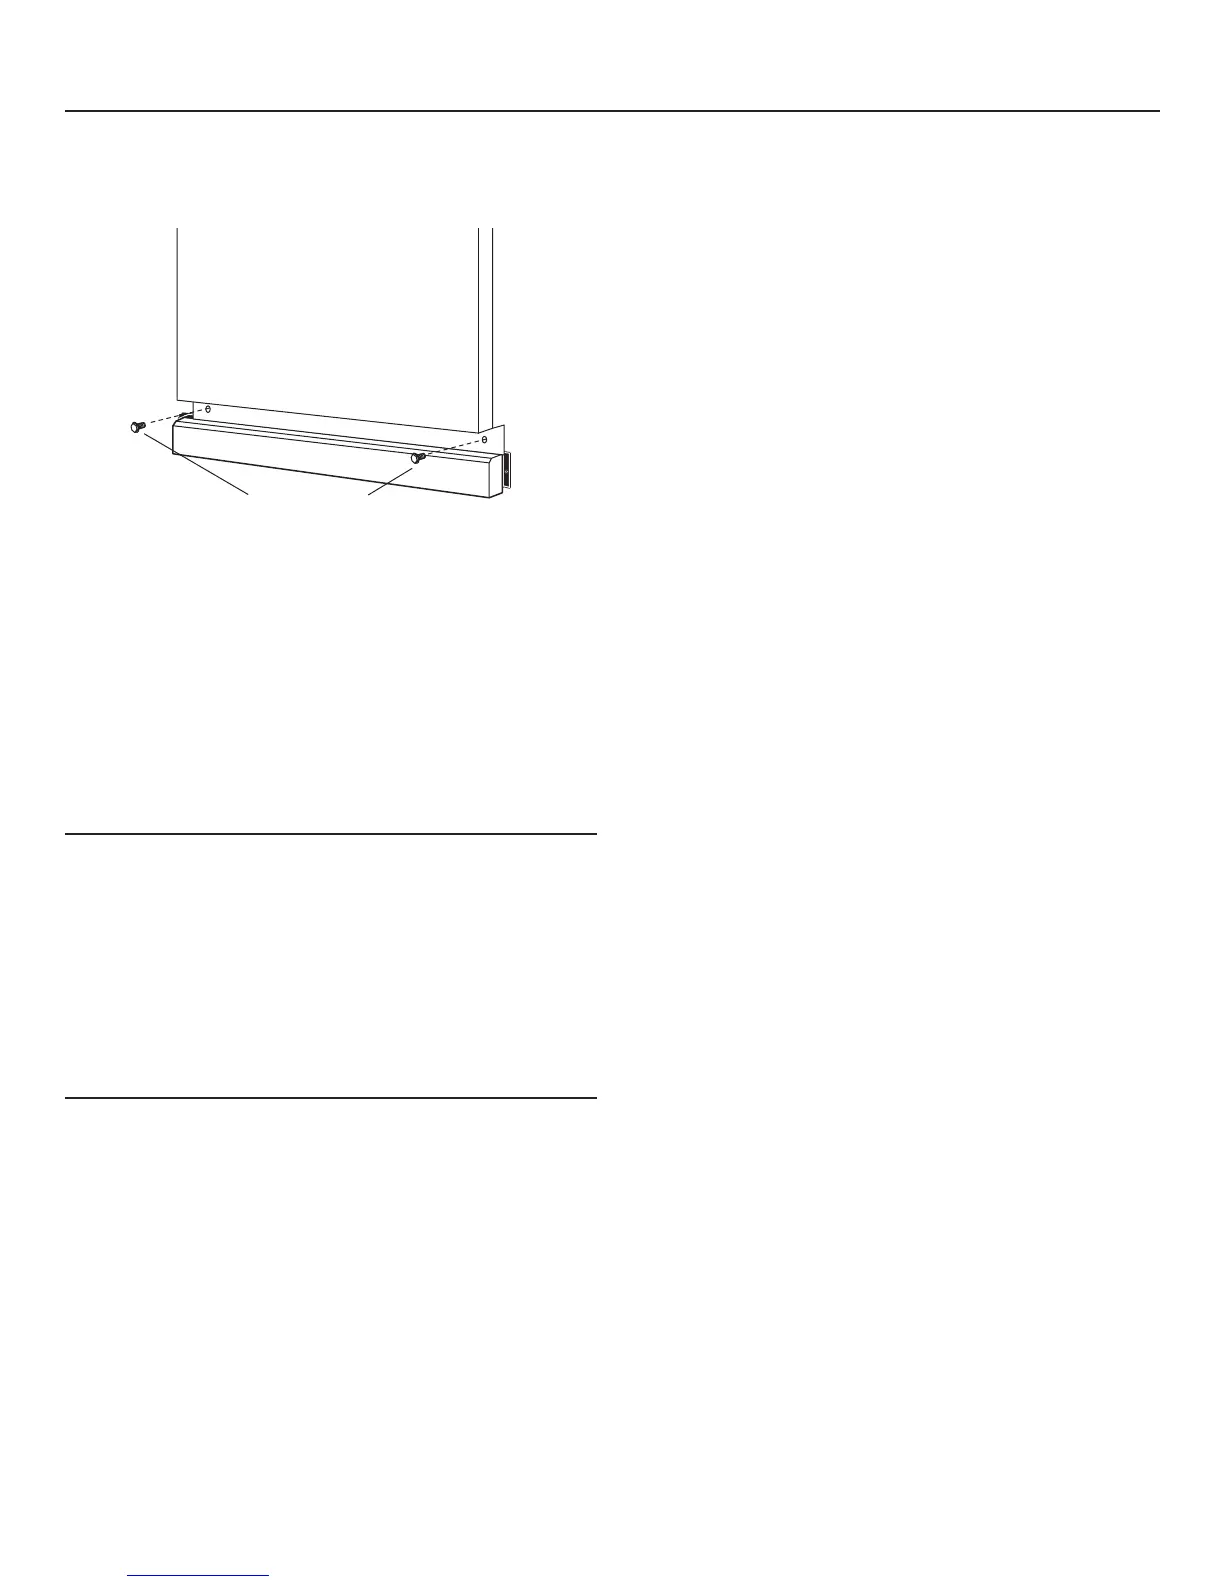
STEP 21: INSTALL TOEKICK
• Place toekick against the legs of the dishwasher.
Attachment
Screws
Toekick
• Align the toekick with the bottom edge and make sure it is
DJDLQVWWKHÀRRU
• Insert and tighten the 2 toekick attachment screws. The
WRHNLFNVKRXOGVWD\LQFRQWDFWZLWKWKHÀRRU
• When reinstalling the toe kick on models with a sound barrier,
ensure that the bottom edge is flush with the floor. Any
excess material should be tucked up behind the outer door.
Tip: Reduce sound from under the dishwasher.
Make sure toekick is against floor.
STEP 23: LITERATURE
• Be sure to leave complete literature package, these
Installation Instructions and product samples and/or coupons
with the consumer.
STEP 22: CHECK THE FOLLOWING
• Tub trim does not interfere with the door
• Dishwasher is square and level at both the top and bottom of
the cabinet opening, with no twisting or distortion of the tub
or door
$OOOHJVRIWKHGLVKZDVKHUDUH¿UPO\LQFRQWDFWZLWKWKHÀRRU
• Drain hose is not pinched between the dishwasher and
adjacent cabinets or walls
7XEWULPLVIXOO\VHDWHGRQWKHWXEÀDQJH

 Loading...