18
Installation
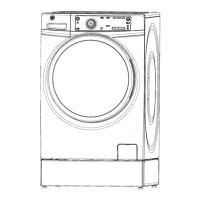
Washer
Instructions
If you have any questions, call 800.GE.CARES (800.432.2737)
or visit our Website at: GEAppliances.com
In Canada, call 1.800.561.3344
or visit www.GEAppliances.ca
BEFORE YOU BEGIN
Read these instructions completely and carefully.
•
IMPORTANT – Save these instructions
for local inspector’s use.
•
IMPORTANT – Observe all governing
codes and ordinances.
•
Note to Installer – Be sure to leave these
instructions with the Consumer.
• Note to Consumer – Keep these instructions
for future reference.
• Skill level – Installation of this appliance requires
basic mechanical and electrical skills.
• Completion time – 1-3 hours
• Proper installation is the responsibility of the installer.
• Product failure due to improper installation is not
covered under the Warranty.
TOOLS REQUIRED FOR
WASHER INSTALLATION
1/2s socket with ratchet
Adjustable wrench or 14mm and 16mm open-end
wrenches
Channel-lock adjustable pliers
Carpenter’s level
PART SUPPLIED
Cable Tie
PARTS REQUIRED (Sold separately)
Water Hoses (2)
Rubber Washers (2)
and Strainer Screens (2)
GE Parts and Accessories
Order on-line at GEApplianceparts.com today, 24 hours a
day or by phone at 800.626.2002 during normal business
hours.
Part Number Accessory
PM14X10002 4 ft Rubber Water Supply Hoses
Or
PM14X10005 4 ft Braided Metal Water Supply Hoses
WH1X2267 Rubber Washer (1) and Screen (1)
This is the safety alert symbol. This symbol alerts you to potential hazards that can kill you or hurt you and others.
All safety messages will follow the safety alert symbol and the word “DANGER”, “WARNING”, or “CAUTION”. These
words are defined as:
Indicates a hazardous situation which, if not avoided, will result in death or serious injury.
Indicates a hazardous situation which, if not avoided, could result in death or serious injury.
Indicates a hazardous situation which, if not avoided, could result in minor or moderate injury.
DANGER
WARNING
CAUTION

 Loading...