Do you have a question about the GE GTD42GASJWW and is the answer not in the manual?
Essential safety guidelines to prevent fire, shock, injury, or explosion during appliance use.
Specific warnings for gas dryers and California's Proposition 65 chemical disclosures.
Details the temperature settings, drying cycles, start function, and optional features like Extended Tumble.
Instruction on cleaning the dryer's lint filter before each use for optimal performance.
Description of features like Drum Lamp, Drying Rack, and Stainless Steel Drum.
Hints for sorting, loading, and cleaning the exterior, interior, and exhaust duct.
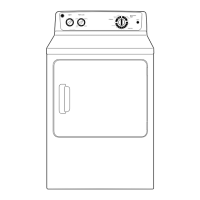
Detailed instructions and illustrations for reversing the dryer door.
Guidelines for correct dryer venting to ensure performance and prevent fire hazards.
Addresses issues like dryer not starting, not heating, noise, spots, and lint.
Solutions for clothes taking too long, wrinkles, shrinkage, and items sitting in dryer.
Details the dryer's warranty period, what is covered, and what is excluded.
Provides website, service scheduling, extended warranties, parts, and contact details.
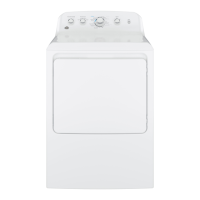
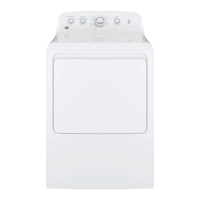
This document serves as an owner's manual for GE Dryers, providing essential information for safe operation, usage, maintenance, and troubleshooting. The manual emphasizes a "laundry your way!" approach, guiding users through various features and settings to optimize their drying experience.
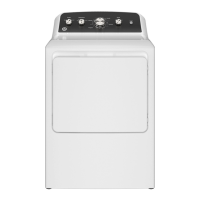
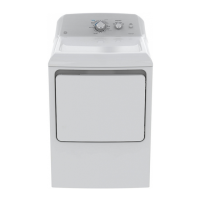
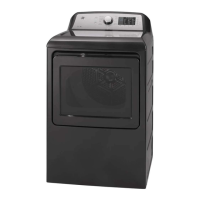
The GE Dryer is designed to efficiently dry laundry items after washing. It utilizes various heat and tumbling settings to remove moisture from fabrics, offering a range of cycles to accommodate different fabric types and desired dryness levels. The dryer's primary function is to provide a convenient and effective method for drying clothes, minimizing the need for air drying and helping to reduce wrinkles.
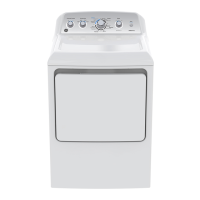
The dryer control panel is central to its operation, featuring several key controls:
Temperature Settings: These allow users to select the appropriate heat level for their laundry. Options include:
Drying Cycles: The dryer offers a variety of cycles tailored to specific needs:
Start Button: After closing the dryer door, users select "Start" to begin the drying operation. Opening the door during a cycle will stop the dryer; closing the door and selecting "Start" again will resume the cycle.
Extended Tumble Option (on some models): This feature helps minimize wrinkles by providing approximately 15 minutes of no-heat tumbling after the clothes are dry. It is compatible with the Cottons and Casuals/Easy Care cycles. If the "Cycle Signal" is also activated, a signal will sound at the end of the drying time and periodically during the Extended Tumble cycle to remind users to remove clothes. If "Extended Tumble" is not selected, the dryer stops when the timer reaches the "Extended Tumble" mark.
Cycle Signal Option (on some models): This signal sounds just before the end of the cycle to remind users to remove clothes promptly, especially for fabrics like polyester knits and permanent press, to prevent wrinkles from setting in. On some models, the signal sound level is not adjustable. If "Extended Tumble" is also selected, the signal will sound multiple times during that phase.
Automatic Cycle Signal (on some models): At the end of each cycle, there is approximately 15 minutes of no-heat tumbling after the laundry is dry. A reminder signal will sound periodically during this time to remind you to remove the laundry.
Drum Lamp (on some models): Provides interior illumination for better visibility when loading and unloading laundry.
Drying Rack (on some models): A handy accessory for drying delicate items, such as washable sweaters, without tumbling. The rack hooks over the lint filter and extends into the dryer drum. It must be used with the "Time Dry" cycle and not when other clothes are in the dryer.
Stainless Steel Drum (on some models): The stainless steel drum is designed for high reliability and durability. Scratches or dents from normal use will not cause rust or corrosion and will not affect the drum's function.
Door Reversal: The dryer door can be reversed to open from either the left or right side, offering flexibility in laundry room layout. This process involves removing and reinstalling hinges and plates, requiring a standard #2 Phillips screwdriver and a tape-tipped putty knife.
Proper maintenance is crucial for the dryer's longevity and efficient operation.
Lint Filter Cleaning: The lint filter must be cleaned before or after each load. Users are instructed to moisten their fingers and run them across the filter to remove lint. Operating the dryer without the lint filter in place is not recommended. Additionally, a qualified technician should vacuum the lint from the dryer once a year.
Exterior Cleaning: Spills or washing compounds on the dryer's exterior should be wiped with a damp cloth. Users are warned that laundry pretreatment soil and stain remover products can damage the control panel and finishes if applied directly to the dryer.
Stainless Steel Surfaces: To clean stainless steel surfaces, a damp cloth with a mild, non-abrasive cleaner suitable for stainless steel should be used, followed by drying with a clean cloth.
Dryer Interior and Duct Cleaning: The interior of the appliance and the exhaust duct should be cleaned periodically (at least once a year) by qualified service personnel to prevent clogging and maintain efficient drying.
Exhaust Duct Inspection and Cleaning: Users should inspect and clean the exhaust ducting at least once a year to prevent clogging, which can lengthen drying times. The manual provides steps to turn off the electrical supply, disconnect the duct, vacuum it with a hose attachment, and then reconnect it.
Exhaust Hood Check: Users should check from the outside that the flaps of the exhaust hood move freely and ensure no wildlife (birds, insects, etc.) are nesting inside the duct or hood.
Venting Requirements: For optimal drying performance, the dryer must be properly vented outdoors using only rigid metal 4" diameter ductwork. The manual explicitly states not to use plastic or other combustible ductwork, to use the shortest possible length, avoid crushing or collapsing the duct, and prevent resting it on sharp objects. Venting must conform to local building codes. Failure to follow these instructions can result in fire hazards and inefficient operation.
The manual includes a comprehensive troubleshooting section to help users diagnose and resolve common issues before calling for service. This section covers problems such as:
The manual provides specific "What To Do" steps for each problem, guiding users through simple solutions.
The manual provides extensive consumer support information, including:
Overall, the GE Dryer manual is a comprehensive guide designed to empower users with the knowledge needed to operate, maintain, and troubleshoot their appliance effectively and safely.
| Type | front load |
|---|---|
| Color | white |
| Dryer Capactity | 7.2 cu. ft. |
| Number of Cycles | 4; time dry, cottons, casuals and delicates |
| Venting | 3 way (rear; left; bottom); vented |
| Temperature Settings | 4; regular, medium, low and no heat |
| Control Panel | knobs |
| Cycle Signal | yes |
| Interior Light | yes |
| Drying Rack | no |
| Sensor Dry Option | yes |
| Sanitize Option | no |
| Steam | no |
| Wi-Fi | no |
| Voltage | 120 volts |
| Current | 15 |
| Depth | 29 1/2 inch |
|---|---|
| Height | 44 inch |
| Width | 27 inch |
| Net Weight | 98 lbs. |