Do you have a question about the GE GTD48EASWWB and is the answer not in the manual?
Ensure close supervision of children around the appliance.
Install dryer where temperature is above 50°F for proper operation.
Installer must leave instructions; consumer should keep them.
Keep flammable materials away from the dryer.
Steps to take if you detect a gas smell.
Use only UL-listed rigid or flexible metal venting, avoid plastic.
Do not install or store the dryer where exposed to water or weather.
Instructions for removing shipping materials and literature.
Diagrams and measurements for dryer installation space.
Recommends using factory specified hoses for steam dryers.
Recommends replacing water supply hoses every 5 years.
Specifies minimum clearances between dryer and adjacent surfaces.
Closet doors must be louvered or have adequate open area.
Rear clearance may need to be greater than 1 inch for ducting.
No other fuel burning appliances in the same closet as gas dryer.
Installation must conform to specific mobile home standards.
Rules for vent material, termination, and fastening.
Always use new inlet hoses; never use old hoses.
Steps for connecting hoses using a Y-connector.
Instructions on tightening couplings and checking for leaks.
List of tools required for connecting a gas dryer.
List of materials required for connecting a gas dryer.
Turn off power before making electrical connections.
Turn the dryer's gas shut-off valve to the OFF position.
Disconnect and discard old flexible gas connector and ducting.
Use new CSA approved line, install manual shut-off valve within 6ft.
Secure connections and check LP gas pressure.
Installation must conform to local and national gas codes.
Install elbow, adapter, and flexible connector at dryer inlet.
Install 1/8" NPT plugged tapping for gas inlet pressure check.
Tighten all gas connections and open the shut-off valve.
Test gas connections for leaks using soapy solution.
Use grounded 3-prong outlet, correct circuit breaker, and proper wiring.
Ensures risk of electric shock is reduced by proper grounding.
List of tools required for connecting an electric dryer.
List of materials required for connecting an electric dryer.
Turn off power before making electrical connections.
Recommendations for selecting and ordering power cords.
Instructions for connecting the dryer using a power cord.
Instructions for connecting the dryer using direct wiring.
3-wire connection not permitted for new construction or mobile homes.
Connect hot, neutral, and ground wires to terminal block and secure cord.
Not for Canada, mobile homes, new construction, or RVs.
Connect hot and neutral wires, secure ground strap and cord.
Use rigid metal or UL-listed flexible metal ducting; avoid plastic and improper termination.
Avoid screens, booster fans, excessive length, and enclosed spaces.
Prefer rigid metal duct; use UL-listed flexible metal if necessary.
Follow rules for duct length, elbow use, and avoiding sharp objects.
Minimize length, avoid bends/crushing, keep straight and clear.
Table and rules for determining maximum allowable vent length.
Proper termination, sealing, and separation of turns are crucial.
Remove old ducting, clean openings, and insulate ductwork if needed.
Slide duct onto dryer outlet and secure with foil tape or clamp.
Using duct elbows prevents kinking and collapsing.
Identify correct exhaust direction and remove knockouts.
Procedure for cutting and reattaching duct for side or bottom venting.
Secure duct and elbow joints with foil tape for side or bottom exhaust.
Level dryer, plug in, and perform initial start-up.
Detailed steps for reversing the door on solid door models.
Detailed steps for reversing the door on glass panel models.
| Brand | GE |
|---|---|
| Model | GTD48EASWWB |
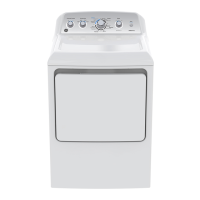
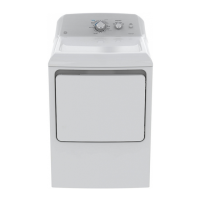
| Type | Electric Dryer |
| Color | White |
| Capacity | 7.2 cu. ft. |
| Voltage | 240 V |
| Amperage | 30 A |
| Drum Material | Aluminized Alloy |
| Control Type | Electronic |
| Number of Cycles | 12 |
| Number of Temperature Settings | 4 |
| Wrinkle Care Option | Yes |
| End of Cycle Signal | Yes |
| Energy Star Certified | No |
| Dryer Type | Vented |
| Weight | 120 lbs |
| Width | 27 inches |
| Height | 44 inches |