– 27 –
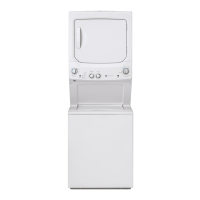
The trap duct assembly houses the trap duct felt
DQGWKHOLQW¿OWHURQLQPRGHOV,WLVORFDWHGRQ
the back side of the front panel.
Trap Duct Assembly Removal
1. Remove the dryer front panel. (See Dryer
Front Panel in this section of this service
guide.)
2. Remove the top bearing assembly. (See Top
%HDULQJDQG%HDULQJ6OLGHVin this section of
this service guide.)
3. Remove the two Phillips-head screws that
attach the air duct to the front panel.
4. Grasp each side of the trap duct assembly,
then unsnap and remove the air duct from the
front panel.
5. Remove the two door switch wire retainers
from the trap duct assembly.
Caution: Upon reassembly, ensure that the door
switch wiring is retained and routed properly to
avoid contact with the drum.
NOTE: The trap duct felt can be replaced by
extracting the seal from the channel located in the
trap duct assembly.
Trap Duct Assembly
Drum Seal
Wire Retainers
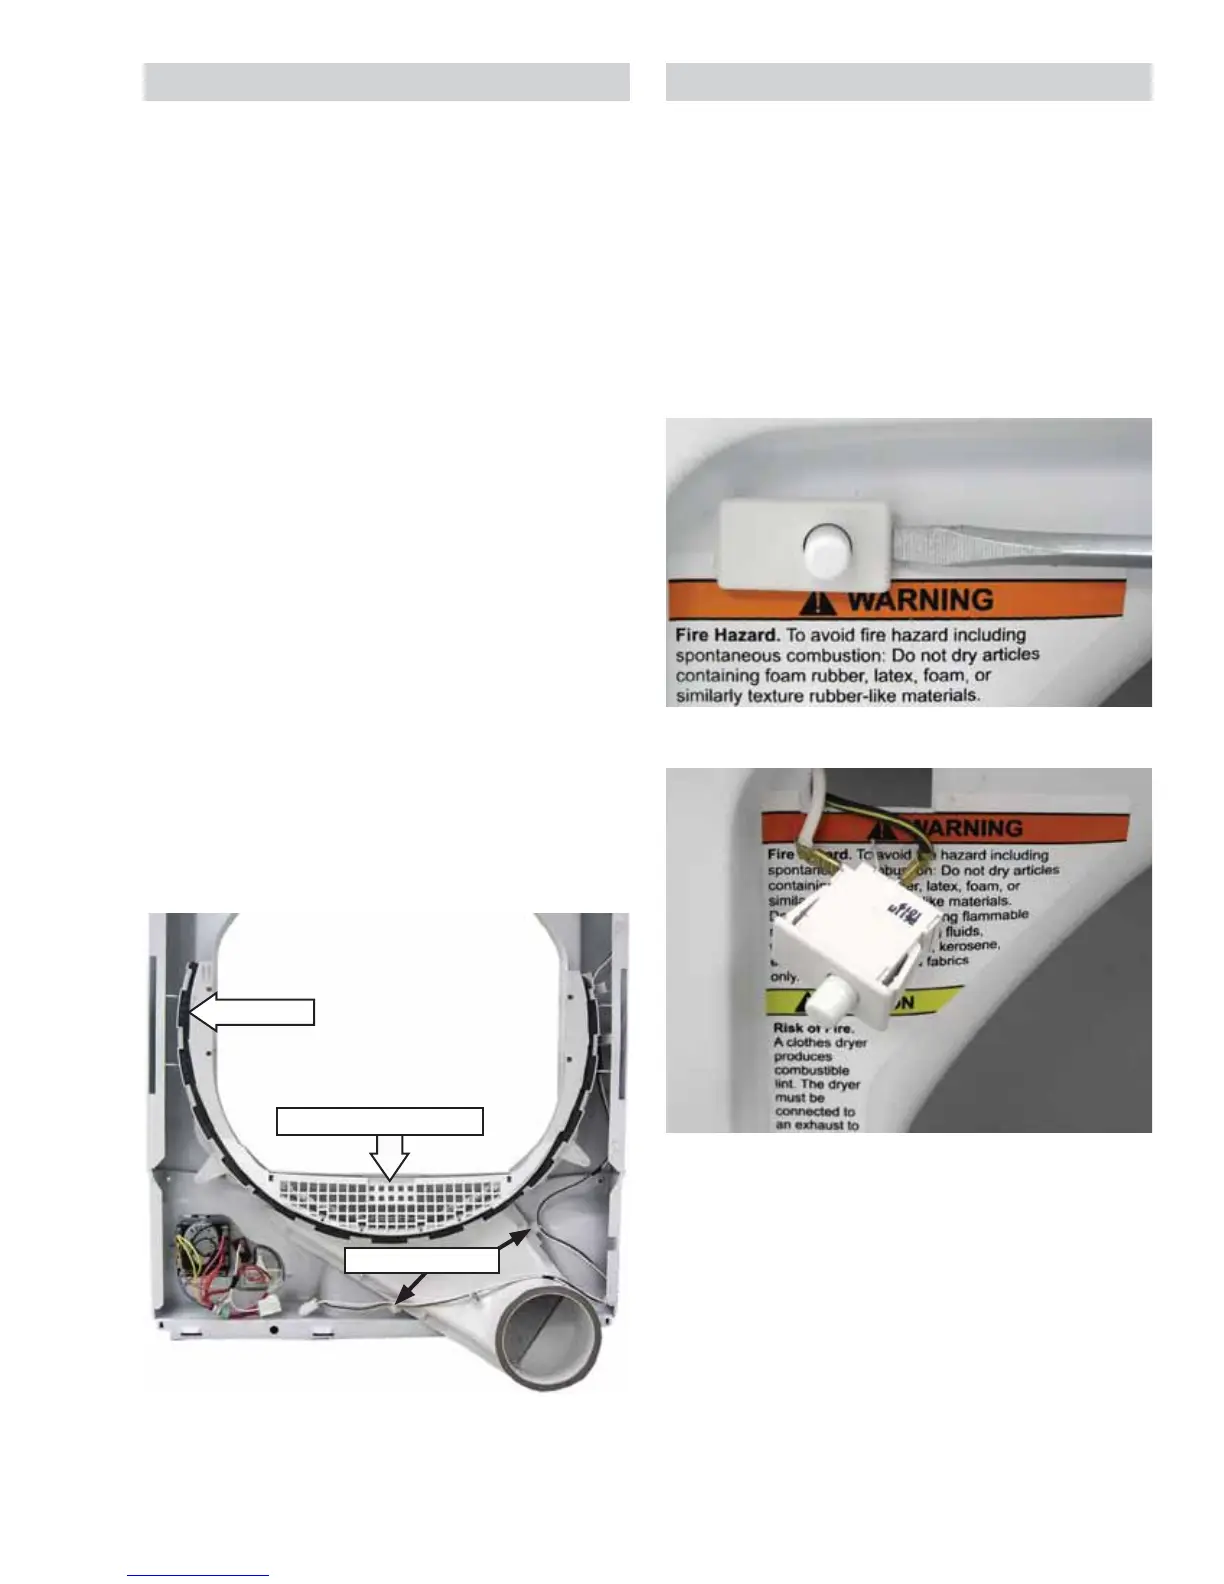
The door switch is fastened to the front panel
by two locking tabs (one on each side). When
the dryer door is closed, the switch will complete
the drum motor circuit, allowing dryer operation.
When the door is open, the switch will open the
drum motor circuit, interrupting dryer operation.
NOTE: Door switch for 27-in. model is shown
below. The procedure to remove the door switch
on 24-in. models is similar.
Door Switch (front view)
Door Switch (removed)
Trap Duct Assembly Door Switch
 Loading...