EasyManua.ls Logo

GE GX1S01R - User Manual

GE GX1S01R
12 pages
Print Icon
To Next Page IconTo Next Page
Loading...
REQUIRED TOOLS FOR INSTALLATION
Phillips screwdrivers
Pliers
Adjustable wrench
REQUIRED PARTS FOR INSTALLATION
3/8 Tubing (Pex or Plastic)
2-3/8 NPT Fittings
Teflon Tape
®
2-3/8 Nuts
2 Tube Inserts
Sump Wrench - UCWRNCH
OPTIONAL KITS AND TOOLS FOR INSTALLATION
NOTE:
Sump wrench (UCWRNCH) and faucet (UNFCTBL)
are sold separately for model GX1S01R.
Drill and 1/4 bit (saddle valve installation)
Drill and drill bit for 3/4 hole (type as required)
if mounting hole is needed for faucet
Pipe cutter
File
CAUTION: To avoid damaging the sink, consult a
qualified plumber or installer for drilling procedures. Special
drill bits may be needed for porcelain or stainless steel.
This GX1S01R is Tested and
Certified by NSF international
against NSF/ANSI Standard 42
for materials and structural
integrity requirements and
against CSA B483.1.
1
49-50247-1 JR 10-08
GENERAL ELECTRIC COMPANY, Appliance Park, Louisville, KY 40225
SAFETY PRECAUTIONS
Check with your local public works department
for plumbing codes. You must follow these guidelines
as you install the Water Filtration system.
Use the Water Filtration system on a potable, safe-to-drink,
home COLD water supply only. The filter cartridge
will not purify the water or make it safe to drink.
DO NOT use on a hot water supply. Cold water supply only
(40-100° F)
.
Install or store where it will not be exposed to temperatures
below freezing or exposed to any
type of weather. Water
freezing in the system will damage it.
Your Water Filtration system will withstand up to 125 pounds
per square inch (psi) water pressure. If your house water
supply pressure is higher than 100 psi, install a pressure
reducing valve before installing the Water Filtration system.
WARNING: Do not use with water that
is microbiologically unsafe or of unknown quality
without adequate disinfection before or after the system.
Systems certified for cyst reduction may be used
on disinfected water that may contain filterable cysts.
Discard all unused and packaging material after installation.
Small parts remaining after installation could be a choke hazard.
Installation Water Filtration System
Instructions GX1S01R
COMPONENT
CUS
Question and Answer IconNeed help?

Do you have a question about the GE GX1S01R and is the answer not in the manual?

GE GX1S01R Specifications

General IconGeneral
BrandGE
ModelGX1S01R
CategoryWater Filtration Systems
LanguageEnglish

Summary

Safety Precautions

General Safety Guidelines

Follow plumbing codes, use only cold potable water, and avoid freezing temperatures for system longevity.

Water Quality Warning

Do not use with microbiologically unsafe water without adequate disinfection. Systems certified for cyst reduction may be used on disinfected water.

Installation Environment

Install or store where temperatures are between 40-100°F and avoid exposure to weather to prevent damage.

Water Pressure Requirements

System withstands up to 125 psi. Install a pressure reducing valve if house supply exceeds 100 psi.

Installation Requirements

Required Tools

Phillips screwdrivers, pliers, and an adjustable wrench are needed for installation.

Required Parts

List of necessary parts includes tubing, fittings, nuts, tube inserts, Teflon tape, and a sump wrench.

Optional Kits and Tools

Optional items for installation include drill bits for saddle valve or mounting holes, pipe cutter, and file.

Installation Options

Connection to Primary Sink Faucet

Connect to the cold water line for the main faucet, ensuring proper shut-off and turn-on procedures.

Connection to Secondary Filtered Water Faucet

Connect to a secondary faucet, requiring specific filter elements and following connection steps.

Mounting Bracket Installation

Use the bracket as a template for wall mounting, ensuring adequate space for sump removal and tubing connections.

System Flushing and Maintenance

Flush Procedure

Steps to flush the system after installation or filter replacement, involving water flow and sump checks.

Filter Cartridge Installation or Replacement

Detailed steps for safely removing, cleaning, and installing or replacing the filter cartridge and sump.

Filter Change Notification

Place a label to record filter changes, recommending replacement every six months for optimal performance.

Warranty Information

Parts List

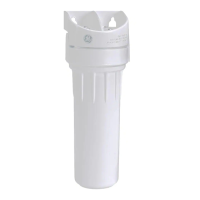
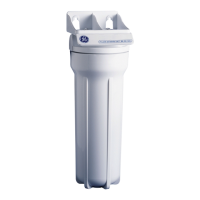
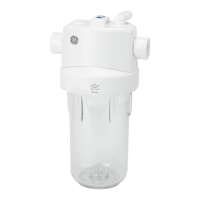
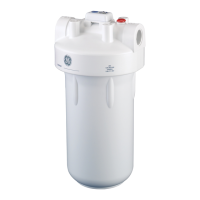
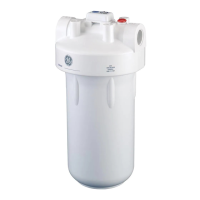
Catalog numbers and descriptions for components like mounting bracket, housing head, sump housing, and screws.

Limited One-Year Warranty

Details on what the warranty covers, exclusions, duration, and how to make a claim.

Related product manuals