—–
--
Youroven i desigm?d!t give you
the best results i baking, broi
MidImMJtirlgWhena.lsed43sr’ecorn-
Emk?d.Before using your’ ovels~
read the directions for setting and
own Light
Lightcomes on automatically when
door is opened or use switch on
windowdoor to turn it on when
door is closed.
ovenSI-M
When the shelvesare correctly
placed on shelf supports they are
designedwith stop-locks to prevent
them from coming out of the oven
or tilting when food is placed on
them.
TO REMOVE,
liup rear of shelf
and pull forward with stop-locks
along top of shelf support.
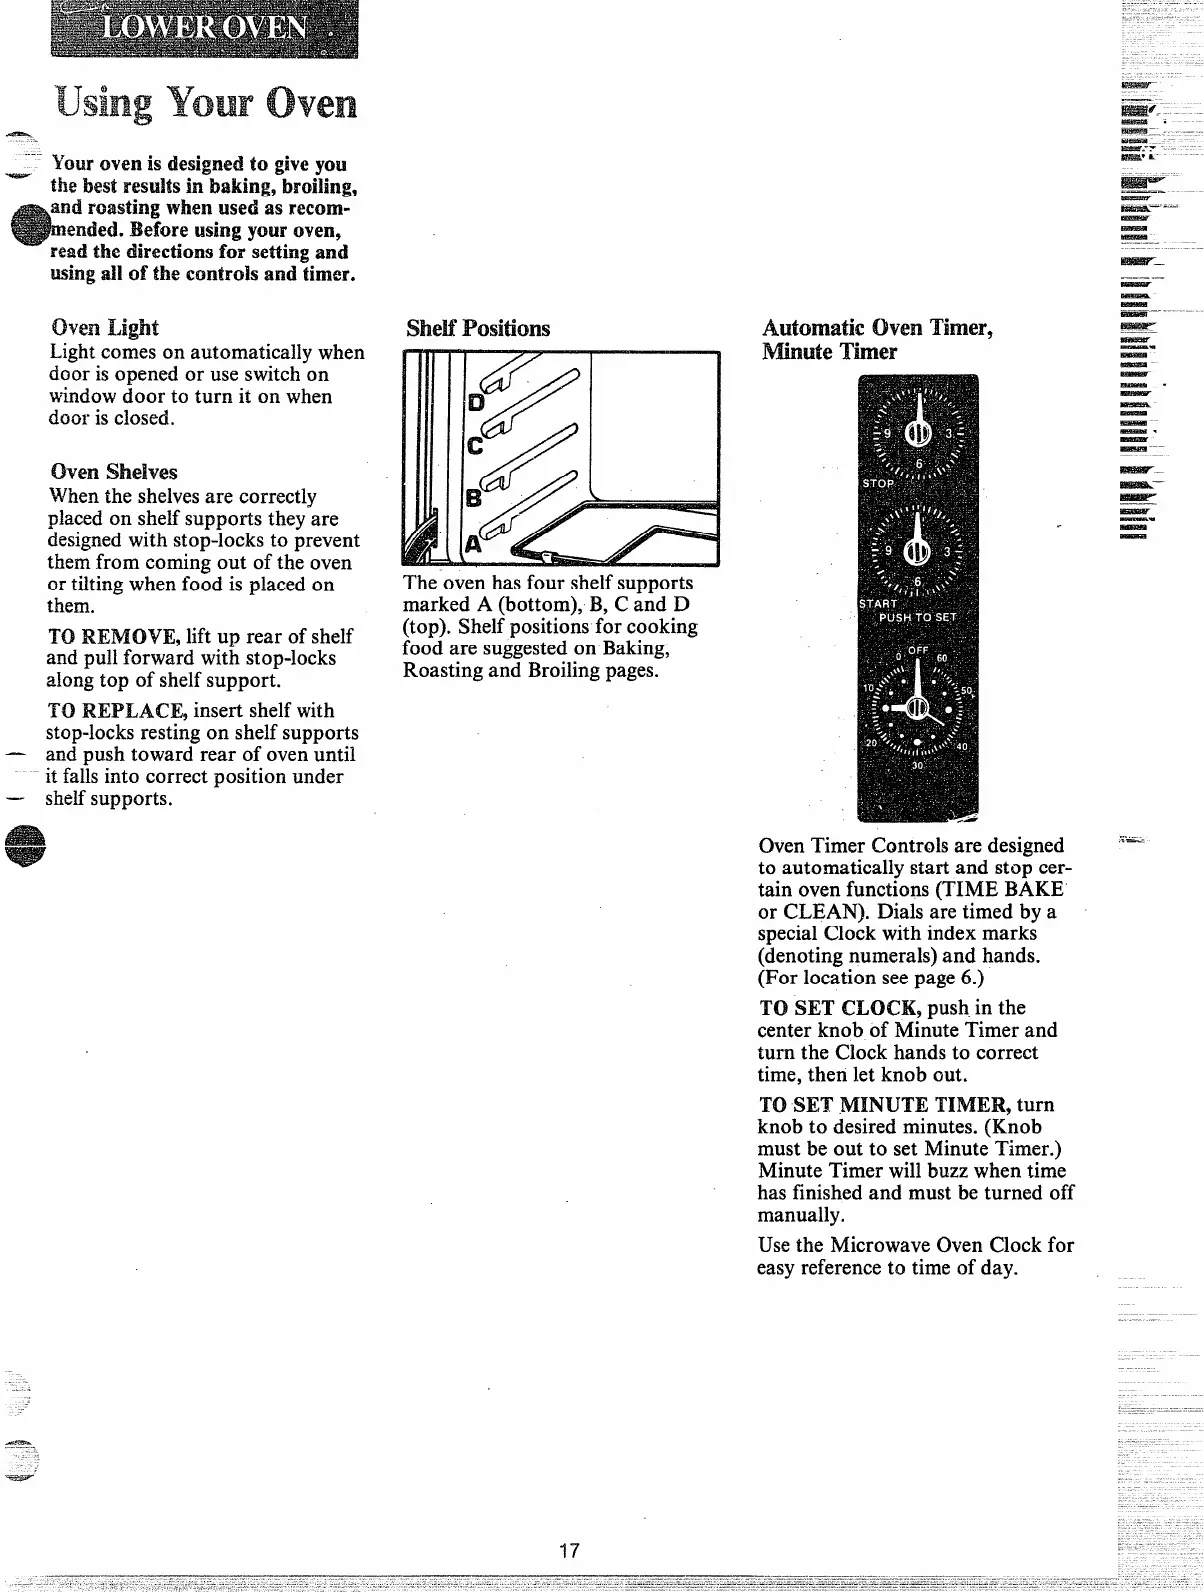
shelfPositions
The oven has four shelf supports
marked A (bottom), B, C and D
(top). Shelf positions for cooking
food are suggested on Baking,
Roasting and Broiling pages.
Awmlaticoven ‘mmM,
mute Timer
l
—
—
—
W
—
—
—
—
E
—
—
—
—
—
U
—
—
8
-
—
.
—
TOREPLACE, insert shelf with
stop-locks resting on shelf supports
— and push toward rear of oven until
it falls into correct position under
—
shelfsupports.
OvenTimer Controls are
designed ‘k
to
automaticallystart and stopcer-
tain ovenfunctions(TIMEBAKE
or CLEAN).Dialsare timed by a
specialClockwithindexmarks
(denotingnumerals)and hands.
(For locationseepage6.)
TO
SET CLOCK,push in the
center knob of Minute Timer and
turn the Clock hands to correct
time, then let knob out.
TO SET MINUTE TIMER9 turn
knob to desired minutes. (Knob
must be out to set Minute Timer.)
Minute Timer will buzz when time
has finished and must be turned off
manually.
Use the Microwave Oven Clock for
easv reference to time of dav.
. d
.—
 Loading...