SeeAutoRoastGuideam page !$.
Auto Roast t.westhe temperature
pmheto cook to the desired serving
temperature.UnlikeTempCook/
Hold, whichuses a singlepower
level,AMo Roast is designedto use
up to 3 power settingswhichauto-
maticallyswitch
duringroasting,
forevenandtendercookingresults
withoutovercooking.
H
S
c
Just as in conventional roasting,
only tender roasts should be Auto
Roasted until specified internal
temperatures are reached. Less
tender roasts should be microwaved
by time, according to the Cookbook
which comes with your oven. Com-
plete information on preparing
roasts for microwaving is in your
Cookbook.
m t P1’epiweRmsts
f AUtO
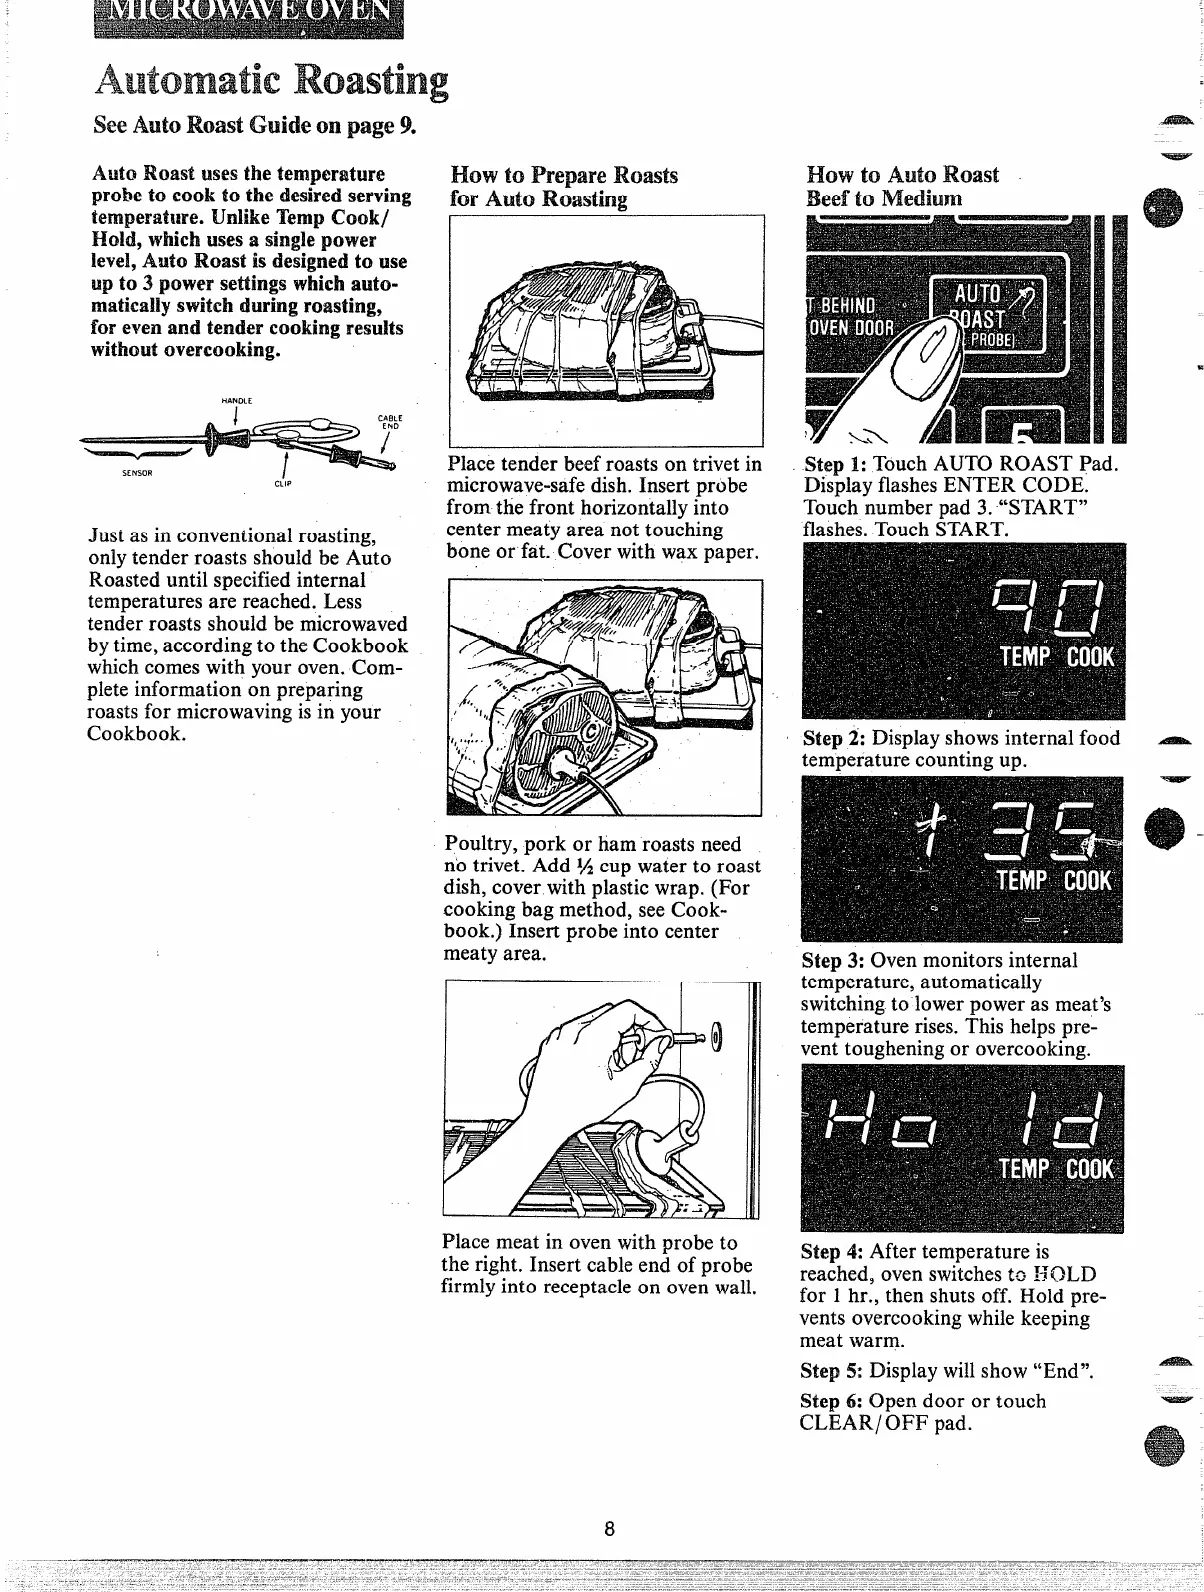
Place tender beef roasts on trivet in
microwave-safe dish. Insert probe
from the front horizontally into
center meaty area not touching
bone or fat. Cover with wax paper.
Poultry, pork or ham roasts need
no trivet. Add 1/2cup water to roast
dish, cover with plastic wrap. (For
cooking bag method, see Cook-
book.) Insert probe into center
meaty area.
Place meat in oven with probe to
the right. Insert cable end of probe
firmly into receptacle on oven wall.
8
Step 1: Touch AUTO ROAST Pad.
Display flashes ENTER CODE.
Touch number pad 3. “START”
flashes. Touch START.
Step2:Display shows internal food
temperature counting up.
Step 3: Oven monitors internal
temperature, automatically
switching to lower power as meat’s
temperature rises. This helps pre-
vent toughening or overcooking.
Step 4: After temperature is
reached, oven switches ta H(OLD
for 1 hr., then shuts off. Hold pre-
vents overcooking while keeping
meat warm.
Step 5: Display will show “End”.
Step 6: Open door or touch
CLEAIZ/OFF pad.
 Loading...