M
Matthew JohnsonSep 16, 2025
Why does the display of my GE Ranges flash?
- AAudrey WilliamsSep 16, 2025
If the display on your GE Ranges flashes, it usually indicates a power failure. Reset the clock to resolve the issue.
Why does the display of my GE Ranges flash?
If the display on your GE Ranges flashes, it usually indicates a power failure. Reset the clock to resolve the issue.
Unable to get the display to show 'oFFSEt' on my GE JS645, what to do?
If you can't get the display to show 'oFFSEt' on your GE Ranges, make sure you're touching the Broil Hi/Lo and Bake pads at the same time and holding them for 3 seconds.
Why does my GE JS645 Ranges control signals after entering cooking time or start time?
If your GE Ranges control signals after entering cooking time or start time, you likely forgot to enter a bake temperature or cleaning time. Touch the Bake pad and desired temperature or the Self Clean pad and desired clean time.
Why are my GE Ranges oven racks difficult to slide?
If the oven racks in your GE Ranges are difficult to slide, especially the shiny, silver-colored ones, it might be because they were cleaned during a self-clean cycle. Apply a small amount of vegetable oil to a paper towel and wipe the edges of the oven racks with it. Do not use lubricant sprays.
Why my GE JS645 Ranges drawer does not slide smoothly or drags?
If the drawer on your GE Ranges doesn't slide smoothly or drags, it could be out of alignment. Fully extend the drawer and push it all the way in. Also, the drawer might be overloaded or the load unbalanced. Reduce the weight and redistribute the contents.
Why there is steam from the vent of my GE JS645?
When using the ovens, it is normal to see steam coming out of the oven vents of your GE Ranges. As the number of racks or amount of food being cooked increases, the amount of visible steam will increase. This is normal.
What to do if food does not broil properly in my GE Ranges oven?
If food isn't broiling properly in your GE Ranges oven, ensure you've selected the appropriate broil mode and are using the correct rack position as suggested in the Cooking Guide. Also, make sure your cookware is cool and specifically designed for broiling. If using aluminum foil, ensure it's properly fitted and slit as recommended. In areas with low voltage, preheat the broil element for 10 minutes.
Why is my GE JS645 Ranges oven not clean after self-cleaning?
If your GE Ranges oven isn't clean after running a clean cycle, it might be due to improperly set oven controls. Please refer to the Cleaning the Oven section for guidance. Also, heavily soiled ovens may require a second cleaning cycle or a longer cleaning time. It's best to clean up any significant spillovers before starting the self-clean cycle.
Why is the oven light not working in my GE Ranges?
If the oven light in your GE Ranges isn't working, first check if the light bulb is loose or defective and tighten or replace it. If that doesn't work, the pad operating the light might be broken, requiring you to call for service. Also, verify that the oven is not in Sabbath mode by checking the Special Features section.
Why does my new GE JS645 Ranges oven cook differently?
If your new GE Ranges oven cooks differently than your old one, it's because it has a different cooking system. Carefully follow recipe times and temperatures for the first few uses. If you still think the oven is too hot or cold, you can adjust the temperature in the Special Features section to match your cooking preferences. This adjustment affects Bake and Convection Bake temperatures only.
Instructions for anti-tip device installation and general safety rules for appliance use.
Guidelines for safe operation of surface units, fire prevention, and flammable materials.
Precautions for glass cooktops, oven operation, and preventing damage.
Safety instructions for self-cleaning cycles and related warnings.
How to set and use surface units, including indicator lights and dual-ring elements.
Information on the glass cooktop, its features, and temperature limiter.
Explanation of various oven control modes like Bake, Broil, Self Clean, Timer, and Warm.
How to adjust oven temperature, sound volume, and manage clock display settings.
Detailed descriptions of baking, broiling, and warming modes for best cooking results.
Instructions for cleaning the exterior surfaces, control knobs, and stainless steel.
Methods for manual cleaning, self-cleaning cycles, and cleaning oven racks and elements.
Procedures for daily cleaning, removing burned-on residue, and preventing damage to the glass.
Step-by-step guide for replacing the oven light bulb safely.
Instructions for removing/replacing the oven door and servicing the storage drawer.
Information on accessing the GE Appliances website, registering the product, and scheduling service.
Details on purchasing extended warranties and how to contact GE Appliances customer support.
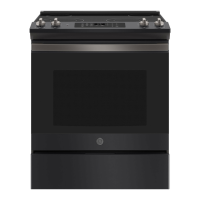
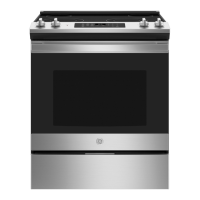
This document describes the operation, maintenance, and features of a GE Electric Front Control Range, suitable for models JS645 and JS660 (30" Front Control Ranges).
The GE Electric Front Control Range is a cooking appliance designed for both surface cooking and oven baking/broiling. It features a radiant glass cooktop with multiple surface units and an oven with various cooking modes.
Surface Cooking: The radiant glass cooktop provides heating units beneath a smooth glass surface. It includes dual surface units on some models, allowing users to select between two cooking sizes to match cookware. A "Hot Cooktop" indicator light illuminates when a unit is hot to the touch and remains on until the unit cools to approximately 150°F. Some models also feature a "Warming Zone" located in the back center of the glass surface, designed to keep hot, cooked food at serving temperature for up to 3 hours. The warming zone does not glow red like the cooking elements.
Oven Cooking: The oven offers several traditional cooking modes:
Special Features: The range includes several special features accessible through a menu:
Setting Surface Units: To activate a surface unit, push the control knob in and turn it to the desired setting. A surface ON indicator light will glow when any unit is active. Dual surface units allow selection of small or large burner sizes by turning the knob to the appropriate setting. The "Melt" setting on some models is specifically for melting chocolate or butter.
Using the Warming Zone: To turn on the Warming Zone, press the "Warming Zone ON/OFF" pad, select "Lo," "Med," or "Hi" using the number pads, and then press "Start." To turn it off, press the "Warming Zone ON/OFF" pad again. Always start with hot food and cover it with a lid or aluminum foil for best results.
Oven Controls: The oven control panel includes pads for:
Cookware Selection: For radiant glass cooktops, flat-bottomed cookware is recommended. Stainless steel and heavy-weight aluminum are good choices. Copper-bottom pans are acceptable but require immediate cleaning of residues. Enamel (painted) on cast iron is recommended if the pan bottom is coated. Cookware to avoid includes enamel (painted) on steel (can bond to glass), glass-ceramic, stoneware, and cast iron (unless specifically designed for glass cooktops), as they can scratch the surface or perform poorly. Always center pans on the surface unit and avoid sliding them to prevent scratches.
For oven cooking, the material, finish, and size of cookware affect baking performance. Dark, coated, and dull pans absorb heat more readily, resulting in browner, crisper crusts. Shiny pans produce more evenly cooked goods. Glass and ceramic pans retain heat well, suitable for pies and custards. Air-insulated pans heat slowly and reduce bottom browning.
Oven Racks: Rack positions can be adjusted to influence cooking results. Higher positions lead to darker tops, while lower positions reduce browning. When using multiple pans, ensure at least 1.5 inches of space between them for proper airflow. Racks should be placed in the desired position before turning on the oven.
General Cleaning: Always ensure all controls are off and surfaces are cool before cleaning. Avoid abrasive cleansers, strong liquid cleansers, steel wool, plastic scouring pads, or oven cleaners on any part of the range, especially painted surfaces, control panels, and the oven interior. Mild soap and water or a vinegar and water solution are generally recommended, followed by rinsing and drying with a soft cloth.
Cooktop Cleaning:
Oven Interior Cleaning:
Oven Door Maintenance: The oven door is removable for cleaning or servicing. To remove, fully open the door, pull down the hinge locks, close the door to the removal position (approximately 3" open), and lift it up and out. To replace, reverse the steps, ensuring the hinge arms are properly seated.
Storage Drawer: The storage drawer can be removed for cleaning underneath the range. It can be cleaned with a damp cloth or sponge. Do not use harsh abrasives. Follow specific instructions for metal or plastic rails to remove and replace the drawer.
Oven Light Replacement: Before replacing the oven light bulb, disconnect power to the range. Allow the glass cover and bulb to cool. For some models, turn the glass cover counterclockwise 1/4 turn, then pull the bulb straight out. Replace with a new 120/130-volt halogen bulb (max 50 watts), handling it with gloves or a dry cloth to avoid skin oils. For other models, turn the glass cover counterclockwise 1/4 turn, then turn the bulb counter-clockwise to remove. Replace with a new 40-watt appliance bulb, turning it clockwise until tight. Reconnect electrical power after replacement.
| Type | Freestanding |
|---|---|
| Number of Burners | 5 |
| Oven Capacity | 5.3 cu. ft. |
| Self-Cleaning | Yes |
| Wi-Fi Connectivity | No |
| Color | Stainless Steel |
| Cooktop Surface | Smooth |
| Oven Cleaning | Self-Clean |
| Width | 30 inches |
| Cooktop Material | Glass |
| Ignition Type | Electronic Ignition |