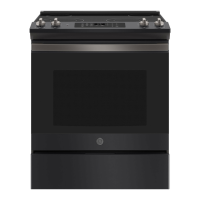
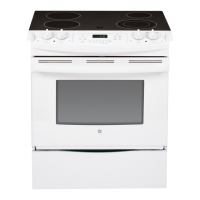
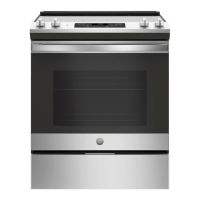
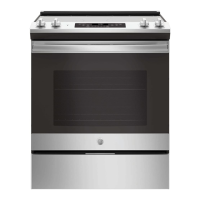
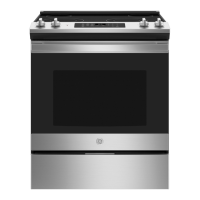
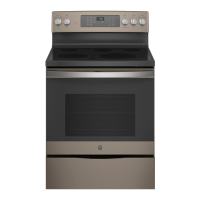
This document describes the operation, maintenance, and features of a GE Electric Front Control Range, suitable for models JS645 and JS660 (30" Front Control Ranges).
Function Description
The GE Electric Front Control Range is a cooking appliance designed for both surface cooking and oven baking/broiling. It features a radiant glass cooktop with multiple surface units and an oven with various cooking modes.
Surface Cooking:
The radiant glass cooktop provides heating units beneath a smooth glass surface. It includes dual surface units on some models, allowing users to select between two cooking sizes to match cookware. A "Hot Cooktop" indicator light illuminates when a unit is hot to the touch and remains on until the unit cools to approximately 150°F. Some models also feature a "Warming Zone" located in the back center of the glass surface, designed to keep hot, cooked food at serving temperature for up to 3 hours. The warming zone does not glow red like the cooking elements.
Oven Cooking:
The oven offers several traditional cooking modes:
- Traditional Bake: Primarily uses heat from the lower element, with some contribution from the upper element, suitable for single-rack cooking. Preheating is generally recommended.
- Broil Hi: Uses intense heat from the upper element to sear thinner cuts of meat or foods requiring less interior cooking. Preheating is not necessary.
- Broil Lo: Uses less intense heat from the upper element for thicker cuts of meat or foods that need to be cooked thoroughly while still browning the surface. Preheating is not necessary.
- Warm: Designed to keep hot foods warm for up to 3 hours. Preheating is not required. It's recommended to cover moist foods and leave crisp foods uncovered.
Special Features:
The range includes several special features accessible through a menu:
- Adjust the Oven Temperature (OFFSEt): Allows adjustment of the oven's baking and convection baking temperature by up to 35°F hotter or cooler. This feature affects Bake and Convection Bake modes only.
- Sound Volume (Sound): Adjusts the oven tone volume to high, medium, low, or off.
- End of Timer Signals (End tonE): Sets the timer end signal to be continuous or a single repeating beep.
- 12-hour Shutoff (2H ShutoFF): Automatically shuts off the oven after 12 hours of continuous operation, which can be enabled or disabled.
- Fahrenheit or Celsius Temperature Display (dEg Unit): Switches the temperature display between Fahrenheit (F) and Celsius (C).
- Clock Display (Cloc diSP): Toggles the clock display on or off.
- Clock Configuration (Cloc cFg): Selects between a standard 12-hour clock or 24-hour military time.
- Sabbath Mode: Complies with Star K standards, disabling tones, oven lights, and introducing delays in display changes. Only continuous or timed baking is allowed. The oven returns to Sabbath Mode after a power outage, but the bake cycle will be off.
Usage Features
Setting Surface Units:
To activate a surface unit, push the control knob in and turn it to the desired setting. A surface ON indicator light will glow when any unit is active. Dual surface units allow selection of small or large burner sizes by turning the knob to the appropriate setting. The "Melt" setting on some models is specifically for melting chocolate or butter.
Using the Warming Zone:
To turn on the Warming Zone, press the "Warming Zone ON/OFF" pad, select "Lo," "Med," or "Hi" using the number pads, and then press "Start." To turn it off, press the "Warming Zone ON/OFF" pad again. Always start with hot food and cover it with a lid or aluminum foil for best results.
Oven Controls:
The oven control panel includes pads for:
- Traditional Cooking Modes: Bake, Broil Hi/Lo, Warm.
- Self Clean (on some models): Initiates the self-cleaning cycle.
- Start: Confirms any cooking, cleaning, or timed function.
- Cancel/Off: Stops all oven operations except the clock and timer.
- Number Pad: Used for programming temperatures and times.
- Set Clock: Sets the time of day.
- Timer: Functions as a countdown timer.
- Cook Time: Programs a specific cooking duration, after which the oven turns off.
- Delay Time: Sets a future time for the oven to start a cooking or cleaning function.
- Oven Light: Turns the interior oven light on or off.
- Lock Controls: Locks the control panel to prevent accidental activation, except for the "Cancel/Off" pad.
Cookware Selection:
For radiant glass cooktops, flat-bottomed cookware is recommended. Stainless steel and heavy-weight aluminum are good choices. Copper-bottom pans are acceptable but require immediate cleaning of residues. Enamel (painted) on cast iron is recommended if the pan bottom is coated. Cookware to avoid includes enamel (painted) on steel (can bond to glass), glass-ceramic, stoneware, and cast iron (unless specifically designed for glass cooktops), as they can scratch the surface or perform poorly. Always center pans on the surface unit and avoid sliding them to prevent scratches.
For oven cooking, the material, finish, and size of cookware affect baking performance. Dark, coated, and dull pans absorb heat more readily, resulting in browner, crisper crusts. Shiny pans produce more evenly cooked goods. Glass and ceramic pans retain heat well, suitable for pies and custards. Air-insulated pans heat slowly and reduce bottom browning.
Oven Racks:
Rack positions can be adjusted to influence cooking results. Higher positions lead to darker tops, while lower positions reduce browning. When using multiple pans, ensure at least 1.5 inches of space between them for proper airflow. Racks should be placed in the desired position before turning on the oven.
Maintenance Features
General Cleaning:
Always ensure all controls are off and surfaces are cool before cleaning. Avoid abrasive cleansers, strong liquid cleansers, steel wool, plastic scouring pads, or oven cleaners on any part of the range, especially painted surfaces, control panels, and the oven interior. Mild soap and water or a vinegar and water solution are generally recommended, followed by rinsing and drying with a soft cloth.
Cooktop Cleaning:
- Normal Daily Use: Use CERAMA BRYTE® Ceramic Cooktop Cleaner and a cleaning pad. Apply a few drops, rub the surface, and wipe off residue with a dry cloth or paper towel. Do not heat the cooktop until it has been thoroughly cleaned.
- Burned-On Residue: Apply CERAMA BRYTE® Ceramic Cooktop Cleaner to the residue area and rub with the cleaning pad. Repeat as needed.
- Heavy, Burned-On Residue: Use a single-edge razor blade scraper at a 45° angle to scrape off the soil, then clean with CERAMA BRYTE® cleaner.
- Metal Marks and Scratches: These can be removed with CERAMA BRYTE® Ceramic Cooktop Cleaner.
- Sugary Spills and Melted Plastic: These require immediate removal while hot using a razor blade scraper and paper towels to prevent permanent damage (pitting or indentation). Any remaining spillover should be cleaned after the cooktop cools.
Oven Interior Cleaning:
- Manual Cleaning: Use mild soap and water or a vinegar and water solution. Do not use oven cleaners or abrasive materials.
- Self Clean Mode (on some models): This feature uses very high temperatures to burn away food soils. Before starting, remove all items from the oven (except enameled racks), wipe up grease, and close the door. Select the desired clean time (3 to 5 hours) and press "Start." The oven door will lock during the cycle and remain locked until cool. Venting the kitchen during the first self-clean cycle is recommended.
- Oven Racks: Enameled (dark color) racks can be left in the oven during self-clean. Shiny metal racks should be removed. All racks can be washed with warm, soapy water. If racks become difficult to slide after self-cleaning, apply a small amount of vegetable oil to the edges.
- Oven Heating Elements: Do not clean the bake or broil elements; soil will burn off during heating. For exposed bake elements, gently lift to clean the oven floor with warm, soapy water.
Oven Door Maintenance:
The oven door is removable for cleaning or servicing. To remove, fully open the door, pull down the hinge locks, close the door to the removal position (approximately 3" open), and lift it up and out. To replace, reverse the steps, ensuring the hinge arms are properly seated.
Storage Drawer:
The storage drawer can be removed for cleaning underneath the range. It can be cleaned with a damp cloth or sponge. Do not use harsh abrasives. Follow specific instructions for metal or plastic rails to remove and replace the drawer.
Oven Light Replacement:
Before replacing the oven light bulb, disconnect power to the range. Allow the glass cover and bulb to cool. For some models, turn the glass cover counterclockwise 1/4 turn, then pull the bulb straight out. Replace with a new 120/130-volt halogen bulb (max 50 watts), handling it with gloves or a dry cloth to avoid skin oils. For other models, turn the glass cover counterclockwise 1/4 turn, then turn the bulb counter-clockwise to remove. Replace with a new 40-watt appliance bulb, turning it clockwise until tight. Reconnect electrical power after replacement.