12
Alternate Construction
Installation Instruction Preparation
If counter opening extends to the wall, it will require
Maintop Filler Kit (supplied with the range) or
Backguard Kit (JXS36XX or JXS39SS) to close the
gap.
Note: If the counter top is greater than 25” it will show a
gap between the backguard and wall or between filler
kit and the wall.
If the countertop is less than 25” a gap will occur
between the countertop front and the control panel
ends (See section E7).
Optional Maintop Filler or
Backguard Kit
AA
AB
Countertops higher than 36 1/2”
If countertop height
is between 36 1/2”
and 38” a lower trim
kit (JXS56XX) is
recommended.
Refer to Kit
instructions for
installation details.
If you are using the optional backguard kit,
Refer to the Backguard Kit instructions for Installation
details.
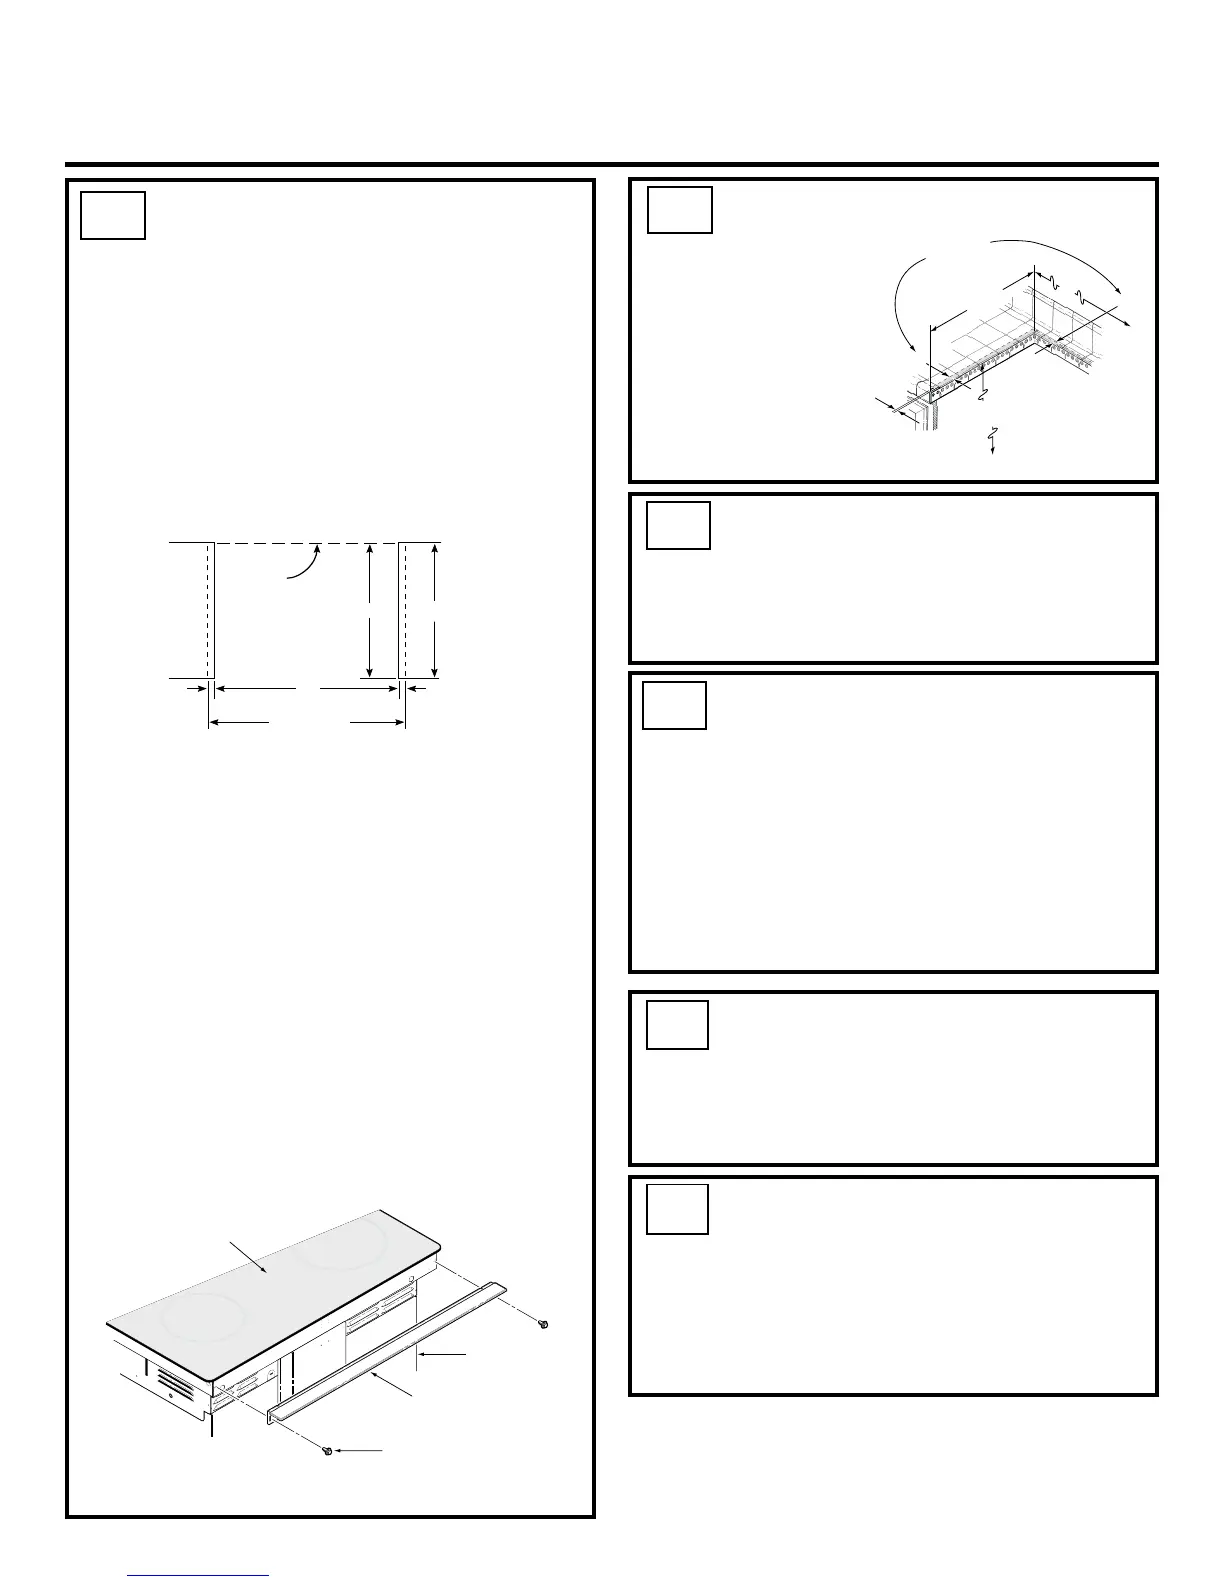
If you use the filler kit, place the metal filler piece
supplied with the range to the back of the range as
shown in the figure below. Start the 2 screws into the
upper holes at the outside rear of the range above the
louvers, through the slots in the trim, holding the filler
piece centered on the maintop frame and pushing
upward to close the gap between the bottom of the
glass and the filler trim.
When the trim is set in the proper position tighten the 2
mounting screws. The top of the trim should be located
below the top surface of the glass to prevent pots, pans
and skillets from damaging the painted parts.
Refer to the Standard Installation of the Range
beginning on page 3.
AC
For Non-Built-In Installation
(End of Cabinet Location)
When installing the range at the end of a cabinet
section which will expose the unfinished side of the
range, use Body Side Kit (JXS76XX), Refer to kit
instructions for installation details.
AD
Island Installation
Attach the anti-tip bracket per instructions in section D
making sure that the rear of the bracket is 25” from the
front of the countertop.
Beware that the screws provided are long and may
penetrate through the back of the island cabinets. In
this event, use shorter screws (not provided) or the
screws provided should be used in the floor, (See
Section D for Wood/Concrete Floor Installation). Do not
use Backguard Kit JXS36XX or JXS39SS.
AE
For Cabinet Openings
Approximately 30-3/8”
If range is installed in cabinet opening approximately
30-3/8” the Vertical Side Trim Kit (JXS86XX) should be
used to cover gaps between range sides and cabinet.
Refer to the kit instructions for installation details.
AF
Cabinets over the Range less
than 30”
If a 30” clearance between cooking surface and
overhead combustible material or metal cabinets
cannot be maintained, protect the underside of the
cabinets above the cooktop with not less than 1/4”
insulating millboard covered with sheet metal not less
than 0.0122” thick.
Pub. No. 31-10426
229C4053P412
25"
Must Be
Level
30"
Smooth Cut
Must Be Level
31-1/8"
Must Be
Flat
Must Be
Flat
Wall
Maintop Filler
Range
Cooktop
(
2
)
#8 Screws
30"
1"
9/16"
Each Side
23-3/16"
36-3/4" to 38"
to Floor
Flat & Level
With Back &
Opposite Side
1/4"
 Loading...