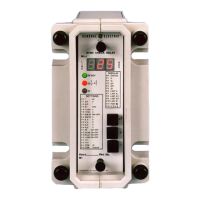
GEK - 105560
26
6.1.6 F6, F7, F8, F9, and F10 Magnitudes recorded
When close enable is given, whether by synchronism or undervoltage, the relay registers of certain
measured magnitudes at that moment. Later, when so desired, in the Reading Sequence they can be
viewed with the following functions:
F6:
LAST VL
F7:
LAST VB
F8:
LAST
∆
V
F9:
LAST
∆θ
F10:
LAST
∆
f
6.1.7 F11: TEST Display and inputs test
In this reading, all the segments of the displays will light up and blink in order to make sure there that
none is defective.
The three LEDs will also light up, indicating they are not defective.
Additionally, the LEDs act as a control for the digital inputs. If these are active the LEDs will blink on
and off; if they are not active, they will light up continuously. The are assigned the follows codes:
•
MANUAL input
→
LED READY
•
ENABLE input
→
LED 52
•
INPUT 52b
→
LED 27
6.1.8 F12: VL VB State of Line and buses
Through the horizontal segments of the display, the MLJ relay gives an indication as to whether the line
(left-hand display) or the bus (right-hand display) are live or dead.
The upper segments indicate live; the lower, dead, and the middle segments show that the value of the
voltage falls between the live and dead values. These limits are determined by the settings in 3-1 to 3-
4.
The MLJ admits the live limit to be inferior to the dead limit. In these cases both the upper as well as
the lower segments can be lit up.
6.2 SEQUENCE OF SETTINGS
In order to introduce or modify the settings it is necessary for the relay to be in the Setting Sequence.
To do this the protective cover must be removed as the three buttons will be used.
Supposing we are in the Readout Sequence. In order to enter in the Setting Sequence, the
ENTER
button must be pressed and, without releasing it, press the
“-”
button. After this operation has been
done, (the buttons may be released),
1-1
will appear on the screen. This means that the 1-1 setting
(voltage difference) can be changed.
Inversely, if you want to go back to the Readout Sequence from the Setting Sequence, both the
“+”
and the
“-”
buttons must be pressed simultaneously. In any case, if two minutes were to pass without
any button being pressed, the MLJ will go automatically back to the Readout Sequence.
Let us suppose we are in the Setting Sequence. In this case the following can be done:
•
Go to the next setting (1-2). Press the “+” button.
•
Go to the previous setting (0-1). Press the “-” button.
•
See or change the current setting (1-2). Press ENTER.