– 55 –
INITIAL AIR SHUTTER SETTINGS
Gas Supply Location Dim. “A”
L.P. Gas Broil Burner 11/32″
Bake Burner 11/32″
Natural Gas Broil Burner 11/32″
Bake Burner 11/32″
(Adjust at the opening nearest the air
shutter screw.)
3. Retighten the air shutter screw.
Bake and broil flame must be
checked with the door closed to
properly check flame characteristics.
4. Turn on the bake or broil burner.
As you watch the flame with the oven
door closed, check the following through
the oven door window:
a. If the flames are yellow, open the
air shutter more.
b. If the flames blow away or flutter
from the burner, close the air
shutter more.
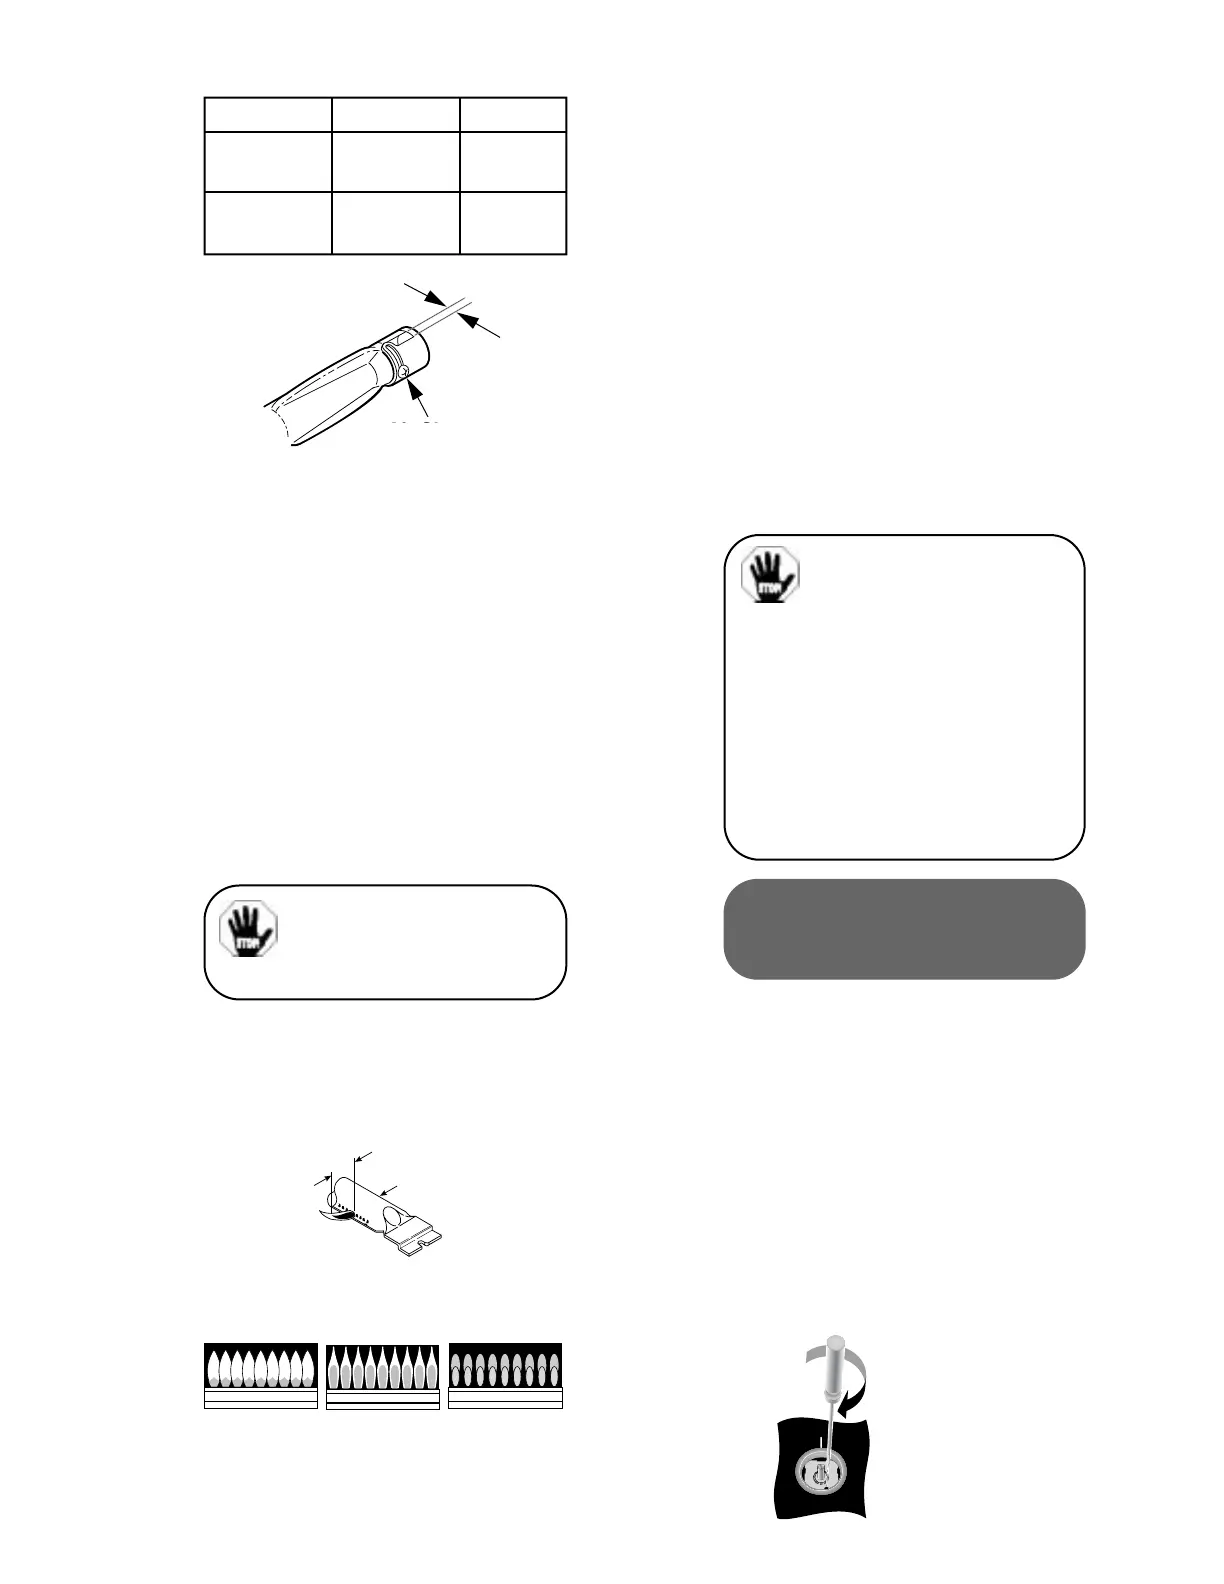
5. Checking the flame size:
Check the inner cone of the flame.
It should be approximately 1/2″ to 3/4″
long for the bake and broil burners.
If the flame size is incorrect, recheck all
conversion steps.
Air Shutter
1/2" TO 3/4"
QUEMADOR PARA
HORNEAR/ASAR
“C”
SOFT BLUE FLAMES
Normal for Natural Gas
“B”
SLIGHT YELLOW
TIPPING
Normal for LP Gas
“A”
YELLOW FLAMES
Call for Service
Air Shutter
Adjustment Screw
Dim. “A”
(See Table)
1/2″ to 3/4″
Inner Cone of Flame
Oven Broiler Burner
“A” YELLOW
FLAMES
Call for Service
“B” SLIGHT
YELLOW TIPPING
Normal for L.P. Gas
“C”
SOFT BLUE FLAMES
Normal for Natural Gas
WARNING: If you
attempt to measure the inner
cone of the flame, please use
caution; burns could result.
HIGH OUTPUT
Low setting adjustments must be made
with two other burners in operation on a
medium setting. This procedure prevents
the low flame from being set too low,
resulting in the flame being extinguished
when other burners are turned on.
a. Remove the valve control knobs.
b. Through the opening, locate the
valve bypass screw located on the
lower right side of the valves.
c. Using a small screwdriver, screw
down the brass bypass screw fully
in a clockwise rotation.
6. When all adjustments are made and
the results are satisfactory:
a. Replace the orifice fitting cover.
b. Replace the oven baffle (flame
spreader).
c. Replace the oven bottom.
IN SOME CASES:
a. With L.P. gas, some yellow tipping
on the outer cone is normal.
b. Foreign particles in the gas line
may cause an orange flame at first,
but this will soon disappear.
SPECIAL NOTE:
To convert the oven back to natural
gas, reverse the instructions given in
making L.P. Adjustments.
Once the conversion is
complete and checked ok,
fill out the L.P. sticker and
include your name, organization
and date conversion was made.
Apply the sticker to the range near
the regulator to alert others in the
future that this appliance has been
converted to L.P. If converting
back to natural gas from L.P.,
please remove the sticker so
others know the appliance is
set to use natural gas.
ADJUSTING LOW
FLAME SETTING ON
COOKTOP BURNERS
 Loading...