12 49-60466-6
2
REVERSE DOOR SWING
SKIP THIS STEP IF DOOR SWING SUITS THE
INSTALLATION
Parts Included:
• Top left case hinge
• Bottom left case hinge
• Left and right side decorative hinge cover
'HFRUDWLYHKLQJHVFUHZKROHFRYHU
• Torx
®
driver bit
Tools Required:
• Phillips screwdriver
• Electric drill
To remove the door:
)ODWWHQWKHVKLSSLQJFDUWRQWRXVHDVDSDG
• Remove the 2 screws and the toekick. Set aside
the screws and toekick for final installation.
8VHWKHVXSSOLHG7RU[
®
bit and electric drill to
remove the 3 screws holding the top case hinge.
Lift off the hinge. (Screws will be used to install the
new hinge.)
• Lift the door off the bottom case hinge.
• Remove the bottom case hinge pin and bracket.
To reinstall the door:
1. Remove the door stop and cam riser on the
bottom right side of the door.
2. Remove the bottom fill plug on the bottom left
side of the door.
3. Reinstall the original door stop and cam riser
onto the bottom left side of the door.
4. Reinstall the bottom fill plug on the bottom right
side of the door.
5. Remove the top fill plug on the top left side of
the door.
6. Reinstall the top fill plug on the top right side.
7. Install the new supplied bottom case hinge pin
and bracket onto bottom left side. Ensure plastic
cam riser is on the case hinge pin.
8. Place the door onto the bottom case hinge.
9. Install the supplied left-hand top case hinge with
the 3 original screws.
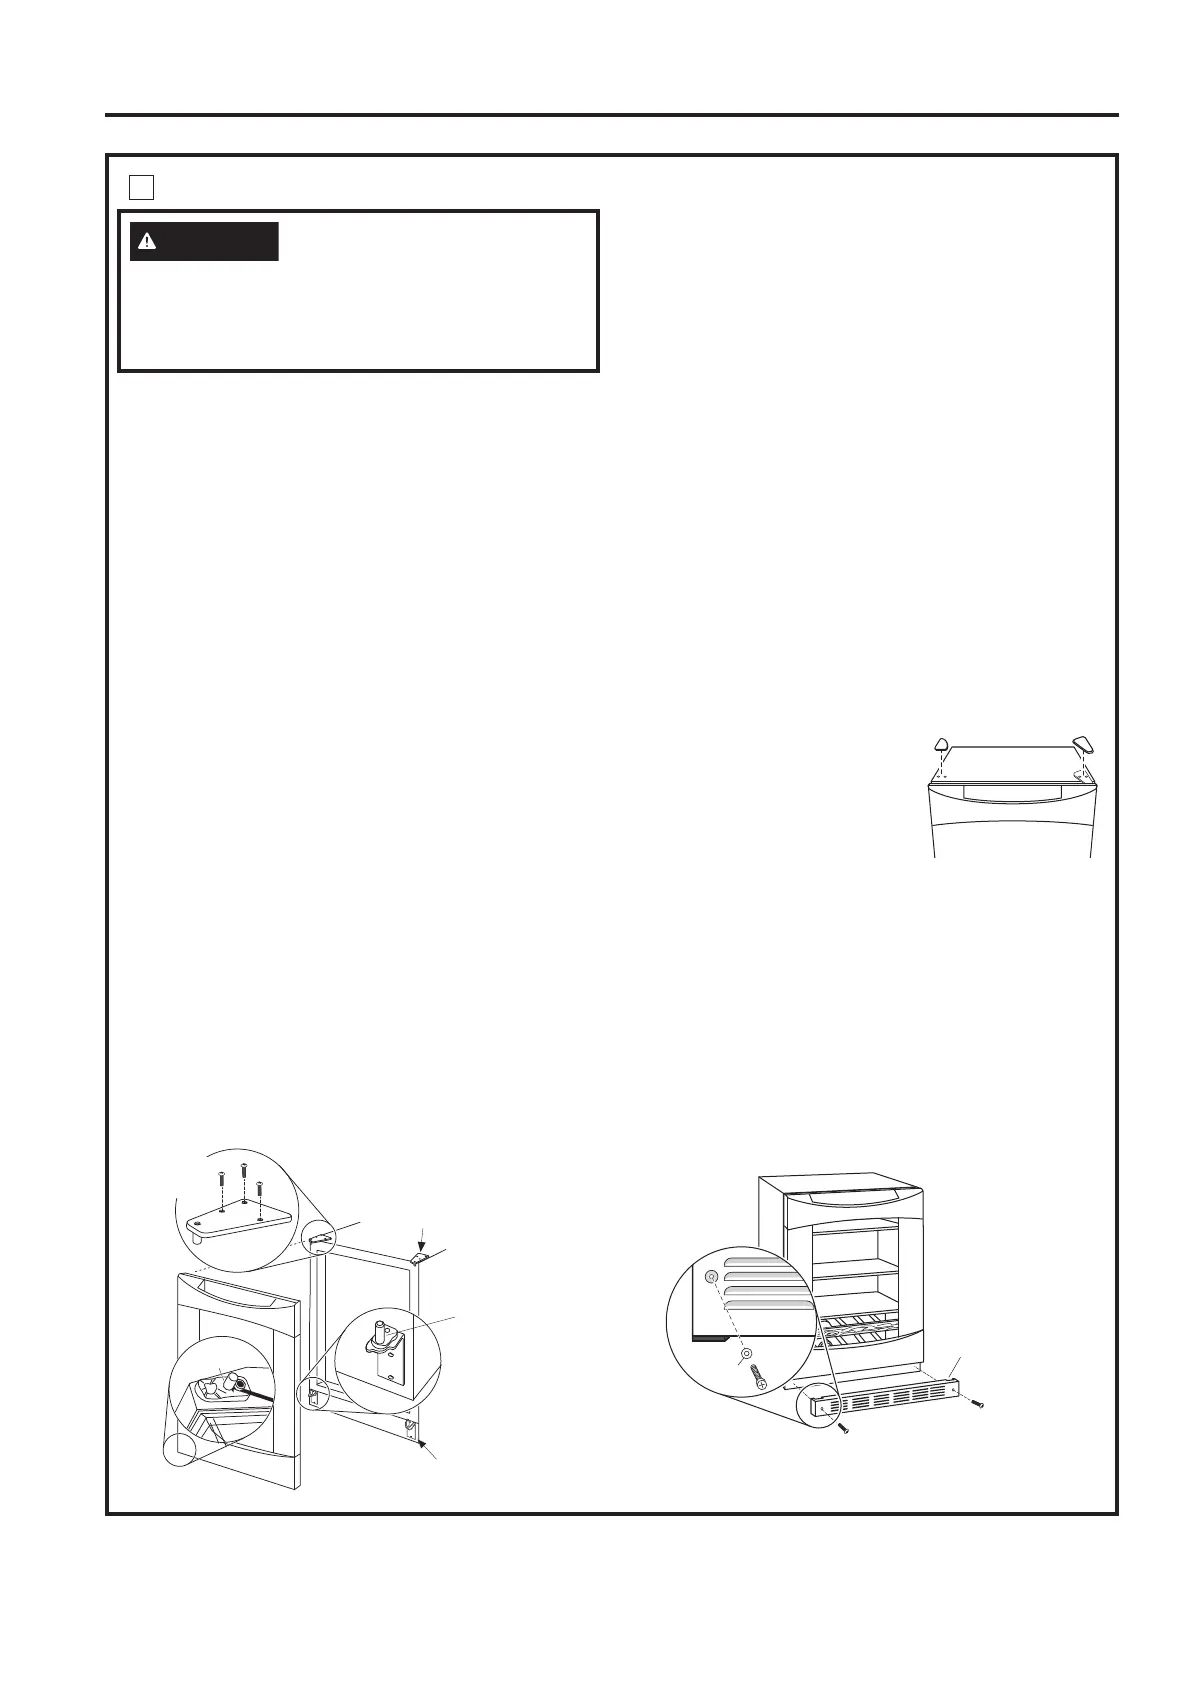
10. 6HOHFWWKHKLQJHFRYHUPDUNHGZLWKDQ³/´
11. Peel backing off the tape inside the decorative
hinge cover.
12. Press and snap the hinge
cover into place.
13. Snap the screw hole cover
into place on the opposite
side.
IMPORTANT: Check to be sure screws are tight and
that the door is straight and does not sag. The door
should swing freely.
Install Toekick
The toekick has a cutout on the left and right sides.
1. Remove the plug on the left side and reinstall on
the right side.
2. Install original screws and spacers. Install screws
through the spacer standoff, toekick and into the
base as shown.
Installation Instructions
Move Fill
Plug to
Right Side
Spacer
Standoff
Install Covers
Remove
Top Hinge
Remove
Hinge
Install
3 Hinge
Screws
Door Stop
and Cam Riser
Hinge
Pin and
Bracket
INSTALLATION INSTRUCTIONS
WARNING
)ROORZDOOVWHSVZKHQUHYHUVLQJ
WKHGRRUVZLQJ)DLOXUHWRIROORZWKHVHLQVWUXFWLRQV
leaving off parts, or overtightening screws, can
lead to the door falling off and result in injury and
property damage.
 Loading...