AUTOMATIC ICEMAKER & DISPENSER
(on some models)
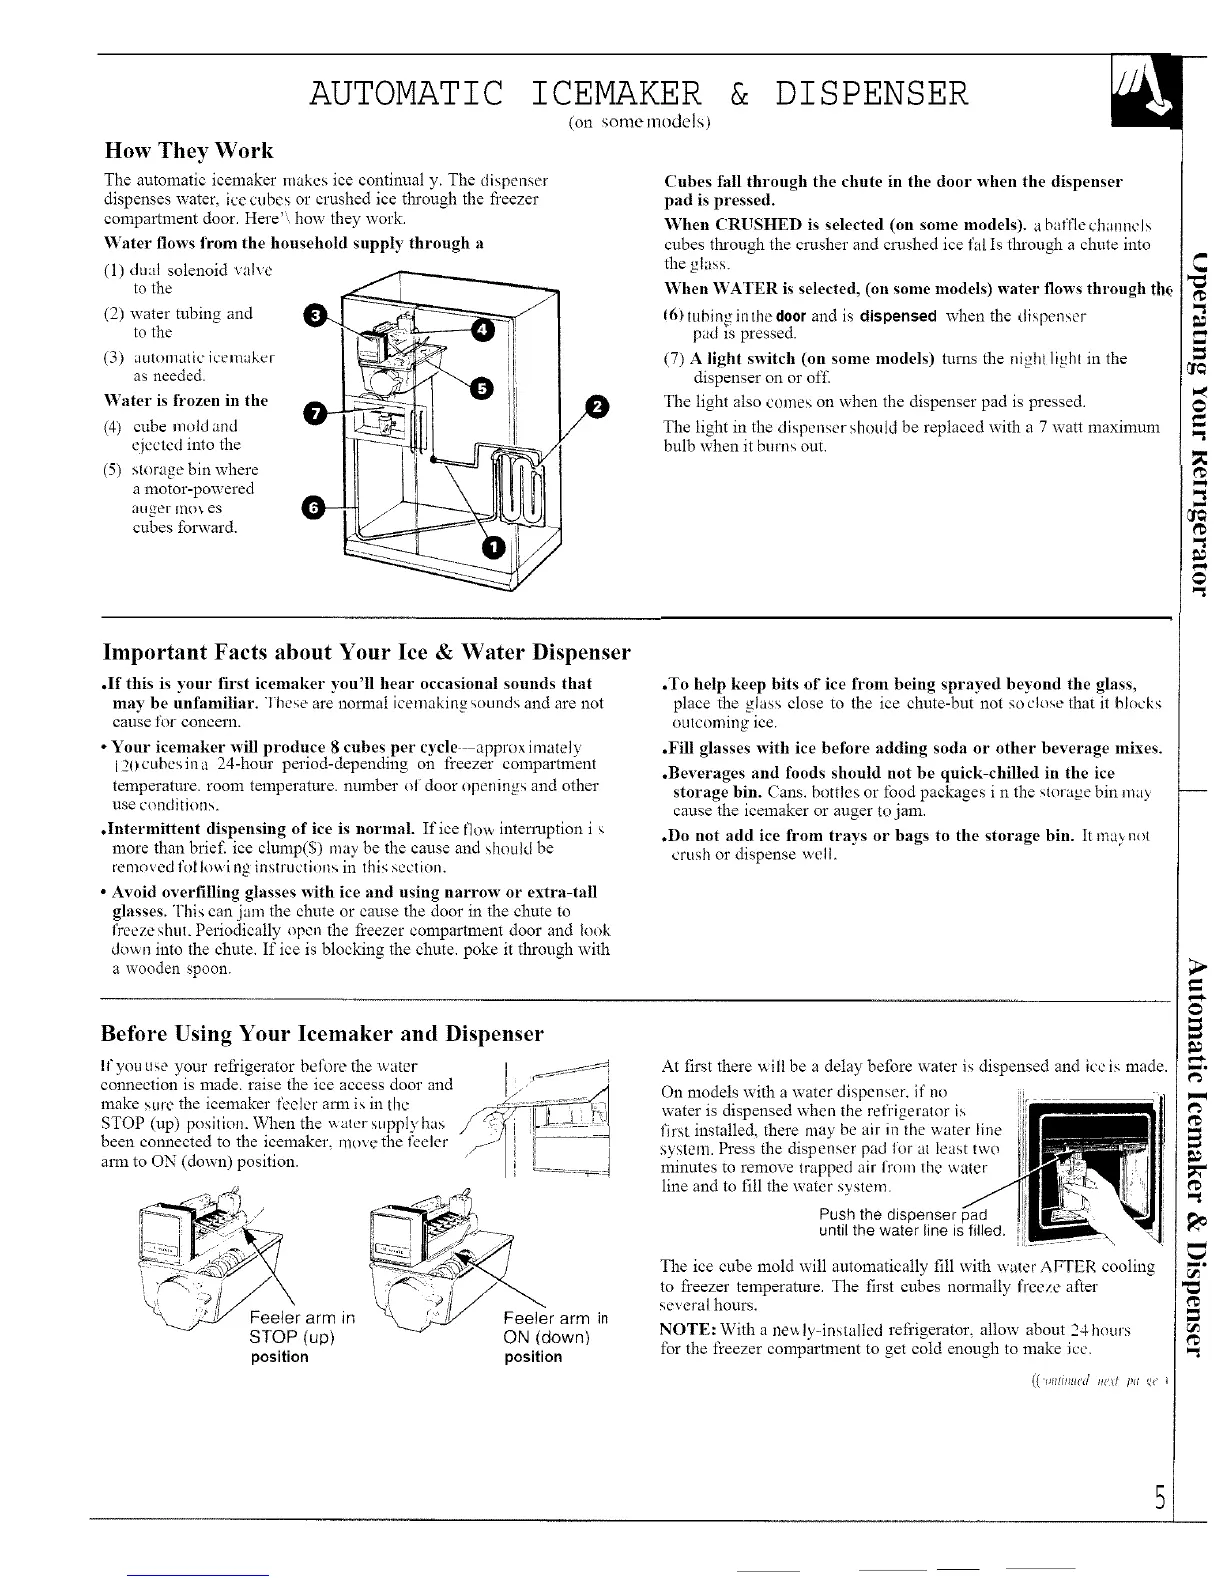
How They Work
The automatic icemaker makes ice continual y. The dispenser
dispenses water, ice cubes or crushed ice tln'ough the fi'eezer
compartment door. Here' how they work.
Water flows t'rom the household supply through a
(l) dual solenoid valve
to the
(2) water tubing and
to the
(3) autonmtlc icemaker
as needed.
Water is frozen in the
(4) cube mokland
<jeered imo the
(5) storage bin where
a motor-powered
_l[igel ll/o _, es
cubes forward.
Cubes fall through the chute in the door when the dispenser
pad is pressed.
When CRUSHED is selected (on some models), a balTlechalmels
cubes through the crusher and crushed ice rid Is through a chute into
the glass.
When WATER is selected, (on some models) water flows through th_
{6) tubing in the door and is dispensed when the dispenser
pad is pressed.
(7) A light switch (on some models) turns the night light in the
dispenser on or off
The light also comes on when the dispenser pad is pressed.
The light in the dispenser should be replaced with a 7 watt nmximum
bulb when it burns out.
Important Facts about Your Ice & Water Dispenser
.If this is your first icemaker you'll hear occasional sounds that
nmy be unfamiliar. These are nomml icemaking _ounds and are not
cause for concern.
•Your icemaker will produce 8 cubes per cycle approx imateh
120 cubesin a 24-hour period-depending ola freezer compartm_ent
temperature, room temperature, number of door openings and other
use conditions.
.Intermittent dispensing of ice is normal. If ice flow inten'uption i s
more than brief, ice clump(S) may be the cause and shoukl be
removed l'ot Iowl ng instl uctions in this section.
• Avoid overfilling glasses with ice and using narrow or extra-tall
glasses. This can jam the chute or cause the door in the chute to
freeze _hul. Periodically open the freezer compartment door and look
dew. into the chute. If ice is blocking the chute, poke it through with
a wooden spoon.
.To help keep bits of ice from being sprayed beyond the glass,
place the glass close to the ice chute-but not soclose that it blocks
outceming ice.
.Fill glasses with ice before adding soda or other beverage mixes.
.Beverages and foods should not be quick-chilled in the ice
storage bin. Cans. bottles or tbod packages i n the storage bin may
canse the icemaker or auger to jam.
.Do not add ice from trays or bags to the storage bin. It ma)not
crush or dispense well.
Before Using Your Icemaker and Dispenser
II'vou the your refi'igerator befl_re the water _ ....... _
connection is nmde. raise the _ce access door and [ .
make st re the lcemaker leeler ama is m t _e _._/---_'
STOP (up) posml,n. When the _ater suppl','has _" 9fi I_L-_--_I/
been connected to the icemaker move the l:eeler _7 i_-- _
arm to ON (down) position. _ ___=_:!
Feeler arm in Feeler arm in
STOP (up) ON (down)
position position
At first there will be a delay befbre water is dispensed and ice b, nmde.
On models with a water dispenser, it" no
water is dispensed when the refrigerator is
first installed, there may be air in the water line
system. Press the dispenser pad for al least two
minutes to remove trapped air from the water
line and to fill the water system.
Push the dispenser pad
until the water line is filled.
The ice cube mold will automatically fill with water AFFER cooling
to freezer temperature. The first cubes nornmlly freeze after
several hours.
NOTE: With a ne_ ly-insmlled refi'igerator, allow about 24 hours
for the freezer compartment to get cold enough to make ice.
 Loading...