Do you have a question about the GE UCG1600L and is the answer not in the manual?
Notice regarding intended users and manufacturer liability for service information interpretation.
Disconnect power before servicing and reconnect all grounding devices properly.
Mandatory 6-step process for GE Factory Service technicians before disassembly.
Explains how the first two characters of the serial number indicate manufacture month and year.
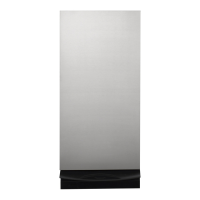
Describes the compactor's design, hands-free operation, and trash reduction capabilities.
Details capacity, compression ratio, cycle time, dimensions, and weight.
Lists available guides and manuals for the compactor, including publication numbers.
Specifies power requirements, circuit needs, and necessary clearances for installation.
Details dimensions and weight limits for custom door panels on specific models.
Diagram illustrating and labeling key control and mechanical components of the compactor.
Explains how the compactor works, how to install trash bags, and loading tips.
Details how to start and stop the compacting cycle and remove full trash bags.
Instructions for cleaning the exterior, painted panels, stainless steel, and drawer interior.
Guidance on changing the foot pedal, noting special thread types for mounting screws.
Steps for removing the control panel and the switch bracket assembly.
Details on removing the Top Limit, ON/OFF, and Directional switches.
Procedures for removing the Start and Tilt switches from the front cover.
Steps for removing the drawer tilt switch and the top cover panel.
Detailed instructions for removing and replacing the motor assembly.
Procedures for removing and reinstalling the ram assembly and actuator bracket.
Information on ram slides and the process for removing/replacing power screw nuts.
Instructions for removing the power screw assembly and the drive chain.
Lists common problems, causes, and troubleshooting steps for the compactor.
Guides for testing motor windings, tilt switches, and control switches.
Troubleshooting motor run winding, centrifugal switch, jammed ram, and low compaction.
Explanation of how the compactor's switches and motor interact during operation cycles.
Details on what GE Appliances will replace, what is not covered, and implied warranty limitations.
| Brand | GE |
|---|---|
| Model | UCG1600L |
| Category | Garbage Disposal |
| Language | English |