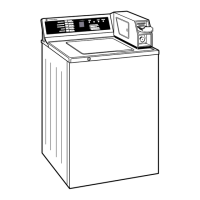
Installation Instructions
INSTALLING THE WASHER
1. Runsome water from the hot and cold faucets to flush
the water linesand remove particles that might clog
the water valve screens.
2. Removethe inlethosesfrom the plastic bag. Remove
black rubber washers from bag and insert into hosefitting
before connectingto unit.
3. (90°elbow end)
Carefullyconnect the inlet
hose marked HOTto the
outside "H" outlet of the
water valve.Tighten by hand;
then tighten another 2/] turn
with pliers.Carefully connect
the other inlet hoseto the
inside"C"outlet of the water
valve.Tighten bu hand; then
tighten another 2/] turn with pliers.Do not cross-threed
or overtighten these connections.
4. Connectthe inlet hose ends to the HOTand COLDwater
faucets tightly by hand; then tighten another 2/] turn
with pliers.Turnthe water on and check for leaks.
S.
.
Carefully move the washer to its final location. Gently rock
the washer into position. It is important notto damage
the rubber leveling legswhen moving uour washer
to its final location. Damaged legscan increase washer
vibration. It may be helpfulto spray window cleaner on
the floor to help move your washer into its final position.
NOTE:To reduce vibration, ensure that all four rubber
leveling legsare firmly touching the floor. Pushand
pull on the back right and then back left of your
washer.
NOTE:Donot use the dispenser drawer or door to lift
the washer.
NOTE:If you are installing into a drain pan, you can use
a 24-inch-long 2x4 to lever the washer into place.
With the washer in its
final position, place
a level on top of the
washer (ifthe washer
is installed under a
counter, the washer
should not be able to
rock).Adjust the front
leveling legs up or down to ensure the washer
is resting solidly. Turn the Iocknuts on each leg
up toward the base of the washer and snug with
a wrench.
NOTE: Keep the leg extension at a minimum to prevent
excessive vibration. The farther out the legs are
extended, the more the washer will vibrate.
Ifthe floor is not level or isdamaged, you may have
to extend the rear levelinglegs.
17
 Loading...