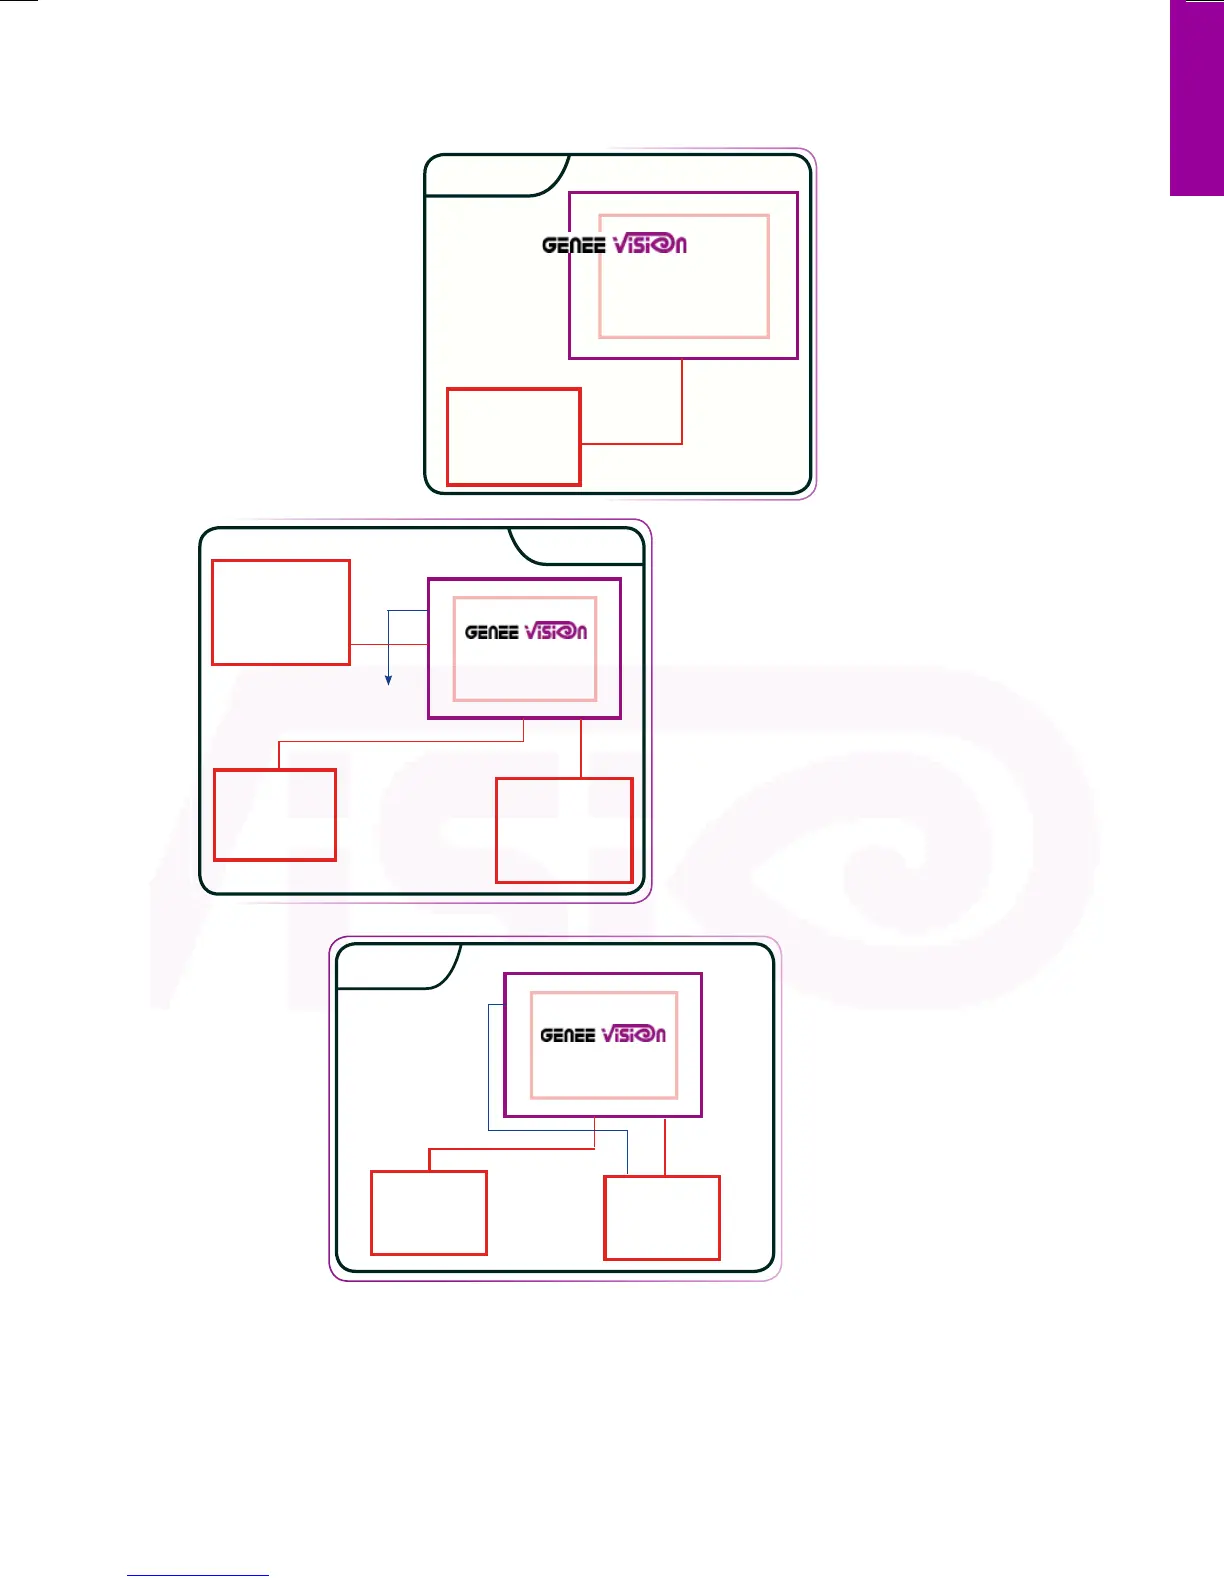
This set-up allows you to
toggle between the Visualiser,
the PC / laptop running
the interactive whiteboard
and an optional, second
(non-interactive) computer
input. The USB lead can be
connected to either computer
depending on which one you
wish to capture Visualiser
images on to.
This set-up allows you toggle between the Visualiser and the
interactive desktop, using the CCD/PC1/PC2 button (no input
on PC2). Any Visualiser still-image can be captured to the
desktop using the ‘VideoCap’ software (on the Genee Vision
disk), or moving image using programs such as ‘Movie Maker’
which comes with Windows XP .
LAPTOP 2
PROJECTOR
MAIN PC/
LAPTOP
connected to
interactive board
projector comp in
RGB in
USB
USB
RGB
USB
RGB
?
projector comp in
USB
(front)
PROJECTOR
USB
RGB
PC/LAPTOP
Set up 3
Set up 2
Set up 2
Set up 3
The simplest set-up, using
the RGB lead, to project
images on to a screen.
projector comp in
RGB in
USB
PROJECTOR
Set up 1
Set up 1
SET UP GUIDE


 To Next Page