sure that the space above and below the
RAM1 is uncluttered and there is a space of
100 mm (4 in) or more behind the amplier.
The space behind the amplifier must be
well ventilated. If the temperature inside
the rack is likely to rise close to the RAM1’s
maximum ambient temperature of 35° C
(95° F), we recommend installing ventilation
fans to ensure that the thermal protection is
not activated prematurely.
Setting the input sensitivity
The input sensitivity of each loudspeaker
can be made to match that of the decoder or
other source by use of the input sensitivity
control on the amplier’s front panel (see
gure 21). A small screwdriver is needed for
the adjustment. The manufacturer default
setting for this control is -6 dBu (0.389V,
fully clockwise) which gives SPL of 100
dB @1m with -6 dBu input level. Note that
to get the full output level of 110 dB SPL,
an input level of +4 dBu (1.22V) is needed
in this setting. Most pre-amplifiers are
capable of this output level.
Setting the room
response controls
The acoustic response of the system may
have to be adjusted to match the acoustic
environment and personal taste. See Table
3 for suggested room response control
settings. If the sound is found subjectively
too bright, set ‘treble tilt’ to -2 dB, if too
bass heavy, set ‘bass tilt’ to -2 dB. The
adjustment is done by setting the three
groups of room response control switches
‘treble tilt’, ‘bass tilt’ and ‘bass roll-o’ on the
front panel of the amplier. The manufacturer
default settings for all controls are ‘All O’
to give a flat response in half space, i.e.
when the loudspeaker has been installed in
a wall. Always start adjustment by setting
all switches to the ‘OFF’ position. Then set
only one
switch within each group to the
‘ON’ position to select the desired response
curve. The switches are not cumulative. If
more than one switch is set to ‘ON’ (within
one switch group) the attenuation value is
not accurate.
Using Autostart and Remote
Control functions
Autostart and Remote Control functions are
not available in units sold in the EU.
The RAM1 amplier can be switched to
“STANDBY” mode by activating the signal
sensing Autostart function or by a remote
control unit (not included in the AIW26B
system). If the system is left unused for
several days, power it down using the
RAM1’s main power switch or a central
power switch if one has been installed.
The Autostart function is activated by
turning switch 4 (AUTOSTART) on the rst
switch group to “ON”. Autostart turns the
amplier to “STANDBY” mode if there is no
signal present for about 30 minutes. When
the signal returns the amplier switches on
immediately and the loudspeaker functions
normally.
If you are using a remote control to
switch the RAM1 between “STANDBY” or
“ON” modes (see chapter “Connecting the
RAM1 amplier”), turn switch 3 (REMOTE
CONTROL), on the first switch group to
“ON”. This activates the remote control
function. In this setting the remote control
will override the Autostart function. If you
want to use Autostart, turn the “REMOTE
CONTROL” switch to “OFF”.
Table 2. Remote control connectors on the
RAM1.
Remote
control type
Pole or
contact
Connect to
remote control
input pin no.
12 V DC
trigger
voltage
+ 1
- 2
External
switch or
relay
Contact 1 3
Contact 2 4
Connect only one remote control unit at a time
Bass Roll-O Bass Tilt Treble Tilt
Half space factory default setting ALL OFF ALL OFF ALL OFF
Well damped (dead sounding) room 0 dB 0 dB 0 dB
Normal room 0 dB 0 dB -2 dB
Highly reective (live sounding) room 0 dB -2 dB -4 dB
Additional settings to compensate the loudspeaker positioning within the room
In a double corner (wall/wall or wall/ceiling) -2 dB -2 dB 0 dB
In a triple corner (wall/wall/ceiling) -4 dB -4 dB 0 dB
If the loudspeaker is positioned behind a perforated screen, add +2 dB to the Treble Tilt setting to
compensate
Table 3. Suggested room response control settings for diering acoustical environments
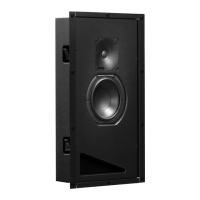
Figure 23. Minimum space requirement
of the RAM1 amplier when not
installed with Genelec RM1 rack mount.
150
(5 7/8 in)
ROOM RESPONSE CONTROLS
RAM1 AMPLIFIERMODULE
ON
GREEN=
NORMAL
OPERATION
YELLOW=
STAND-BY
BASS
ROLL-OFF
-2 dB
-4
INPUTSENSITIVITY
REQUIREDFOR
100dBSPL@1m.
+4
+6
+2
0
-6
-2
dBu
-4
REMOTECTRL
AUTOSTART
ON
OFF
-6 dB
-4
-2
ON
OFF
BASS
TILT
MUTE
TREBLE
TILT
ON
OFF
-4 dB
-2
+2
MUTE
100
(4 in)
50
(2 in)
50
(2 in)
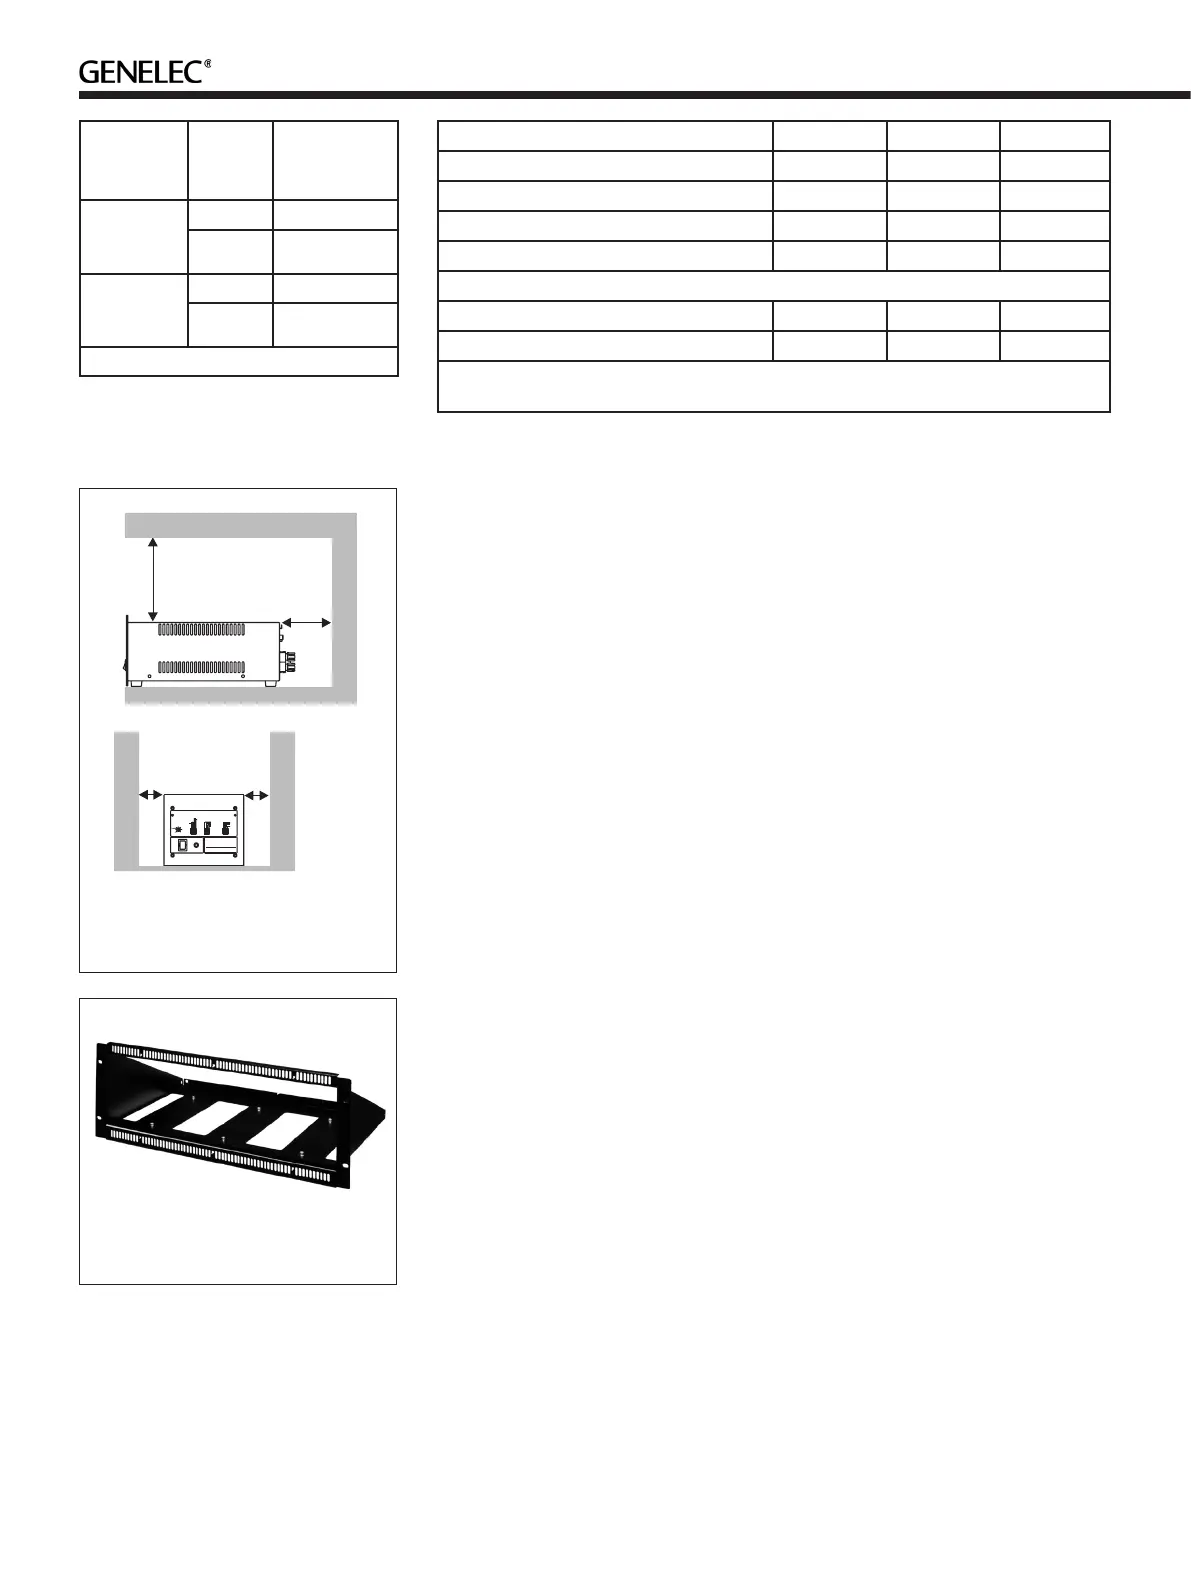
Figure 24. The optional Genelec RM1
rack mount holds up to three RAM1
ampliers.
 Loading...