Mini-Rooter XP™
5
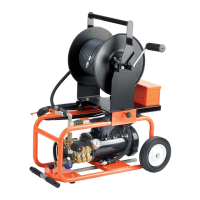
Operation
1. Begin by pulling the cable from the drum and sliding it into the
drain as far as it will go.
2. Tighten the knob at the top of the Power Cable Feed so that the
feed roller presses against the cable. Be sure not to over tighten
since this could cause excess cable wear. Note: The Power Ca-
ble Feed is designed for use with 3/8‖ and 1/2‖ cables only.
3. The feed lever controls the feeding rate and direction of the ca-
ble. Move the lever down to feed the cable out of the drum. The
further the lever is moved downward, the faster the cable will
feed out. Move the lever up to retract the cable into the drum.
When the lever is in the middle (neutral) position, the cable will
spin in place.
Feed Control
Lever
Feed Pressure Knob
Reverse
Neutral
Forward
Cable Application Chart (Table 1)
Cable Size Pipe Size Typical Applications
1/2" 3" to 4"
Roof Stacks and Small Floor
Drains (No roots)
3/8" 2" to 3"
Roof Stacks, Laundry Lines and
Small Drains
*5/16" 1-1/2" to 2" Sinks, Basins and Small Drains
*1/4" 1-1/4" to 2"
Small Lines, Tubs and Shower
Drains
*The 1/4‖ and 5/16‖ diameter cables are for use with the J-Drum and
Dual Drum.
OPERATING INSTRUCTIONS
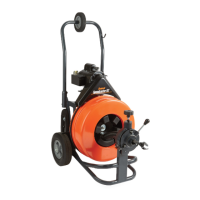
Set-Up
1. Place machine within ap-
proximately two feet (.6m) of
drain opening. Be sure the
Mini-Rooter XP Guide Tube
(XP-GT) is in place. If you
can’t place the machine this
close to the drain opening,
run the cable through the
optional Guide Tube Exten-
sion (GTE) or a metal guide
tube to prevent cable whip-
ping. On manual feed ma-
chines, always keep a gloved
hand on the cable.
2. Position the foot pedal for easy accessibility. The machine is
designed for one-person operation. Be sure you can quickly re-
move your foot from the pedal in an emergency.
3. Be sure the motor switch is in the off position.
4. Select the proper cutting tool (See Cutter Application Chart—
Table 2). A good tool to start with is the Arrow Head or Boring
Gimlet. After the line is opened, follow with larger blades, which
scrape the inside edges of the pipe, assuring a real cleaning job.
5. Insert the cutter into the female connector at the end of the 3/8"
or 1/2" cable and tighten the connecting screw and lock washer
firmly in place.
Cutter Application Chart (Table 2)
Cutter Cat. # Typical Applications
Cutters for 3/8” and 1/2”Cables
Arrow Head
AH
Starting tool, ideal for cutting and
scraping.
Boring
Gimlet
BG
Starting tool, to remove loose
objects.
1-1/2‖
U-Cutter
1-1/2UC
Finishing tool, works well in
grease stoppages.
2‖ Side
Cutter Blade
2SCB
Finishing tool, for scraping inside
edges of pipe.
Note: There are no fixed rules for what cutter to use. If one tool
doesn’t take care of a stoppage, simply try another.
NOTE: Do not operate machine if warning labels on the switch box
and power cord are missing or illegible.
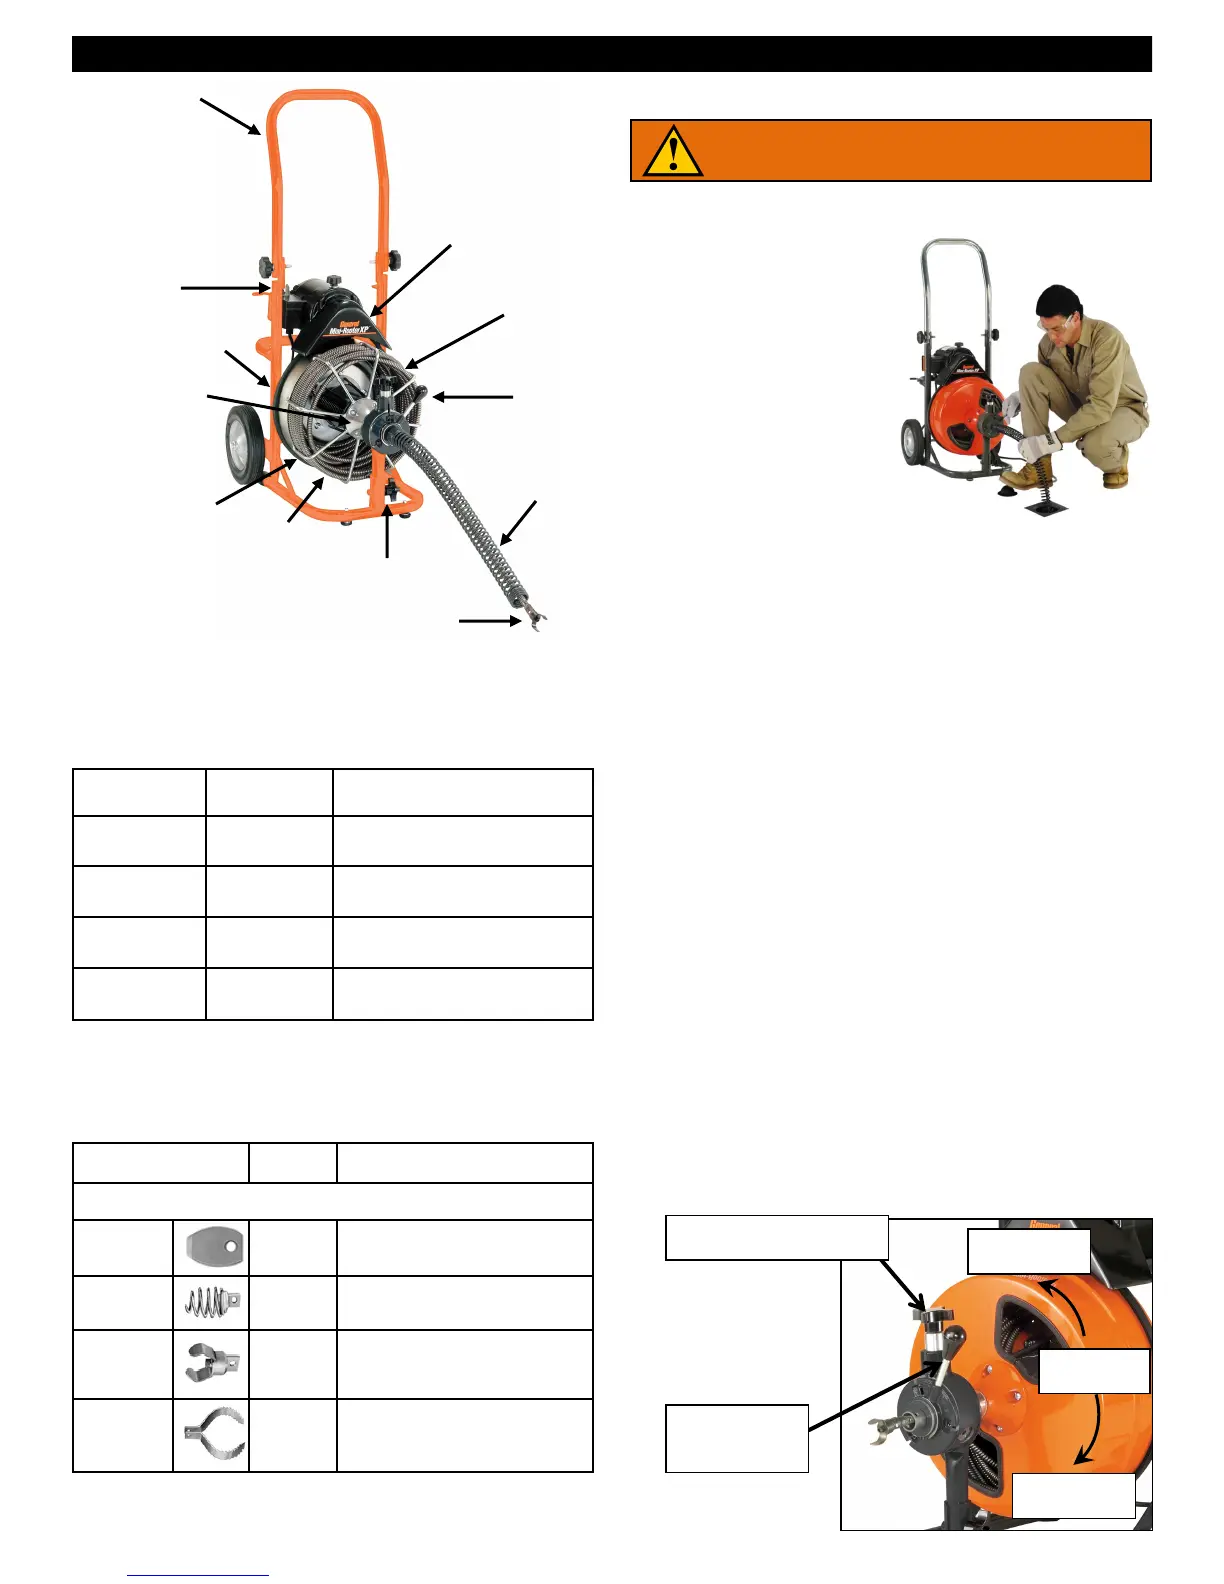
Folding Handle
Motor Switch
V-Belt
Front Drum Hub
Open Drum
Cable
Front Post Knob
Cutter
Guide Tube
Feed Control
Lever
Feed
Pressure
Knob
Belt Guard
MAKE SURE THE MOTOR SWITCH
IS IN THE „OFF‟ POSITION!