MAINTENANCE
MAKE SURE THE SANDER HAS BEEN TURNED OFF AND UNPLUGGED FROM THE POWER SOURCE BEFORE PERFORMING ANY
MAINTENANCE.
DO NOT OPERATE THE SANDER WITH A DAMAGED SWITCH, POWER CORD, PLUG, OR OTHER PARTS. REPLACE A DAMAGED PART
IMMEDIATELY.
• Keep the machine CLEAN and FREE OF DUST. Vacuum or brush off any loose debris and wipe down the machine
and the tables occasionally with a damp rag.
• Drums must always be kept clean. Dirt on drums will cause poor tracking and belt slippage.
• Periodically inspect the ON/OFF switch, power cord, plug and other parts for damage.
PERIODIC MAINTENANCE
REQUIRED MAINTENANCE
REPL
ACEMENT OF THE SANDING BELT
Sanding belt should be replaced when worn out.
Standard size (6" by 108") replacement belts can be purchased in a variety of grits from your General® International
dealer under the following parts numbers:
• #15-011 6” x 108” Sanding Belt 80 Grit
• #15-012 6” x 108” Sanding Belt 100 Grit
• #15-013 6” x 108” Sanding Belt 120 Grit
or (depending on availability) from your local tool, abrasives or sharpening supply dealer. These are standard sizes
that should be readily available in most areas. The use of any other size is not recommended and can lead to seri-
ous injury and/or damage to the machine.
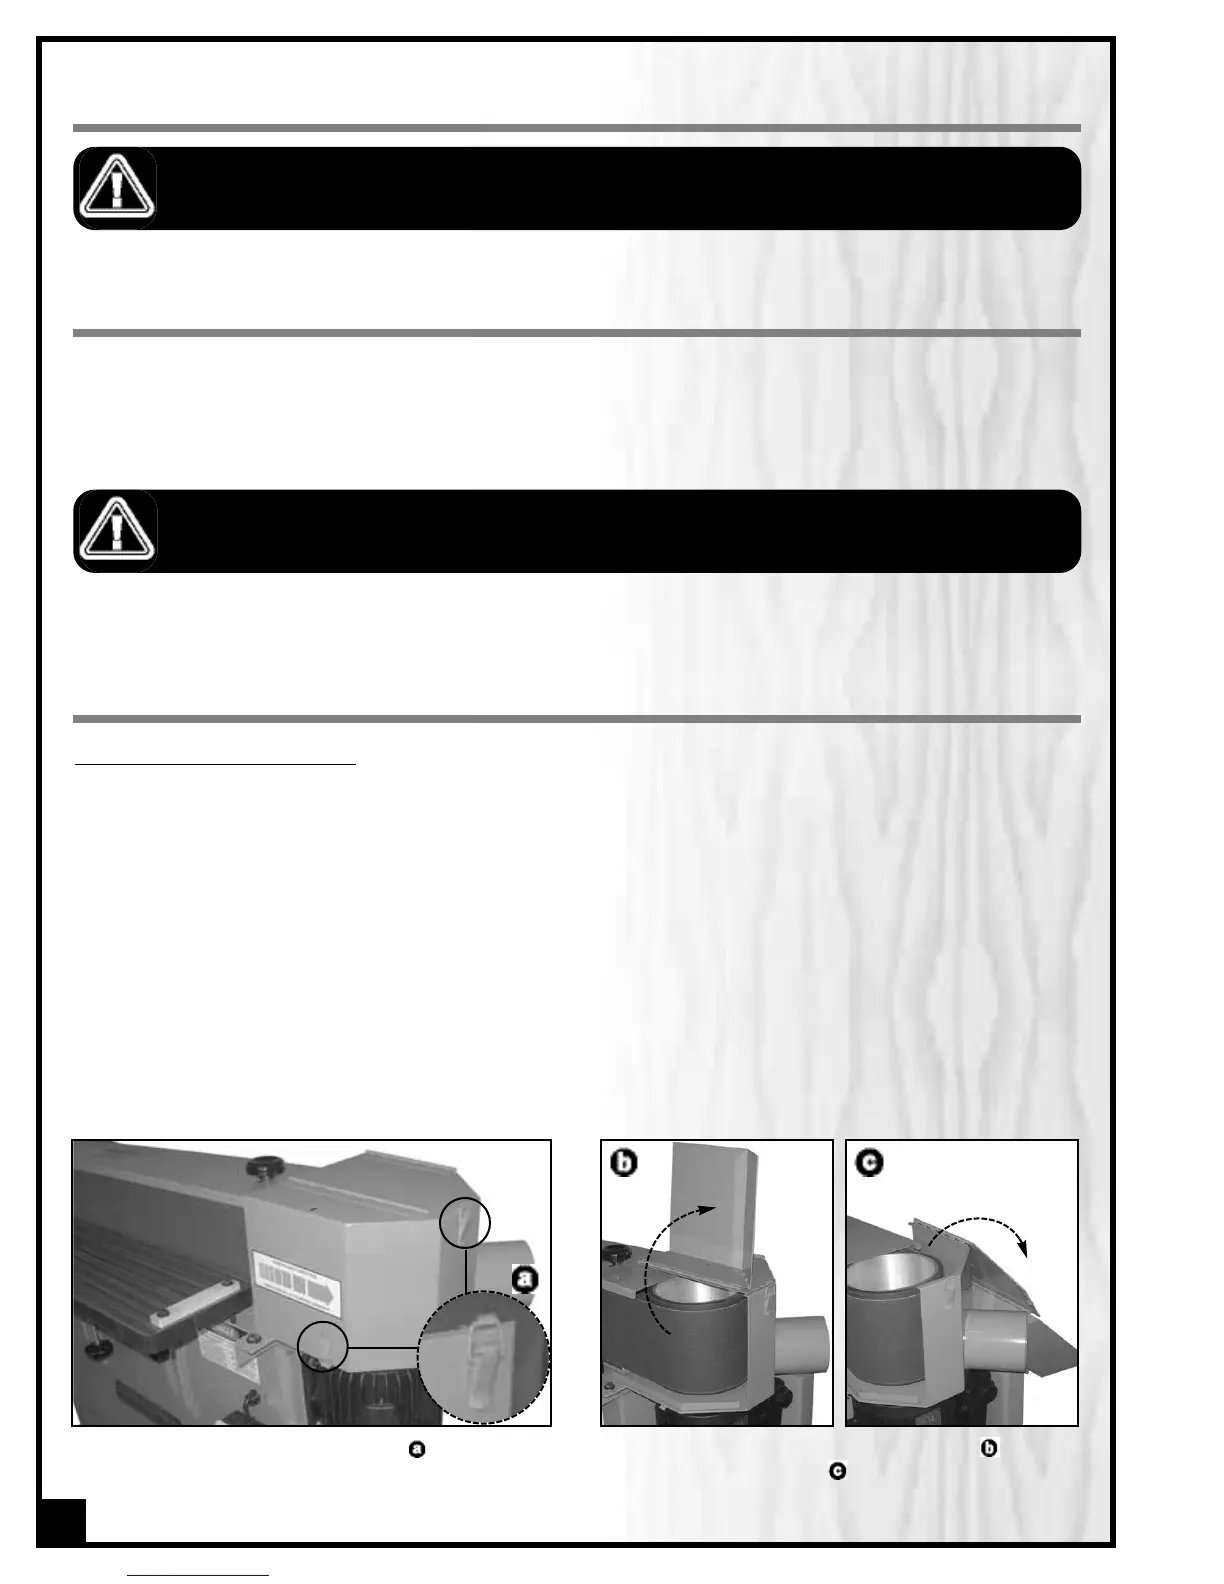
Replace an installed, worn sanding belt as follows:
2.
Flip the first section of the dust cover up , then flip
the entire cover back .
1. Unlock the two dust hood latches to access the
drive roller.
14
 Loading...