ver 1.3
9
99
9
~ÄëçäìíÉ=ÑáÇÉäáíó
There is no need to do this if you think that your power amplifier does
not have the power to drive the woofers. This is because the G6.1 has a
rising impedance below 150Hz, and the built-in amplifier off-loads your
power amplifier for the bass.
If you choose to do this, use a good quality interconnect cable to
connect the output of your preamplifier to the PREAMP level input RCA or
balanced XLR connector on the back plate of the G6.1. The preferred is
to use the balanced XLR input on the G6.1 if your preamplifier has
balanced outputs.
Switch the Bass Input Selector to the down (L
INE LEVEL) position. This
position will bypass the high-level input, and take the bass input for the
built-in servo bass amplifier directly from the preamp.
Note: if you are connecting the G6.1’s to a home theatre or multi-
channel audio system, please see the multi-channel section of this user
guide later.
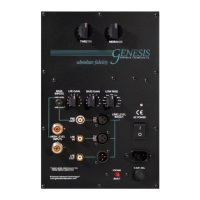
2.4 Loudspeaker Controls
2.4.1 Tweeter and Midrange Controls
The two knobs at the top of the
amplifier plate on the back of the
speaker tailor the mid- and high-
frequency response of the G6.1.
They are subtle controls, but they
can make a great difference in
gaining that last bit of additional
performance in tuning your
speakers into the room that you are using them in. They can turn your
system from very good to exceptional, so take the time to work through
this process.
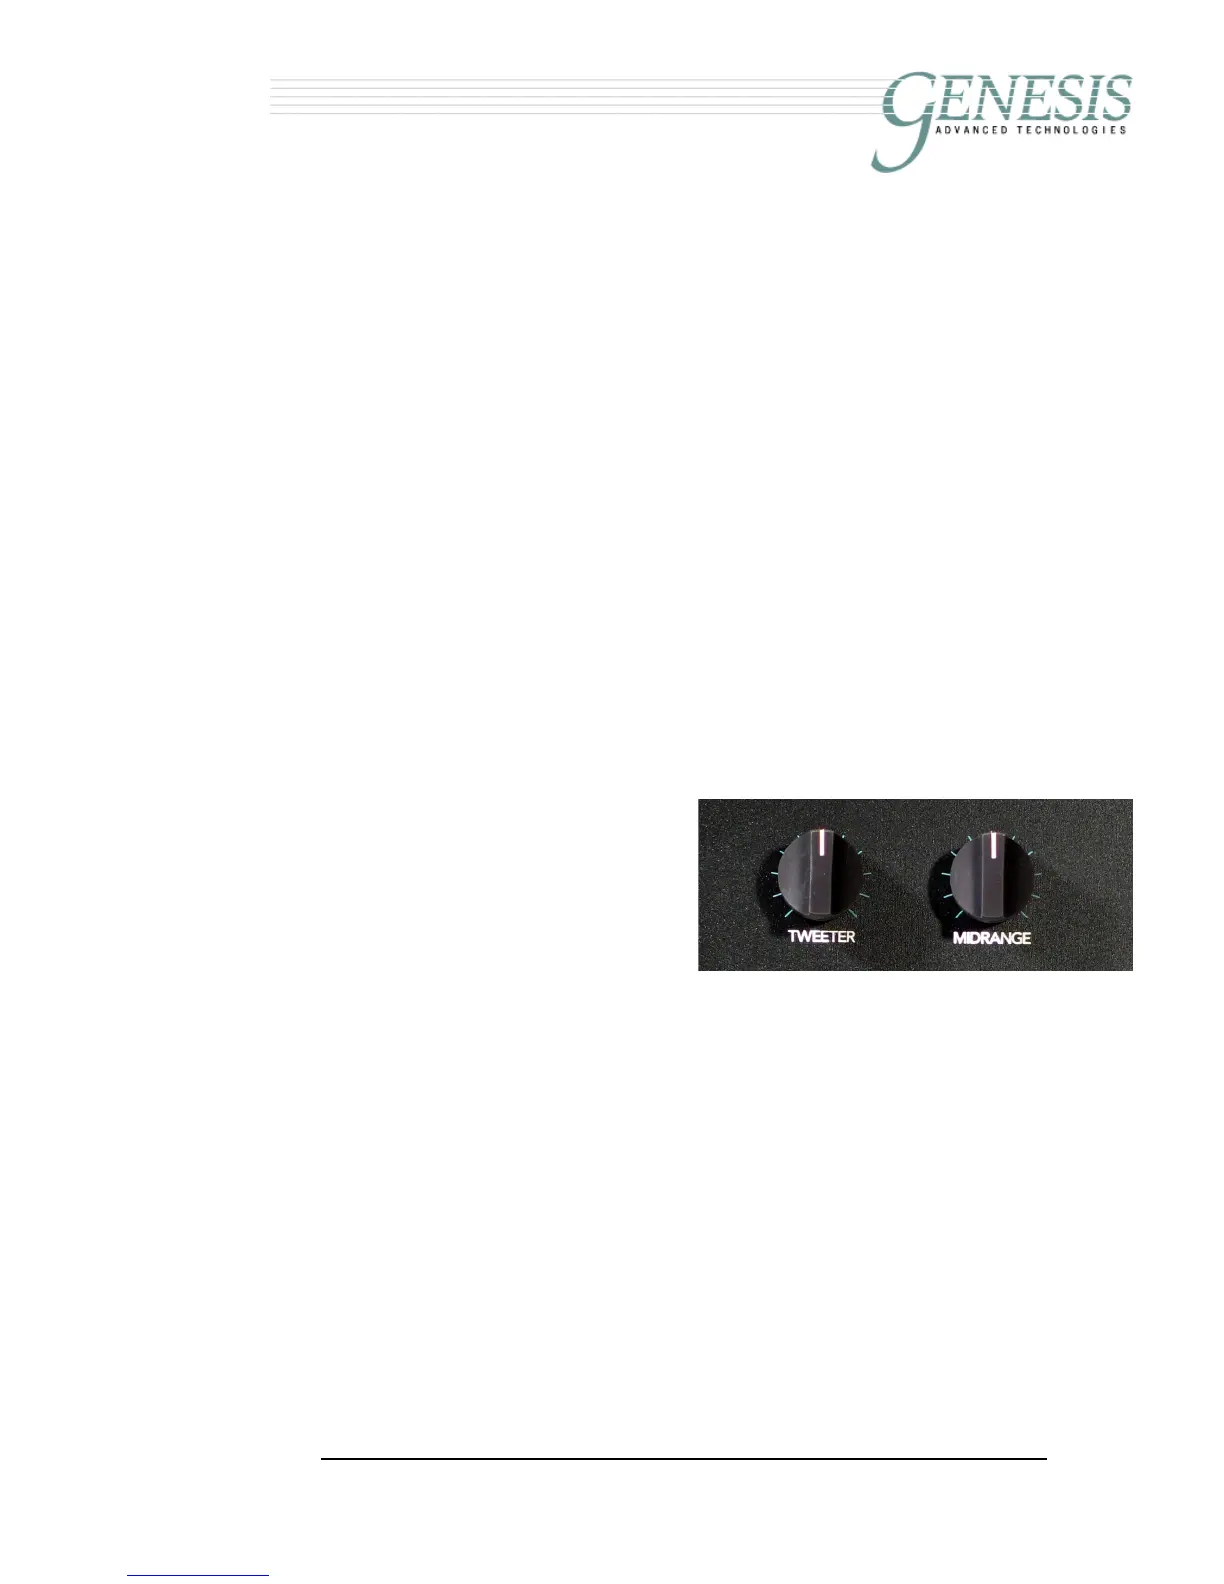
The top left knob marked T
WEETER is a volume control for the front
tweeter. Turning this control clockwise will increase the level of the
tweeters. Use this control if you need a bit more treble, or to increase the
apparent space of the soundstage. Too high a tweeter level, and you
can feel that crashing cymbals are leaping out at you, and nylon stringed
guitars sound steely. Start with this control at the 12 o'clock position.
There is about a one dB range for this control.
The top right knob marked M
IDRANGE is used to adjust the level of the
midrange. Start at the 12 o’clock position. Turning the control anti-
clockwise will make the midrange sound leaner, and turning it clockwise
will make the midrange sound fuller. A fuller midrange can also can
 Loading...