English
10" Compound Miter Saw
Operator’s Manual GMS1015LC
10
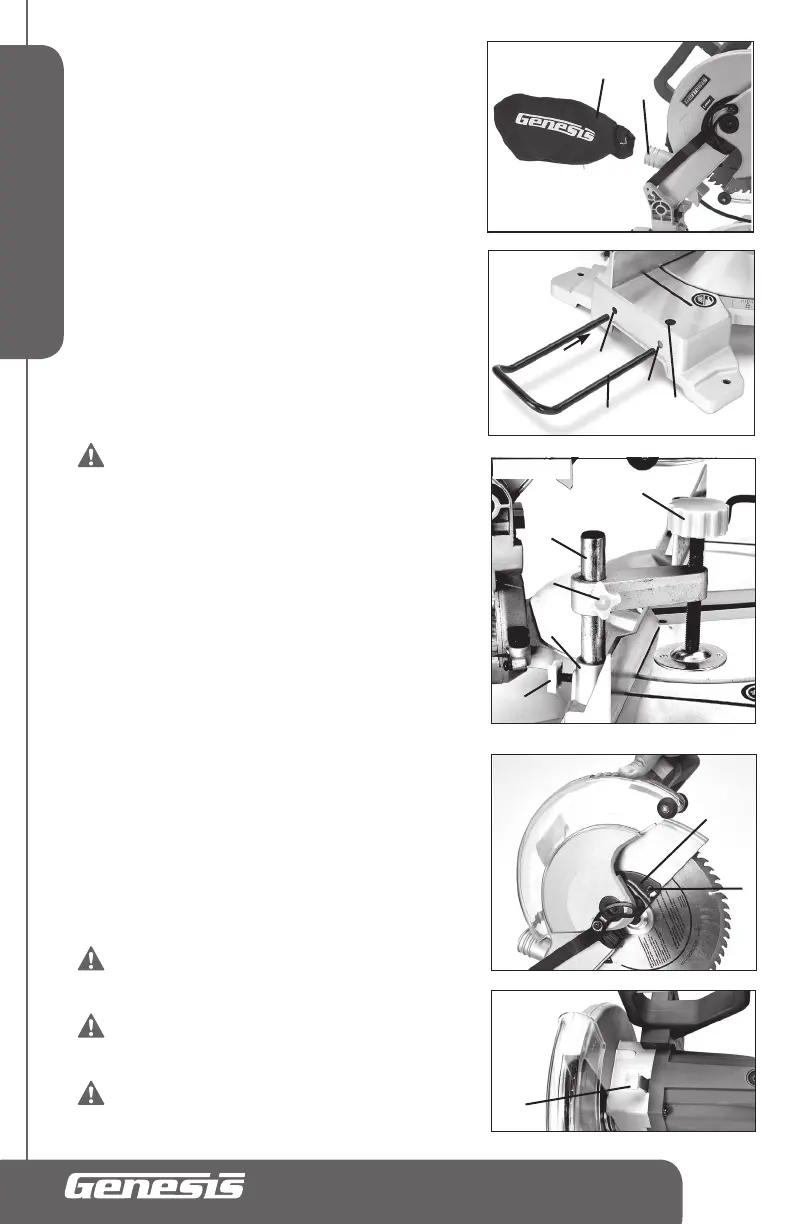
Release pressure on the clips and the metal ring at the bag’s
opening should lock in the grooves of the sawdust port. To remove
the dust bag for emptying, simply reverse the above procedure.
The dust bag should be checked often and if more than half full,
remove the bag by simply reversing the installation procedure.
Dispose of the accumulated saw dust in the dust bag and then
reinstall the dust bag before resuming operation of the miter saw.
TABLE EXTENSIONS (FIG 4)
Your saw comes with two table extensions (1). They can be installed
in either the left or the right side of the saw base.
To Install the Table Extensions
1. Loosen the extension lock screw (2) by using a Phillips
screwdriver.
2. Insert the ends of the table extension into the holes (3) in the
side of the base and adjust the extension to the desired length.
3. Secure the extension by tightening the extension lock screw
(2).
WORK CLAMP ASSEMBLY (FIG 5)
WARNING: In some operations, the work
clamp assembly may interfere with the operation of
the blade guard assembly. Always make sure there
is no interference with the blade guard prior to
beginning any cutting operation to reduce the risk
of serious personal injury.
This miter saw is equipped with a Hold down Work Clamp (1). The
work clamp can be positioned in the provided mounting holes in the
base behind the miter fence to the right and left of the cutting head.
Insert the clamp column (3) into the mounting hole (2). Secure it by
tightening the lock screw (6). Use the clamp lock knob (4) to quickly
secure the clamp in position. Use the clamp tightening screw (5)
to secure workpiece against the miter table as needed, especially
small workpiece.
The work clamp provides greater control by clamping the work
piece to the fence or the saw table. It also prevents the workpiece
from creeping toward the saw blade. This is very helpful when
cutting compound miters.
NOTE: Depending on the cutting operation and the size of the
workpiece, it may be necessary to use a C-clamp instead of the
work clamp to secure the workpiece prior to making the cut.
CHANGING THE SAW BLADE
(FIG 6, 7, 8, 9)
WARNING: Be sure that the tool is
switched off and unplugged from the power source
before performing any work on the tool.
WARNING: Use only 10 inch diameter saw
blades and are rated for speeds equal to or greater
then the nameplate rated RPM of this miter saw.
WARNING: Use only blades designed for
cross-cutting operations.
FIG 3
1
2
FIG 4
2
1
3
3
4
3
2
1
5
FIG 5
6
FIG 6
1
2
3
FIG 7
7