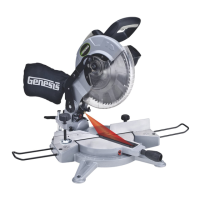
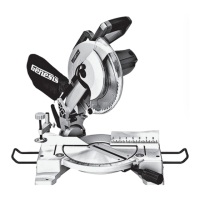
English
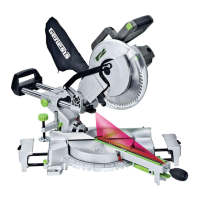
10" Sliding Compound Miter Saw
Operator’s Manual GMSDR1015LC
14
WARNING: Always transport the miter saw in the locked down position,
carrying the saw by carrying handle on the cutting arm. DO NOT lift or carry the miter saw
using the trigger handle, doing so may cause misalignment of miter and bevel settings.
LOCKING AND UNLOCKING THE CUTTING HEAD (FIG 16)
When storing or transporting the miter saw, the cutting head should be locked in the down position.
To Lock Down the Cutting Head
1. Lower the cutting head completely with the cutting depth stop
plate (2) in the upward position.
2. Push the locking pin (1) inwards to lock the cutting head.
To Unlock the Cutting Head
1. Press down lightly on the cutting head.
2. Pull the lock pin (1) outwards to unlock the cutting head.
3. Slowly raise the cutting head to the work position.
STARTING AND STOPPING THE MITER
SAW (FIG 17)
NOTE
: The saw is equipped with a Lock-Off Switch (2) for extra
safety.
To start the miter saw, firmly grasp the saw's top handle. Use
your thumb to press the Lock-Off switch (2), then depress the
trigger switch (1).
To stop the miter saw, completely release the trigger switch.
WARNING: After completing a cut, release
the trigger switch to activate the electric blade
brake. Keep the cutting head down until the blade
comes to a complete stop before raising the cutting
head to the upward or starting position. A rotating
saw blade can be dangerous.
WARNING: The torque resulting from
electric blade brake activation may loosen the arbor
bolt. Occasionally check the arbor bolt and tighten
if necessary.
TABLE HAZARD AREA (FIG 18)
On each side of the rotating miter table, there is a “hands” warning symbol that is cast into the table. The area
between the two “hand” symbols is designated as a “Hazard Zone” and the miter saw operator should never place
their hands inside this area while the miter saw is running.
WARNING: Keep your hands outside the “Hazard Zone” and out of the path
of the saw blade. Use the supplied work clamp or other clamping means to secure the
workpiece in place before making a cut with the miter saw.
ROTATING THE MITER TABLE (FIG 19)
This miter saw will accurately cut any angle from the straight 90°
cut to 45° left and 45° right.
To Rotate the Miter Table, loosen
the Miter Lock Handle (1) one or two turns counterclockwise, Use
your index finger to pull up the detente lever (2) to release, and
then rotate the miter table to the desired angle using the Miter Lock
Handle (1). When the desired angle is reached, turn the Miter Lock
Handle (1) clockwise to lock the miter table in place.
NOTE: This miter saw comes with 9 positive stops: 0° for 90° cutting, left-15°, 22.5° , 30°, 45°, right-15°,
22.5°, 30°, 45° for quick setting of common miter cutting angles.
FIG 18
FIG 17
2
1
FIG 19
4
3
2
1
1
FIG 16
2
 Loading...