English
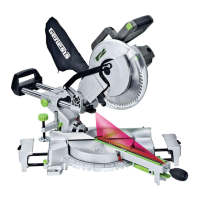
10" Sliding Compound Miter Saw
Operator’s Manual GMSDR1015LC
16
WARNING: If securely holding the workpiece causes your hand to be in the
machine’s “Hazard Zone”, clamp the workpiece in place and move your hand(s) to a safe
position before making the cut.
Regardless of the type of cut being performed with your compound miter saw, the following basic set-up steps are
used, unless specified otherwise.
1. Check and confirm the cutting arm (bevel position) and the rotating table (miter position) are at the correct
settings and the related adjustment handles are firmly locked in place.
2. Mark the position of desired cut onto the workpiece surface to ensure proper blade and laser alignment.
3. Place the workpiece on the saw table, align the blade and/or laser light with the cut line, then position it firmly
against the fence and hold or clamp it firmly in place. If using a hand to hold the workpiece in place, be sure it
is outside the “Hazard Zone”. Never attempt freehand cutting or cutting a workpiece not firmly held against the
fence or table!
4. Turn on the saw, allowing the blade to reach full speed. Lower the cutting head slowly into the workpiece and
perform the cut at a steady rate.
5. When the cut is completed, release the trigger switch and allow
the blade to completely stop rotating before raising the blade
and cutting head out of the completed cut.
MITER CROSSCUTTING (FIG 23)
Crosscuts are cuts made across the grain of the workpiece, with
a straight cut being made with the both the blade bevel and miter
table set at 0°. A miter crosscut is made when the miter table is set
at some angle other then 0°.
1. Measure and mark the workpiece with the desired cut line.
Mark the workpiece on each side of the cut line indicating
which side is the scrap or off cut and which the desired finished
piece is.
2. Unlock the rotating miter table by loosening the miter locking
knob.
3. Use the miter handle to rotate the table, left or right, to the
desired cutting angle. Then tighten the miter lock knob.
4. Place the workpiece onto the saw table and against the fence.
Turn on the laser light source.
5. Move the workpiece left or right to align the cut line with the
saw blade and laser light. Then secure the workpiece in place,
holding it either by hand for large pieces or via the clamping
device for small pieces.
6. After confirming the saw settings and that the workpiece is
secured, turn on the saw and make the cut.
BEVEL CUTTING (FIG 24)
A bevel cut is made by cutting across the workpiece grain with the blade angled or tilted to the workpiece. When
making a straight bevel cut, the miter table is set at the 0° position and the blade angled and set at a position
between 0° and 45° left.
1. Measure and mark the workpiece with the desired cut line. Mark the workpiece on each side of the cut line
indicating which side is the scrap or off cut and which the desired finished piece is.
2. Set and lock the rotating miter table in place at 0°.
3. Loosen the bevel locking handle and move the cutting arm left to the desired bevel angle as indicated by the
bevel scale pointer. Tighten the bevel locking handle securely.
4. Place the workpiece onto the saw table and against the fence. Turn on the laser light.
5. Move the workpiece left or right to align the cut line with the saw blade and laser light. Then secure the
workpiece in place, holding it either by hand or via the clamping device.
6. After confirming the saw settings and that the workpiece is secured, turn on the saw and make the cut.
FIG 23
FIG 24