Chapter I. Hardware Installation
Step 1. Step 2.
Step 3
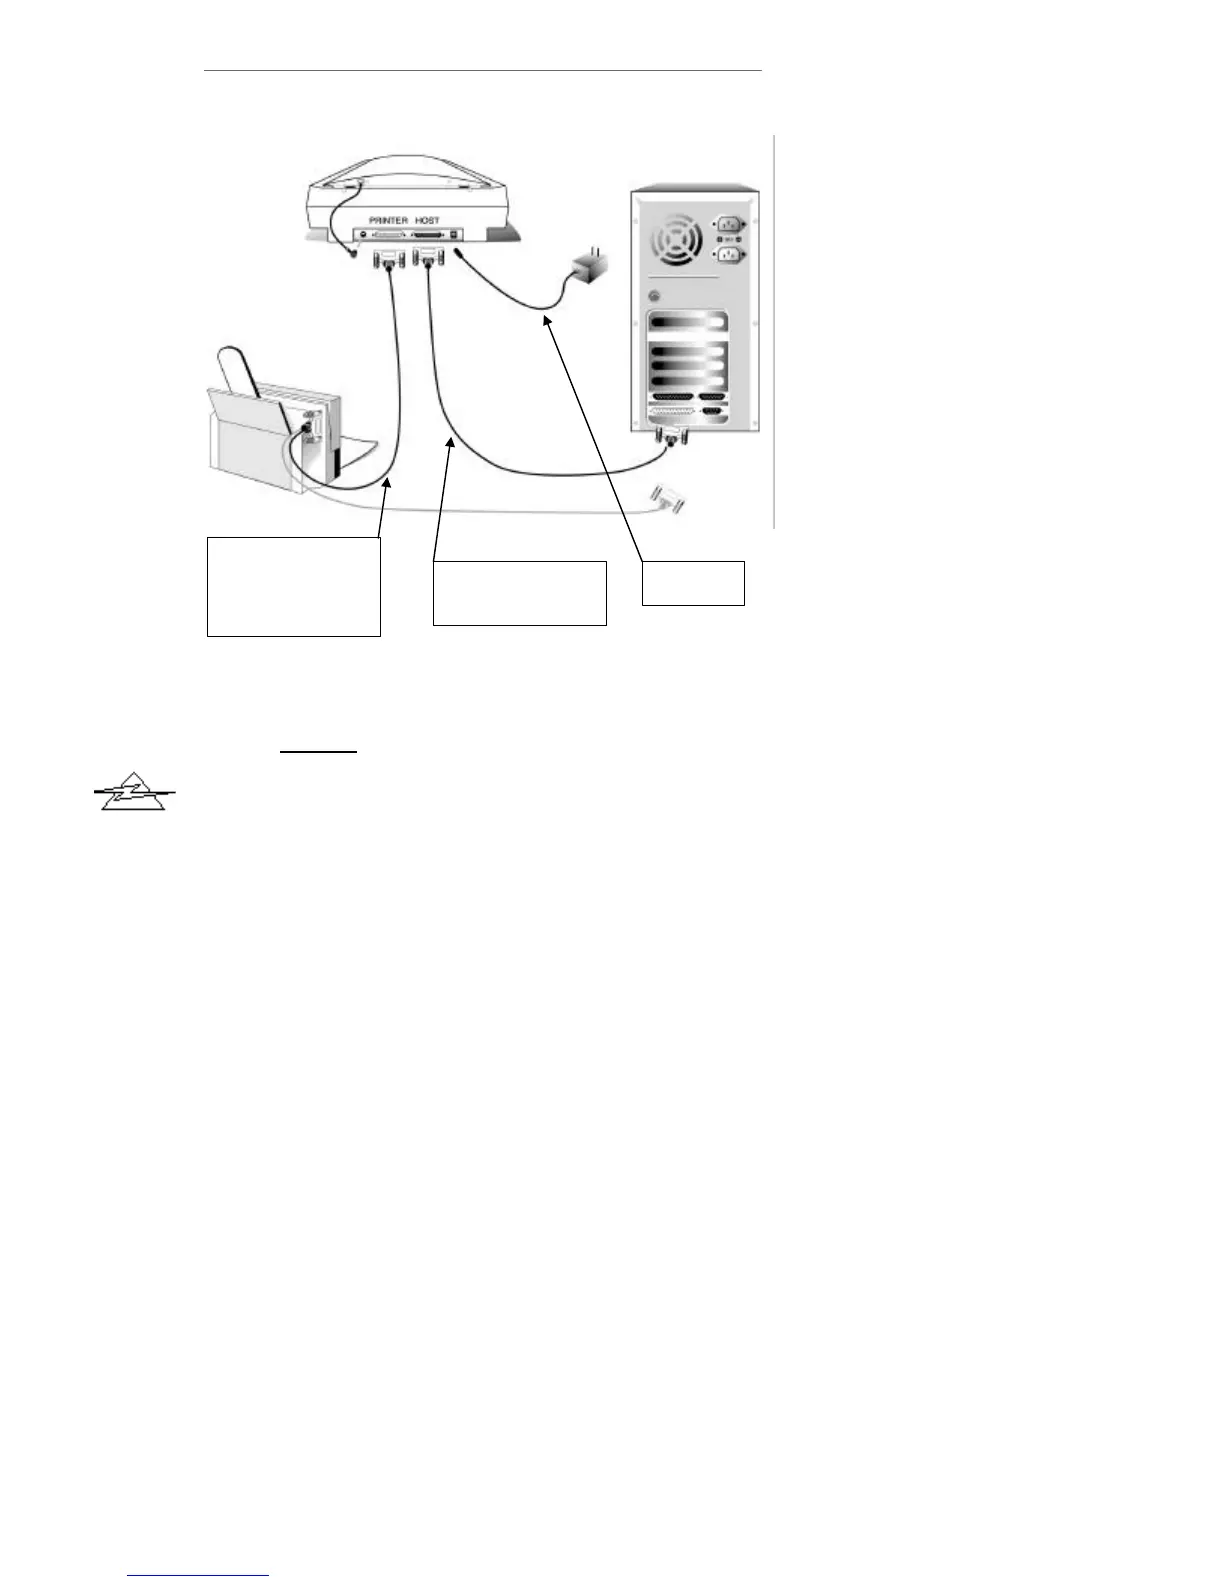
Figure 1. Connecting the Scanner
1. Unplug the power cords from your
computer and printer.
2. Please take a moment to study Figure 1.
3. If you have a printer connected to your
computer, please disconnect its cable from
the rear of the computer.
4. Next, plug the same end of the
disconnected printer cable into the
PRINTER port on the rear of the scanner
(see Figure 1, Step 1).
5. Eliminate any ESD (Electro Static
Discharge) from the scanner cable by
touching its metal connector to any metal
portion of your computer.
6. Plug the SCANNER CABLE into the
scanner (see Figure 1, Step 2) port
marked HOST.
7. Connect the other end of the SCANNER
CABLE into the PC’s parallel (printer)
port (see Figure 1, step 2).
Danger
Disconnect the Printer
cable from the computer
and plug it into the
PRINTER Port at the rear
of the Scanner
The computer Parallel
Port Connects to the
scanner HOST Port
REAR OF
REAR OF SCANNER
REAR OF
PRINTER
Plug in all
power cords