REPLACEMENT PROCEDURE 5:
COMMUNICATIONS CORD
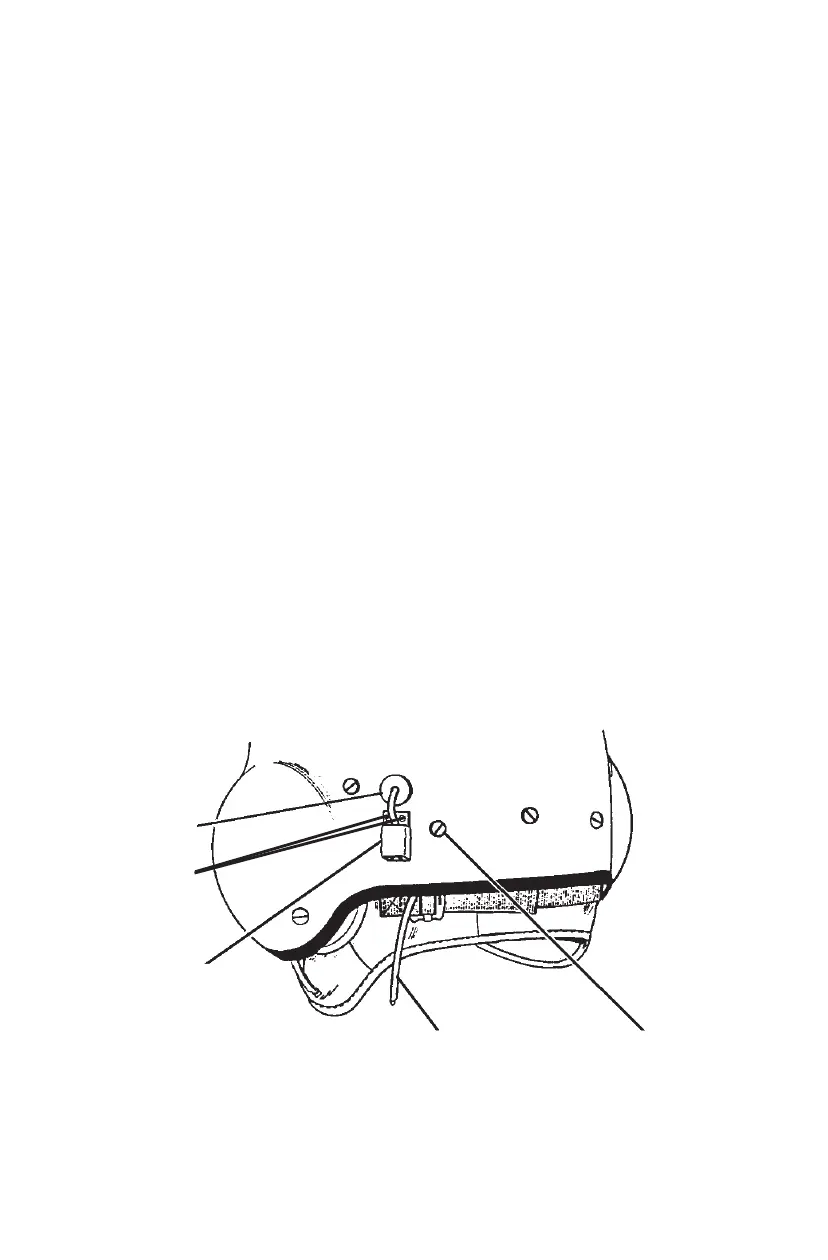
1. Unplug the microphone cord from the connector (Figure 19) at the rear of
the helmet.
2. Cut the shrink tubing away from the connector using a razor blade or a knife.
3. Remove the connector and the two screws (Figure 19) securing the bracket
and the mounting plate to the helmet shell.
4. Remove the TPL and slide the energy-absorbing liner out as in Replacement
Procedure 1, Steps 1, 3, and 4. This will provide access to the rear retention
strap and the strain relief plate.
5. Remove the screw, washer, and post securing the left rear retention strap
and the cord strain relief plate from the left rear of the helmet (Figure 19).
6. Carefully remove the earphone holders from the earcups and the earphones
from the earphone holders. Remove the cord leads from the earphones
using a jeweler’s screwdriver or a hex wrench as required.
7. Remove the grommet (Figure 19) from the helmet shell and the
communications cord from the helmet.
8. Insert the replacement cord through the grommet hole in the helmet shell
and attach the grommet to the helmet shell.
(Continued on next page)
19
STRAIN RELIEF
PLATE SCREW
COMMUNICATIONS CORD
CONNECTOR
GROMMET
Figure 19. Communications Cord and Hardware
BRACKET
SCREWS
 Loading...