INTRODUCTION
Please read these instructions, follow them carefully and keep them for future
reference. The unit, when properly installed and maintained, will operate
safely and reliably for many years.
TYPE OF UNIT
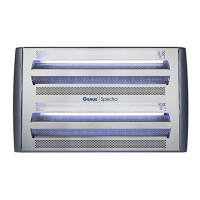
The Genus
®
Spectra range consists of 2 models; a 2 lamp unit, a 1 lamp unit.
Both models use the same Control boards. Lamp types are PL36W UV-A .
UNPACKING
Each unit is carefully packed before leaving the production factory to ensure
arrival in perfect working order. Please be sure to remove all packing from
around and within the unit before installation.
LOCATIONS
1. The extent to which insects are attracted to Genus
®
Spectra depends
largely on the intensity of other light available, whether daylight, or artificial
light, keep the unit switched on 24 hours.
2. Mount the unit within 1-1.5m (3-5’) of the floor whenever possible.
Note. If mounting vertically, ensure lamp holders are at the top of the unit.
3. To comply with current Health and Safety legislation, ensure that safe and
appropriate access to the unit for maintenance and cleaning is available.
4. Place the unit as far as possible from windows (to minimise competition
from sunlight) and any other competing light sources.
5. Do not place the unit directly over exposed foods, food preparation
surfaces or packing lines.
6. Do not hang the unit over sources of heat or steam since this may
damage the insulation of the electric cables.
7. Place the unit out of reach of children whenever possible.
CONNECTION TO THE ELECTRICITY SUPPLY
The unit must be installed by a qualified electrician observing the following
instructions.
1. Check the input voltage on the unit label is correct for your electrical
supply.
2. Ensure that the circuit is fused at 3A maximum.
3. Connect the unit to the electricity supply by the cable provided which is
terminated in a plug connector. If this connector is incompatible with the
installation it must be cut off, rendered unusable, and disposed of.
4. Connection to the unit must be made using a cable type H05RN-F for
European models or cable type 3x18AWG SJT for North American
models. The cable supplied is of this type.
5. Connect the cable to the electricity supply ensuring that the colour code is
strictly followed [see table]:
 Loading...